
A Practical Guide to CICD Jenkins Pipelines

When you think about CI/CD, Jenkins is almost impossible to ignore. It’s the open-source automation server that essentially acts as the central engine for your entire development pipeline, connecting everything from your Git repository to your production environment. The end goal? Faster, more reliable software releases.
Why Jenkins Still Dominates CI/CD
In a world full of newer, cloud-native tools, Jenkins remains a powerhouse in the CI/CD landscape. Its staying power isn't just about being a legacy tool; it's a testament to its incredible flexibility and the massive open-source community behind it. Think of it as the command center for your software delivery process.
The core idea is simple: automate everything. The moment a developer commits new code, Jenkins can spring into action.
- Build the Application: It compiles the source code into an executable format.
- Run Automated Tests: It kicks off unit, integration, and other tests to squash bugs early.
- Package the Artifacts: It creates deployable files like JARs, WARs, or Docker images.
- Deploy to Environments: It pushes the ready-to-go application to staging or production servers.
This hands-off approach drastically cuts down on manual errors and, more importantly, frees up your developers to do what they do best—write code.
The Power of an Open-Source Ecosystem
One of the biggest reasons Jenkins continues to dominate is its plugin ecosystem. It's massive. With over 1,800 community-contributed plugins, Jenkins can integrate with virtually any tool in your tech stack.
Need to send Slack notifications? There's a plugin for that. Want to scan your code with SonarQube? There's a plugin for that, too. This adaptability makes Jenkins a solid choice for organizations of all sizes, from tiny startups to massive enterprises.
To give you a better sense of how it fits into the broader toolset, we've put together a detailed CI/CD tools comparison that shows how different platforms stack up.

As you can see right on its homepage, this focus on plugins and broad integration is exactly why so many teams continue to build their pipelines on Jenkins.
To break it down even further, here’s a quick look at the features that make Jenkins such a go-to for automation.
Jenkins Key Features At A Glance
| Feature | Description | Impact on CI/CD |
|---|---|---|
| Extensive Plugin Ecosystem | Access to over 1,800 plugins for integrating with almost any tool. | Unmatched flexibility to customize pipelines and connect your entire toolchain. |
| Open-Source and Free | Community-driven development and completely free to use. | Low barrier to entry and strong community support for troubleshooting. |
| Platform Independence | Runs on Windows, macOS, and various Unix-like systems. | Can be deployed in any environment, whether on-premise or in the cloud. |
| Distributed Builds | Can distribute build/test workloads across multiple machines. | Massively improves build speed and scalability for large, complex projects. |
These core strengths are what give Jenkins its longevity and power, allowing teams to build CI/CD processes that are perfectly tailored to their needs.
Proven Scalability and Growth
Jenkins isn't just holding its ground; it's growing where it counts. The platform’s ability to handle massive workloads is proven by its real-world adoption numbers.
Between June 2021 and June 2023, the number of Jenkins Pipeline jobs surged by an incredible 79%, jumping from 27.1 million to 48.6 million jobs per month. That kind of growth speaks volumes about its reliability and scalability in demanding production environments. For a closer look at the numbers, the Jenkins project growth analysis from the CD Foundation has all the details.
Setting Up a Production-Ready Jenkins Environment
A powerful CI/CD pipeline needs a solid foundation, and with Jenkins, that starts long before you write your first Jenkinsfile. Moving beyond a simple "hello world" example means setting up an environment that's secure, stable, and ready for real production workloads from day one.
Before you even think about installing Jenkins, you have to get your Java situation sorted. Jenkins is a Java application, so having a compatible Java Development Kit (JDK) is non-negotiable. I always recommend sticking with a Long-Term Support (LTS) version, like JDK 17 or 21, to ensure you're on a stable, well-supported release.
Navigating the Initial Setup
Once Jenkins is installed and running, you'll be greeted by the post-installation setup wizard. This isn't just a formality—it's your first and best chance to lock down your instance and install the core plugins that will power your pipelines.
First things first, you'll need to grab the initial administrator password, which Jenkins generates and stores in a file on the server. This is a crucial security measure to prevent anyone from hijacking your brand-new instance.
Next, the wizard gives you a choice: "Install suggested plugins" or "Select plugins to install." It’s tempting to just click the suggested option and move on, but I strongly advise against it. Always choose to select your own plugins. This prevents installing a bunch of stuff you don't need, which can bloat your instance and even introduce security risks down the road.
Pro Tip: Start lean. You can always add more plugins later. Stick to the essentials at first: the Pipeline plugin, the Git plugin, and whatever you need for your specific build tools (like Maven, Gradle, or Node.js).
This deliberate approach keeps your Jenkins environment clean and maintainable. And that's incredibly important when you consider Jenkins is projected to command up to 47% of the global CI/CD market by 2025, supported by a massive ecosystem of over 1,850 community plugins. Keeping your installation tidy from the start is the only sane way to navigate it all. You can read more about CI/CD market trends on 9cv9.com.
Configuring Global Tools and Security
With your initial plugins installed and your first user created, the final piece of the puzzle is configuring global tools and security. This is where you tell Jenkins where to find the command-line tools your build agents will rely on.
Just navigate to Manage Jenkins > Tools. This is your central hub for defining tool locations. You'll want to configure:
- JDK Installations: Specify the paths to different Java versions your various projects might need.
- Git: Point Jenkins to the Git executable.
- Maven/Gradle: Add the locations for your build automation tools.
By setting these up globally, your pipelines can simply call tools by name (e.g., 'maven-3.8') without hardcoding file paths into your Jenkinsfile. This small step makes your pipelines way more portable and much easier to manage.
Finally, don't forget to properly secure your instance. Head over to Manage Jenkins > Security and configure a security realm. While "Jenkins’ own user database" is a common starting point, a real production environment should integrate with something more robust like LDAP or another identity provider. This centralizes user management and seriously strengthens your overall CI/CD security.
Building Your First Declarative Jenkinsfile
Alright, it’s time to graduate from clicking around the Jenkins UI and start treating your pipeline like code. The modern way to handle your CI/CD Jenkins workflow is with a Jenkinsfile, which is just a text file that lives right there in your project's source control. This is a huge win—it makes your pipeline versionable, reviewable, and so much easier to manage.
We're going to focus on the Declarative Pipeline syntax. It’s a much more structured and readable way to define your automation, and frankly, it's the best place to start if you're new to this.
The infographic below gives a great high-level view of the CI/CD process we're about to build, from the moment a developer commits code all the way to deployment.
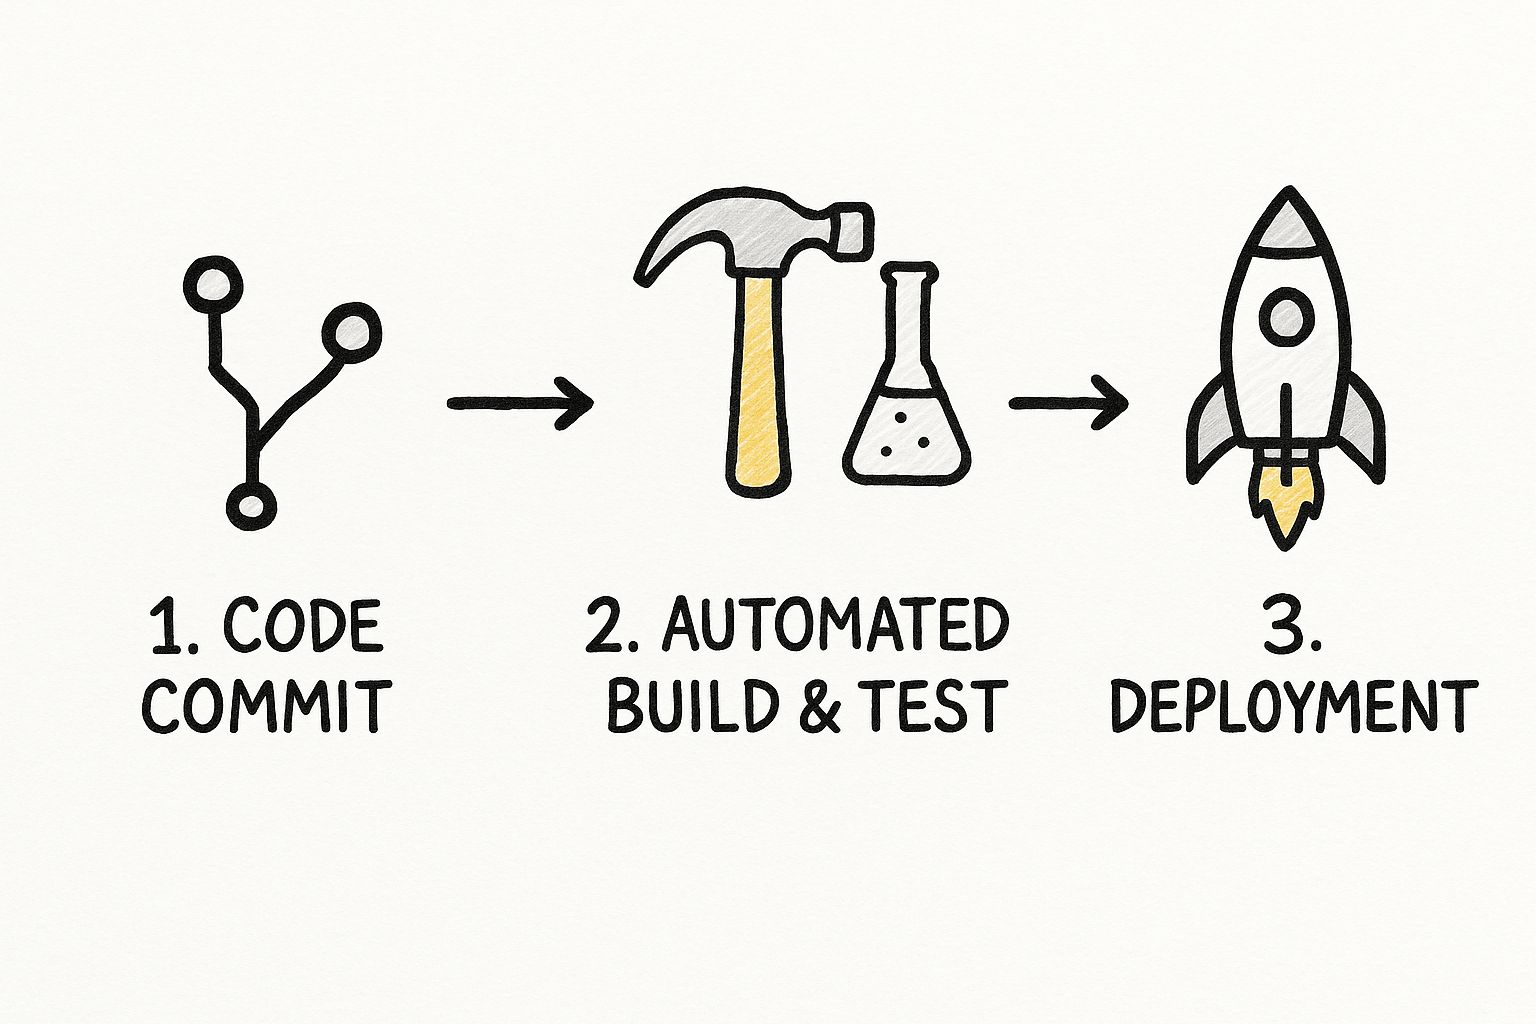
This flow really highlights the core idea of CI/CD: automate every step you can to keep things consistent and fast. Now, let’s turn that concept into a working Jenkinsfile.
Understanding the Core Syntax
At its core, a Declarative Jenkinsfile is built from specific blocks that tell Jenkins what to do and where to do it. Think of it like a recipe with clearly defined sections for ingredients and instructions.
You'll quickly get familiar with these essential building blocks:
pipeline: This is the main wrapper for your entire definition. Every DeclarativeJenkinsfilehas to start with this.agent: This tells Jenkins where to run the pipeline. For now,agent anyis perfect; it just means "use any available machine."stages: This block holds one or morestageblocks. Eachstageis a distinct phase of your process, like "Build," "Test," or "Deploy."steps: Inside eachstage, thestepsblock is where the real work happens. This is where you’ll run shell scripts, call build tools, and execute commands.
These four components are the backbone of any Declarative Pipeline. Once you get the hang of how they fit together, you can build some seriously powerful and easy-to-maintain workflows.
A version-controlled Jenkinsfile is a game-changer. It doesn't just document your CI/CD process; it lets you audit changes, roll back to previous versions, and collaborate on pipeline improvements just like you do with your application code.Creating a Practical Pipeline
Let's put this into practice and build a Jenkinsfile for a simple Node.js web app. Our pipeline will do three things: check out the code from Git, install dependencies and build the project, and then run the unit tests. Simple, but effective.
First, create a new file named Jenkinsfile (no file extension!) in the root of your project. Then, paste in this code:
pipeline { agent any
stages {
    stage('Checkout Code') {
        steps {
            // This command pulls the latest code from your repository
            git 'https://your-repository-url.com/your-project.git'
        }
    }
    stage('Build Application') {
        steps {
            // Run shell commands to install dependencies and build
            sh 'npm install'
            sh 'npm run build'
        }
    }
    stage('Run Unit Tests') {
        steps {
            // Execute the test suite to validate the new build
            sh 'npm test'
        }
    }
}
}
This simple file defines a clean, three-stage CI process. Each stage has a descriptive name, which makes it incredibly easy to see your pipeline's progress in the Jenkins UI. The sh step is your workhorse for executing standard shell commands, making it flexible enough to run almost any command-line tool you need.
Once you commit this Jenkinsfile to your repository and set up a Pipeline job in Jenkins to point to it, this entire workflow will kick off automatically on every new code change. You've just created the foundational loop for an effective CI/CD process.
Automating Deployments and Integrating Tools
Alright, with a solid build and test pipeline humming along, you’re ready for the step that delivers the real value: automated deployment. This is the moment your code goes from a successfully tested artifact to a live, running application. Let's push our Jenkinsfile a little further and get our application out to a staging environment, closing the loop on the development cycle.
You might be surprised how simple it is to add a deployment stage. We'll just enhance our previous Jenkinsfile by adding a "Deploy to Staging" stage. For now, it will run a simple shell script to simulate a deployment. In the real world, though, this script could be doing anything from copying files to a server, spinning up a Docker container, or calling a cloud provider’s API.
If you want to get a better handle on the concepts behind this, our guide on what deployment automation is is a great place to start. It covers the core ideas and benefits in more detail.
Extending the Jenkinsfile for Deployment
To get this working, we just need to append a new stage to our stages block. It’s a clean approach that keeps the pipeline logic organized and easy to read.
Here’s what the updated Jenkinsfile looks like:
pipeline { agent any
stages {
    // Previous stages (Checkout, Build, Test) go here...

    stage('Deploy to Staging') {
        steps {
            echo 'Deploying to the staging environment...'
            sh './deploy-staging.sh' // Execute our deployment script
        }
    }
}
}
The deploy-staging.sh script is where the magic happens. It could be a simple secure copy command (scp) or a full set of Docker commands to build and run a fresh container. Keeping your deployment logic in a separate script makes both the pipeline and the deployment process much easier to manage over time.
Integrating Feedback with Plugins
A pipeline that runs silently is a pipeline you can't trust. For a CI/CD process to be truly effective, your team needs immediate, actionable feedback. This is where the Jenkins plugin ecosystem really shines, letting you bolt notifications and analysis tools right into your workflow.
Let’s look at a couple of essential integrations you should consider from day one:
- Slack Notifications: The Slack Notification plugin is a no-brainer. It pipes real-time updates on your pipeline’s status directly into your team's channels. You can set it up to ping you on success, failure, or unstable builds, which keeps everyone on the same page without having to check the Jenkins UI.
- SonarQube Scanner: To keep your code quality high, the SonarQube Scanner plugin is indispensable. Just add a SonarQube analysis step, and you can automatically fail the build if the code doesn't meet your quality gates for bugs, vulnerabilities, or nasty code smells.
Integrating tools like Slack and SonarQube transforms your pipeline from a simple automation script into a comprehensive feedback system. It ensures that every commit is not only built and tested but also meets quality standards and communicates its status instantly.
By adding these kinds of integrations, your CI/CD Jenkins pipeline becomes an active, helpful participant in your development process. It automates deployments, enforces quality gates, and gives your team the visibility it needs to move fast without breaking things. This is the end-to-end automation that every modern DevOps practice is striving for.
Optimizing Pipelines for Speed and Scalability
When your projects start to take off, a sluggish CI/CD pipeline can go from a handy assistant to a major development headache. A thirty-minute build might not sound so bad at first, but when you have multiple developers pushing changes, those delays add up fast, bringing productivity to a screeching halt.
The secret to keeping things moving in a growing cicd jenkins environment is to get ahead of the problem by optimizing for speed and scalability from the get-go.
Parallel Stages, Faster Feedback
One of the quickest wins here is to run your pipeline stages in parallel. Think about it: instead of running unit tests, then integration tests, then static code analysis one after the other, you can set up Jenkins to fire them all off at the same time on different agents. This one change can seriously slash your total pipeline runtime, getting feedback to your developers much, much faster.
Adopting Reusable and Efficient Code
Another smart move is to embrace shared libraries. It's all too common to see the same chunks of pipeline logic copied and pasted across dozens of different Jenkinsfiles. A shared library lets you centralize that code, following the DRY (Don't Repeat Yourself) principle. It makes your pipelines a breeze to maintain—a single tweak to the library updates every project using it.
Caching dependencies is another non-negotiable optimization. Why waste time and bandwidth downloading the same packages and libraries from scratch on every single build? By caching those dependencies locally, future builds can grab them in a fraction of the time, which dramatically speeds things up.
Key Takeaway: Pipeline optimization isn't a "set it and forget it" task. It’s an ongoing process of spotting bottlenecks—like sequential tests or duplicated code—and then applying smart solutions like parallelization and shared libraries to keep your development cycle humming along.
The value of efficient tools like Jenkins is clear when you look at the wider industry. The DevOps ecosystem is on track to hit $25 billion by 2025, and it’s estimated that 80% of Global 2000 companies now have dedicated DevOps teams. You can discover more insights about these DevOps trends on Radixweb.
For teams ready to take their workflows to the next level, using Jenkins to optimize your CI/CD pipeline offers even more strategies that build on these core ideas. When you combine these techniques, you're building a system that can scale right alongside your project’s complexity, ensuring your CI/CD process remains a powerful asset, not a source of frustration.
Answering Your Top Jenkins Pipeline Questions
As you get your hands dirty with Jenkins pipelines, you’ll quickly find that a few questions pop up time and time again. These are the classic "stuck points" that everyone hits. Getting solid answers to these is what separates someone who just follows tutorials from someone who can actually build, debug, and optimize a CI/CD workflow from the ground up.
Let's dive into some of the most common hurdles you're likely to face.
What’s The Real Difference Between Declarative And Scripted Pipelines?
This is usually the first big fork in the road you'll encounter. The choice between a Declarative and a Scripted Pipeline really comes down to structure versus flexibility.
The Declarative Pipeline is the modern, preferred approach. It gives you a clean, straightforward syntax with clear blocks like pipeline, agent, and stages. This structure makes your pipeline incredibly easy to read and maintain, especially for standard, everyday CI/CD processes.
On the other hand, the Scripted Pipeline is pure, flexible Groovy code. Think of it as the "expert mode." It offers you total programmatic control to build highly complex or non-standard workflows. But with great power comes a much steeper learning curve.
For most teams just starting out, my advice is always to begin with Declarative. You can accomplish almost anything you need to, and it sets you up with a solid, maintainable foundation.
How Do I Secure Credentials In A Jenkins Pipeline?
Let’s get one thing straight: never, ever hardcode secrets like API keys, passwords, or tokens directly in your Jenkinsfile. It’s a massive security vulnerability that leaves sensitive data sitting in plain text right inside your source code repository.
The right way to handle this is with the Jenkins Credentials plugin. It’s built for this exact purpose.
You store your secrets safely inside the Jenkins UI, and then you can securely inject them into your pipeline using the credentials() helper method. This is typically done within an environment block. This simple practice keeps your secrets out of your codebase and makes them much easier to manage and rotate over time.
Can I Actually Run Jenkins Pipelines Inside Docker Containers?
Yes, and you absolutely should! This is one of the best practices you can adopt for creating clean, isolated, and perfectly reproducible build environments.
By defining a Docker agent right in your Jenkinsfile, you’re telling Jenkins to spin up a fresh container for your build and run all the stages inside it.
For instance, you can specify an agent like this: agent { docker 'maven:3.8.1-jdk-11' }.
This single line guarantees that every build runs with the exact same dependencies and tool versions. It completely wipes out the classic "but it works on my machine!" problem. It also keeps projects from interfering with each other on the same Jenkins agent, leading to far more stable and reliable automation.
Ready to escape CI bottlenecks and gain powerful insights into your build performance? Mergify's merge queue and CI insights can help your team save time and reduce infrastructure costs. Learn more about what Mergify can do for you.


