
Master CICD with Jenkins and Docker: A Practical Guide

Combining CI/CD with Jenkins and Docker creates a seriously powerful automation pipeline. You're essentially pairing Jenkins' knack for orchestration with the consistent, self-contained environments Docker provides. This duo finally solves that classic "but it works on my machine" headache, making sure your code behaves the same way everywhere, from a developer's laptop all the way to production. The end result? Faster, more reliable software delivery.
Why Jenkins and Docker Are a DevOps Powerhouse
At its core, a solid DevOps culture is all about speed, reliability, and consistency. The partnership between Jenkins and Docker hits all three of these nails on the head, creating a synergy that most tools just can't match on their own.
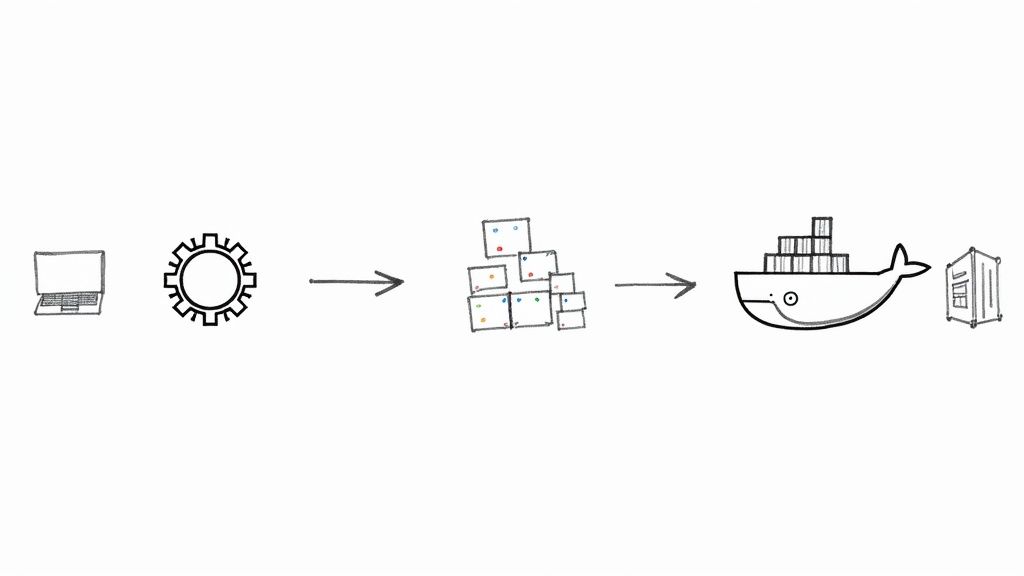
Think of Jenkins as the brain of the operation—the orchestrator—and Docker as the universal shipping container. Docker ensures the cargo (your application) arrives intact, no matter the destination.
Jenkins, the open-source automation server, is the backbone of your CI/CD workflow. It's fantastic at managing and kicking off complex sequences of tasks, from compiling code to running tests and pushing out deployments. But without a consistent environment, the automation Jenkins provides can be surprisingly brittle.
This is exactly where Docker comes in. It allows you to package your application and all its dependencies into a neat, portable container. By integrating it with Jenkins, developers can automate the entire build-test-deploy cycle using these containers, which crushes environment-related bugs and ramps up efficiency.
The Perfect Partnership for Automation
Put them together, and you get a robust system where every single code change automatically triggers a predictable, repeatable process. This setup pays off in huge ways, both for the business and the tech team.
Here are a few of the biggest wins you'll see:
- Complete Environmental Consistency: Docker containers wrap up your application and every single one of its dependencies. A build that passes inside a Docker container on your laptop will behave identically in the Jenkins pipeline and, later, in production.
- Accelerated Build and Test Cycles: Lightweight Docker containers spin up and disappear in seconds. This lets Jenkins provision a clean, isolated environment for every single build or test run, which drastically shortens the feedback loop for developers.
- Simplified Dependency Management: Forget about juggling different versions of libraries or runtimes on your build agents. You define the required versions once in a
Dockerfile, and that's it. It's used everywhere, completely stamping out configuration drift.
In my experience, the biggest win is eliminating environment-related deployment failures. Once a team adopts a container-first approach with Jenkins, they spend less time debugging infrastructure and more time building features.
Understanding Each Tool's Role
To really get why they work so well together, it helps to see their distinct roles. Jenkins handles the what and when—the actual workflow steps. Docker, on the other hand, manages the where—the environment everything runs in.
Here's a quick look at how each tool contributes to a streamlined automation workflow.
Jenkins and Docker Roles in Your CI/CD Pipeline
| Aspect | Jenkins (The Orchestrator) | Docker (The Environment) |
|---|---|---|
| Primary Function | Automates the build, test, and deployment workflow. | Packages applications and dependencies into portable containers. |
| Area of Control | Manages the sequence of pipeline stages and triggers jobs. | Defines and isolates the runtime environment. |
| Key Artifact | The Jenkinsfile (pipeline-as-code). |
The Dockerfile and container images. |
| Main Benefit | Workflow automation and continuous integration. | Consistency, portability, and isolation across all stages. |
This clear separation of concerns makes the entire CI/CD process easier to manage, scale, and troubleshoot. You can explore a broader CI/CD tools comparison to see how this combination stacks up against other solutions on the market.
This synergy is exactly why "CI/CD with Jenkins and Docker" remains a cornerstone of modern software development.
Preparing Your Build and Deployment Environment
A killer CI/CD pipeline is only as solid as the foundation it’s built on. Before you even think about writing a Jenkinsfile, you have to get your environment set up correctly. Nailing this part ensures your automation runs the same way, every single time, and helps you dodge that classic "it works on my machine" headache later on.
First up, you need to decide how you're going to run Jenkins. You've basically got two options. You could install it directly on a server—bare metal or a VM—which gives you total control. The other, more modern approach is to run Jenkins inside a Docker container. For a CI/CD with Jenkins and Docker setup, this is usually the way to go because it keeps everything consistent and portable.
No matter which path you choose, you’ll need the Docker Engine installed and running, either on the same machine as Jenkins or on an agent it can reach. Think of Docker as the heart of your build process; it’s what will actually create your images and spin up your containers.
Getting this initial setup right involves a few key steps to prep your environment for the real automation work.
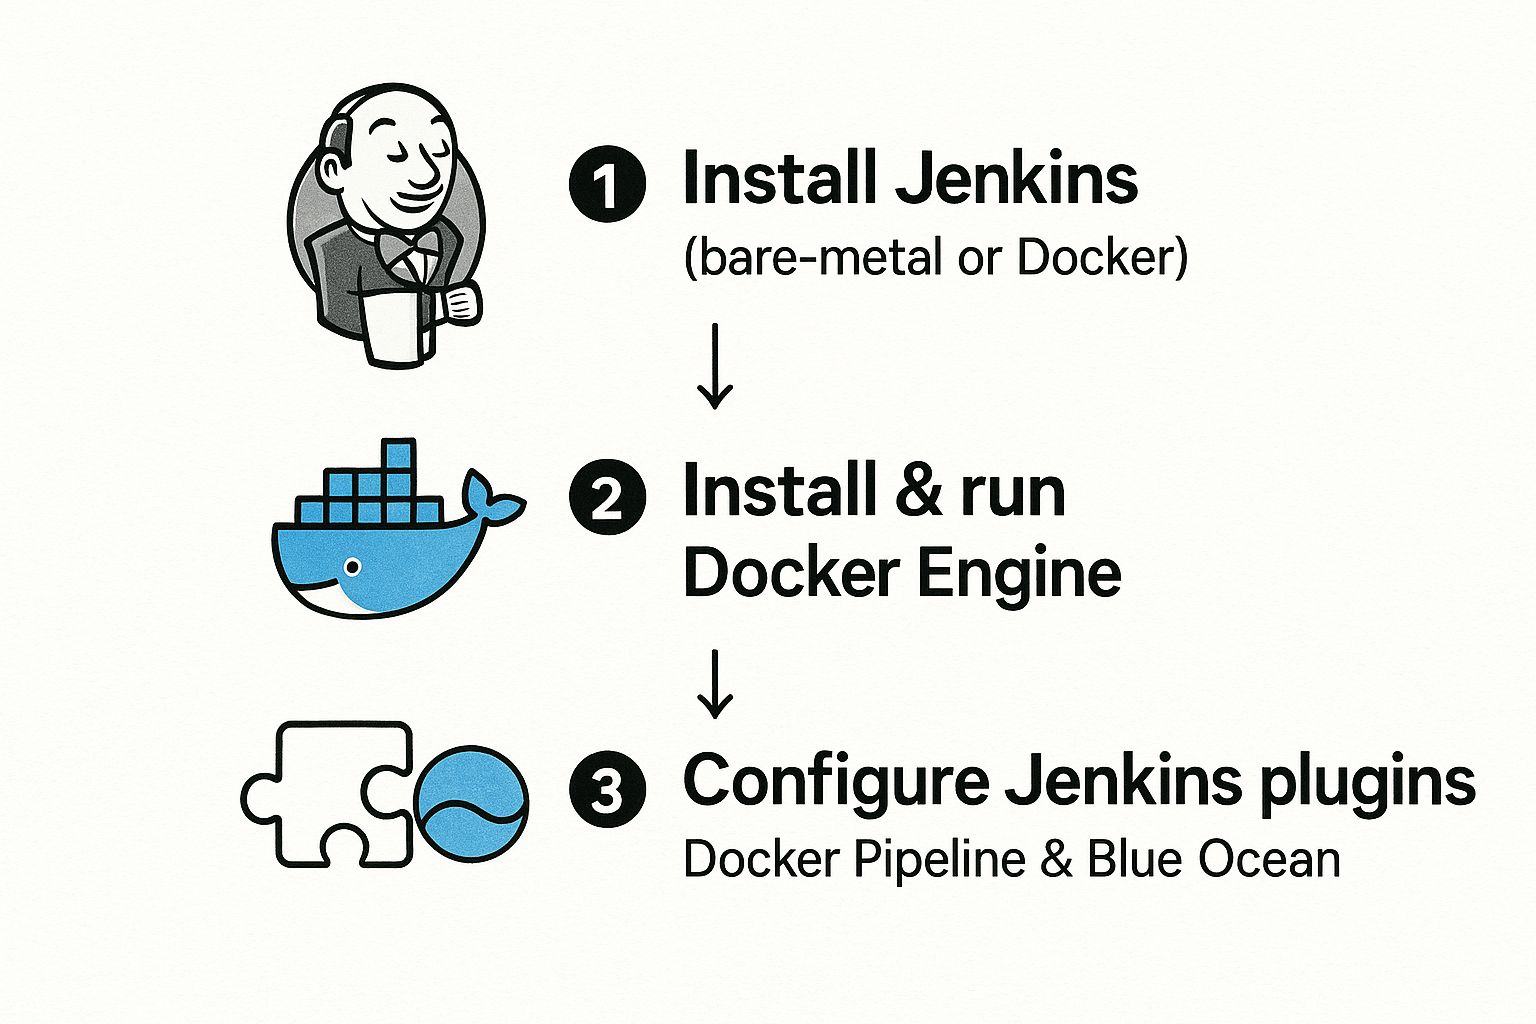
As you can see, a working environment isn't just about the core tools. It's also about the plugins that bridge the gap between Jenkins and Docker.
Installing and Configuring Key Jenkins Plugins
A vanilla Jenkins installation is powerful, but its true magic comes from the massive plugin ecosystem. For what we're doing, a couple of them are absolutely essential. Jenkins has been a workhorse in the CI/CD world for ages, known for its incredible flexibility thanks to over 1,500 plugins. This extensibility is why so many developers stick with it. It's not perfect—setups can get complex and security needs attention, as you can read about in the state of CI/CD on blog.jetbrains.com—but the right plugins make all the difference.
To get started, head over to Manage Jenkins > Plugins. In the "Available" tab, you can search for and install what you need.
Here are the plugins you can't live without for this workflow:
- Docker Pipeline: This is the big one. This plugin gives you the
dockerglobal variable inside your Jenkinsfile. It’s what lets you build, tag, push, and run Docker images with clean, declarative syntax. - Blue Ocean: While you could technically live without it, you won't want to. Blue Ocean provides a modern, visual UI that makes your pipelines so much easier to understand. It’s a lifesaver for tracking down failures in complex, multi-stage jobs.
Installing these plugins is your first real step toward "pipeline-as-code." They give your Jenkinsfile the power to talk directly to the Docker daemon, turning your script into real-world actions like building a new container image.Why Blue Ocean Is a Game Changer
Let's be honest, the classic Jenkins UI is functional but feels... well, dated. Trying to figure out why one specific stage of your pipeline failed can be a real pain. Blue Ocean was built specifically to fix that, offering an interface designed from the ground up for continuous delivery.
The difference is night and day. It makes it instantly clear which stages passed, which failed, and what's currently running. This means faster debugging and a much less frustrating experience for you and your team.
Once these plugins are installed and Jenkins has had a quick restart, your environment is officially ready for action. You have Jenkins as your orchestrator, Docker as your build engine, and the right plugins to connect them. With this foundation in place, you’re all set to start writing your Jenkinsfile and build your first automated pipeline.
Crafting Your First Dockerized Jenkinsfile
Alright, with our environment set up, it's time to bridge the gap between theory and execution. This is where we tell Jenkins what to do and how to do it by creating a Jenkinsfile. Think of this file as the blueprint for your entire CI/CD with Jenkins and Docker workflow.
The Jenkinsfile is the very heart of the "pipeline-as-code" philosophy. Instead of clicking through a bunch of UI menus to configure a job, you define everything in a simple text file that lives right alongside your application code in your Git repo. This makes your pipeline versionable, easy to review in pull requests, and completely reproducible.
We'll be using the Declarative Pipeline syntax, which is the modern, structured way to write a Jenkinsfile. It’s far easier to read and maintain, making it the perfect place to start.
The Anatomy of a Declarative Pipeline
Before we dive into the full script, let's quickly break down the key building blocks. Once you get these, the final Jenkinsfile becomes a lot less intimidating.
pipeline { ... }: This is the main wrapper for your entire pipeline definition. Everything else goes inside here.agent any: This little directive tells Jenkins it can run the pipeline on any available agent. Later on, you can get specific and tell it to use a particular agent, like a Docker container.stages { ... }: This block holds the sequence of yourstagedirectives. Stages are just the major logical steps of your pipeline, like "Build," "Test," and "Deploy."stage('Stage Name') { ... }: This defines one of those specific steps. Naming them clearly is crucial for knowing what's going on, especially when you're looking at the pipeline view in Blue Ocean.steps { ... }: Inside each stage, thestepsblock is where the real work happens. This is where you'll list the actual commands to run, like a shell script or a Docker command.
With this structure in mind, the process of building, testing, and packaging an application becomes a simple, logical sequence.
Building a Pipeline for a Simple Application
Let’s put this all together and create a Jenkinsfile for a basic Node.js app. The principles here are universal, so you can apply the same logic to a Python, Go, or any other project you can stuff into a container. We'll assume you have a simple project with a Dockerfile ready to go.
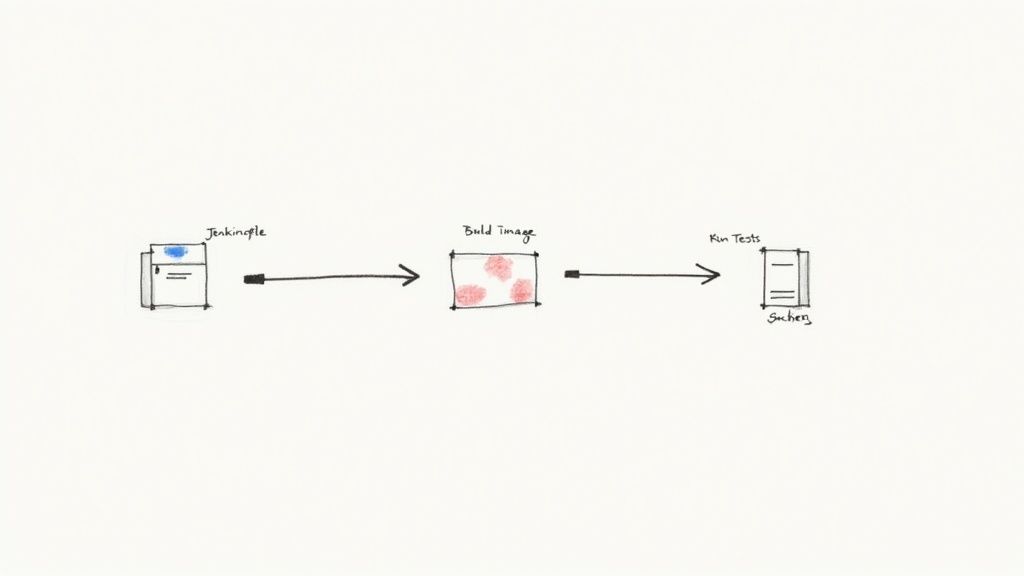
Our pipeline is going to do four key things:
- Check out the source code from Git.
- Build a Docker image using the project's
Dockerfile. - Run tests inside a temporary container spun up from that new image.
- Push the image to a registry like Docker Hub if the tests pass.
Here’s the complete Jenkinsfile we're aiming for. Don't worry, we'll walk through it section by section.
pipeline {
agent any
environment {
    // Defines a reusable variable for the Docker image name.
    // Replace 'your-dockerhub-username' with your actual username.
    DOCKER_IMAGE = "your-dockerhub-username/my-node-app:${env.BUILD_NUMBER}"
}

stages {
    stage('Checkout Code') {
        steps {
            // This step checks out the code from the repository
            // where this Jenkinsfile is located.
            git branch: 'main', url: 'https://github.com/your-org/your-repo.git'
        }
    }

    stage('Build Docker Image') {
        steps {
            script {
                // Uses the Docker Pipeline plugin to build an image.
                // The result is stored in the 'appImage' variable.
                appImage = docker.build(DOCKER_IMAGE)
            }
        }
    }

    stage('Run Tests') {
        steps {
            script {
                // Runs the tests inside a container from the newly built image.
                // The '--rm' flag ensures the container is removed after the tests run.
                appImage.inside {
                    sh 'npm install'
                    sh 'npm test'
                }
            }
        }
    }

    stage('Push to Registry') {
        steps {
            // The withRegistry block handles authentication with Docker Hub.
            // 'dockerhub-credentials' is the ID of the credential stored in Jenkins.
            docker.withRegistry('https://index.docker.io/v1/', 'dockerhub-credentials') {
                appImage.push()
            }
        }
    }
}
}
This script is the complete recipe for our automated workflow. Now, let's break down each stage so you understand the "why" behind every line.
Deconstructing the Jenkinsfile Stages
The real power of a Jenkinsfile is how it neatly organizes distinct actions into logical stages. This makes troubleshooting a breeze—if the "Run Tests" stage fails, you know exactly where the problem is.
Stage 1: Checkout Code
This is always where you start. The git command pulls the latest code from your specified repository and branch. Jenkins already knows how to handle authentication if you’ve configured your repository credentials.
Stage 2: Build Docker Image
Here, we use the docker.build() command that comes from the Docker Pipeline plugin. We just pass it the image name we defined up in the environment block. This one command tells Jenkins to find the Dockerfile in the checked-out code and run a docker build, automatically tagging the new image with the build number for easy versioning.
Stage 3: Run Tests
This is the critical quality gate. Instead of running tests directly on the Jenkins agent, we use the appImage.inside { ... } block. This is a slick command that spins up a temporary container from the image we just built and runs our test commands inside it.
The inside block is a game-changer. It guarantees your tests are running in the exact same environment that will eventually go to production. This is how you kill the "but it works on my machine" problem once and for all.Stage 4: Push to Registry
Finally, if all the previous stages pass, we push our battle-tested image to a container registry. The docker.withRegistry(...) block is the secure way to handle authentication. It wraps the push command and uses the credentials you've stored safely in Jenkins's credential manager, which means you never have to hardcode secrets in your script.
By crafting this Jenkinsfile, you've created a fully automated, reliable, and transparent CI/CD pipeline. Now, every push to your repository will trigger this sequence, giving your team fast, consistent feedback and producing a ready-to-deploy artifact every single time.
Automating Application Deployment Seamlessly
So far, our pipeline has done a great job with continuous integration—it builds, tests, and neatly packages our application into a Docker image. But a CI/CD with Jenkins and Docker setup isn't finished until we nail the "CD" part: continuous delivery or deployment. This is where we automate getting our tested application onto a server so people can actually use it.
This final stage is all about bridging the gap between a ready-to-go Docker image in a registry and a live, running application. It's probably the most critical step, and honestly, it's where things can get messy if you aren't careful. We need a secure, repeatable, and reliable way to push our container to a remote environment like a staging server.
Let's get that crucial deployment stage added to our Jenkinsfile.
Establishing a Secure Connection with SSH
To deploy anywhere, our Jenkins pipeline needs to securely connect to a remote server and run commands. The tried-and-true method for this is SSH (Secure Shell). But you should never, ever hardcode SSH keys or passwords directly into your Jenkinsfile. That's a massive security hole waiting to be exploited.
Instead, we'll lean on Jenkins’s built-in Credentials Manager. It’s designed specifically for this kind of sensitive data. You can safely store your server’s private SSH key inside Jenkins and just reference it by a unique ID in your pipeline.
Here’s how to get that set up:
- Head over to Manage Jenkins > Credentials.
- Pick the right domain (or just use global) and click Add Credentials.
- For the "Kind," choose SSH Username with private key.
- Give it a memorable ID (like
staging-server-key), add the username, and paste in the private key.
Once you save it, Jenkins encrypts and manages this secret for you. Your pipeline script only ever sees the ID, keeping the actual key locked down.
Adding the Deployment Stage to Your Jenkinsfile
Okay, let's create a new Deploy to Staging stage in the Jenkinsfile. This stage will grab the SSH credentials we just stored and connect to our remote server to update the running application. The game plan is pretty simple: pull the new Docker image and restart the container.
To make this happen, we need one more essential Jenkins plugin: SSH Agent. This little gem lets our pipeline use the stored SSH credentials, making them available to shell commands inside a specific block.
stage('Deploy to Staging') {
steps {
// 'staging-server-key' is the ID of the credential we stored in Jenkins.
sshagent(credentials: ['staging-server-key']) {
// The sh command now runs in a context where it can authenticate with the remote server.
sh '''
ssh -o StrictHostKeyChecking=no user@your-staging-server.com <<EOF
# Login to Docker Hub on the remote server
docker login -u your-dockerhub-username -p ${DOCKERHUB_TOKEN}
                # Pull the latest image we just built
                docker pull your-dockerhub-username/my-node-app:${env.BUILD_NUMBER}

                # Stop and remove the old container if it exists
                docker stop my-node-app || true
                docker rm my-node-app || true

                # Run the new container
                docker run -d --name my-node-app -p 3000:3000 your-dockerhub-username/my-node-app:${env.BUILD_NUMBER}
            EOF
        '''
    }
}
}
This script block is a powerful piece of automation. It securely connects to the target server and runs a sequence of commands to pull the new image, stop the old container, and fire up the new one. The entire process is now completely hands-off.
Here's a pro-tip from experience: use the|| truetrick afterdocker stopanddocker rm. This stops the script from failing on the very first deployment when the container doesn't exist yet. It just makes your pipeline that much more resilient.
Managing Different Deployment Environments
In the real world, you're not just deploying to one place. You’ll have multiple environments, like staging and production. Hardcoding server details for just one environment simply won't scale. We need a more flexible approach.
This is a perfect job for environment variables and a bit of conditional logic. We can configure our Jenkins job to be parameterized, letting a user pick a target environment when they kick off the pipeline.
You can add a parameters block at the top of your Jenkinsfile:
parameters {
choice(name: 'TARGET_ENV', choices: ['staging', 'production'], description: 'Select the deployment target')
}
Then, you can use a when directive to control which deployment stage runs based on that choice. This approach keeps your logic clean and helps prevent accidental pushes to production. You can dive deeper into the concepts of deployment automation in this comprehensive guide—it's a fundamental practice for any modern software team.
By adding this secure deployment stage, you’ve officially closed the loop on your CI/CD pipeline. Your process is now automated from code commit all the way to a running application, all orchestrated by Jenkins and powered by Docker.
Alright, you've got a pipeline that works. That's a huge first step. But now it's time to take it from a functional prototype to a professional, production-grade system that your team can actually rely on.
A few smart techniques can make a world of difference in your pipeline's speed, security, and how easy it is to maintain. Honestly, these are the refinements that separate a basic setup from a truly efficient CI/CD with Jenkins and Docker workflow.
The whole CI/CD market is blowing up, expanding from its previous USD 9.41 billion valuation. That growth isn't just a number—it reflects a real, urgent need for faster, more reliable software delivery. If you want to keep up, adopting professional practices isn't optional. For a look at the landscape, you can check out the top CI/CD tools on contextqa.com.
Optimize Docker Images with Multi-Stage Builds
One of the most impactful changes you can make right now is to use multi-stage builds in your Dockerfile. Think about a typical build for a compiled language. You pull in compilers, SDKs, and a whole suite of build tools. These are essential for building your app, but they're just dead weight in your final image, bloating its size and expanding its attack surface.
Multi-stage builds are the perfect solution. You use multiple FROM instructions in a single Dockerfile. The first stage acts as a "builder," packed with all the development tools needed to compile your code. Once that's done, a second, final stage starts from a clean, minimal base image and only copies the compiled artifacts over from the builder.
The result? Dramatically smaller and more secure production images. They contain only what's necessary to run the application, with no leftover build tools or source code. Smaller images also mean faster pulls from your registry and quicker deployments. To take security a step further, you should also get into the habit of regular container image scanning in your workflow to catch vulnerabilities before they hit production.
I've seen teams adopt multi-stage builds and shrink their production image sizes by as much as 90%. This doesn't just make deployments faster—it massively reduces the potential attack surface of your running containers.
Speed Up Your Pipeline with Docker's Build Cache
Slow builds are an absolute productivity killer. One of the best ways to keep your Jenkins pipeline snappy is to lean into Docker’s build cache. Every time you run docker build, Docker examines each instruction and checks if it has already built an identical layer before. If it finds a match in its cache, it just reuses it. Simple, but incredibly powerful.
To really get the most out of this, you need to structure your Dockerfile with the cache in mind.
- Order matters. Place instructions that change infrequently at the top. For example, your commands to install dependencies (
COPY package.jsonandRUN npm install) should come before you copy your application source code (COPY . .). - Be specific. Instead of a single, broad
COPY . ., try copying only what’s needed for a specific step, like thepackage.jsonfile on its own.
This simple bit of ordering prevents a minor code change from busting the cache for your dependency layer, which is often the most time-consuming part of any build.
Keep Your Team in the Loop with Notifications
A silent pipeline is a mysterious one. When a build breaks—and it will—you need to know immediately. Integrating automated notifications is a straightforward but absolutely vital step for any serious CI/CD system. Luckily, Jenkins has a plugin for just about every communication tool out there.
Here are a couple of the most common and effective setups:
- Slack Integration: The Slack Notification plugin is a classic. You can send messages directly to a team channel for build failures, successes, or any other important event.
- Email Notifications: For more detailed alerts, the built-in Mailer plugin can send emails, complete with console logs, to a distribution list whenever a build needs attention.
Setting up these alerts makes build failures visible and actionable problems for the entire team. It helps create a culture of collective ownership over the pipeline's health and provides that immediate feedback loop that's so crucial for moving quickly.
Common Questions About Jenkins and Docker
As you start weaving Jenkins and Docker together, a few questions always pop up. Trust me, I've seen them all. Getting these sorted out early on can save you hours of frustration and help you build a solid CI/CD pipeline from day one.
Let's dive into some of the most common things that trip people up when they're first integrating these two powerhouses.
Can I Use Docker Compose Within a Jenkins Pipeline?
Absolutely, and you definitely should. It's a fantastic way to handle applications with multiple, interconnected services. Think about it: your app, a database, maybe a Redis cache—Docker Compose spins them all up in one go.
You can call docker-compose commands right from a shell step (sh) in your Jenkinsfile. This is a game-changer for running proper end-to-end tests where the entire application stack needs to be live. A common pattern I see is to create a docker-compose.test.yml file specifically for the pipeline to use.
What Is the Difference Between a Declarative and Scripted Pipeline?
This is one of the first big decisions you'll make when writing a Jenkinsfile. The modern, recommended approach is the Declarative Pipeline. It gives you a clean, structured syntax that’s just easier to read and maintain. For most teams, especially if you're new to Jenkins, this is the way to go.
The Scripted Pipeline, on the other hand, is basically a full-on Groovy script. It’s incredibly flexible and powerful, but that power comes at a cost. The learning curve is much steeper, and things can get messy and hard to manage if you're not careful. For the vast majority of CI/CD workflows, Declarative gives you everything you need with much better guardrails.
The key takeaway here? Start with a Declarative Pipeline. Its structure naturally guides you toward best practices and makes your pipeline’s purpose clear to anyone who reads it. If you ever hit a wall and need some complex logic, you can always drop into a script { ... } block for a specific task. You get the best of both worlds.How Should I Manage Secrets like Docker Hub Credentials in Jenkins?
Whatever you do, never hardcode secrets in your Jenkinsfile. It’s a massive security risk. Putting credentials directly in your code exposes them in your repository and build logs for anyone to see. Jenkins has a much better, built-in way to handle this.
The Credentials Manager is your best friend here. Here’s the secure way to do it:
- Go into Jenkins and store your Docker Hub login, API tokens, or SSH keys as a "Secret text" or "Username with password" credential.
- Give it a simple, memorable ID, like
dockerhub-credentials. - Then, in your Jenkinsfile, use the
withCredentialsblock to pull the secret in by its ID.
This approach keeps your secrets encrypted and only injects them into the pipeline when it's actually running. They stay completely out of your version control, right where they should be.
At Mergify, we're obsessed with making the entire development cycle faster and more efficient. Our platform helps you automate merge queues, slash CI costs, and give your developers back precious time. Find out how Mergify can streamline your workflow.


