Git Create Branch Local and Remote A Practical Guide


When you need to create a new Git branch and share it, the process is a straightforward one-two punch: first, you create the branch on your local machine, and then you push it up to the remote server for your team to see.
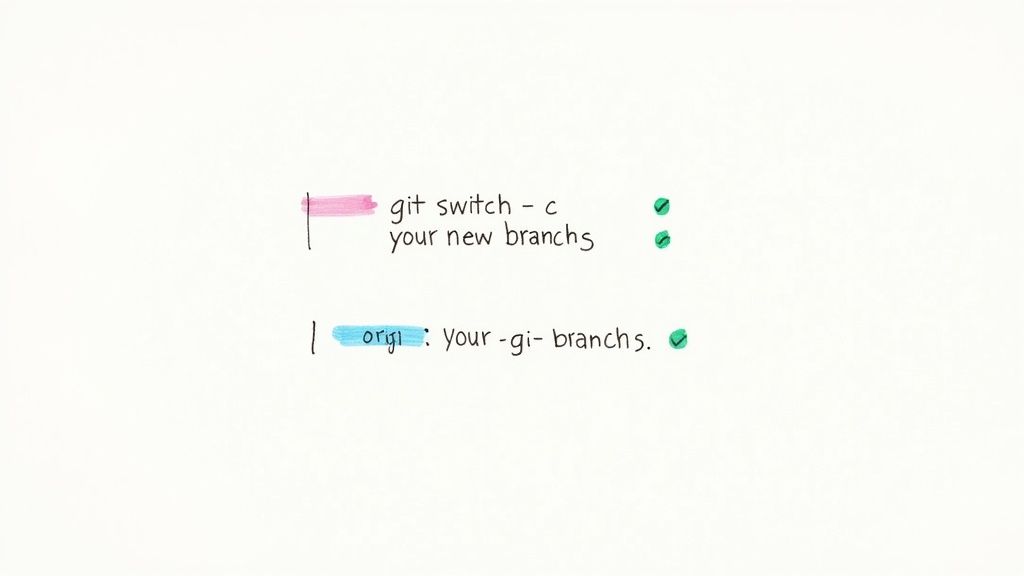
The go-to command combo for this is git switch -c new-feature followed by git push -u origin new-feature. This simple workflow keeps your work safely stored on your machine before you share it.
Your Quick Guide to Git Branching Commands
Before we get into the nitty-gritty, let's cover the commands you'll be using day in and day out. These are the building blocks of any collaborative project that relies on Git.
One of the things that makes Git so powerful is how it handles branches. Unlike older version control systems that would bog down by copying every single file, Git just creates a tiny, lightweight pointer to a specific commit. It's almost instant.
This design is a huge reason why Git is the backbone for 99% of open-source projects. It allows teams to spin up branches for new features, bug fixes, or experiments without ever slowing down.
Git Branch Creation Commands at a Glance
To make sure you're grabbing the right tool for the job, here’s a quick breakdown of the most common commands for creating and switching branches locally.
| Command | What It Does | When to Use It |
|---|---|---|
git switch -c <branch> |
Creates a new branch and switches to it. | The modern, recommended method for its clarity and safety. |
git checkout -b <branch> |
Also creates and switches to a new branch. | A traditional, still-common method, though switch is preferred. |
git branch <branch> |
Creates a new branch but does not switch to it. | Useful for setting up a branch without leaving your current work. |
Knowing the subtle differences here can save you from a lot of confusion and make your workflow much smoother.
Once you've made your commits on the new branch, the next logical step is to get those changes back into your main line of development. That's when you'll need to know how to expertly merge one branch into another to integrate your work.
Why Git Uses Local and Remote Branches
The separation between local and remote branches isn't just a quirky feature of Git; it’s the very reason it's so powerful for collaborative development. This distributed model was a deliberate design choice that gives every developer on a team a huge amount of safety, speed, and autonomy.
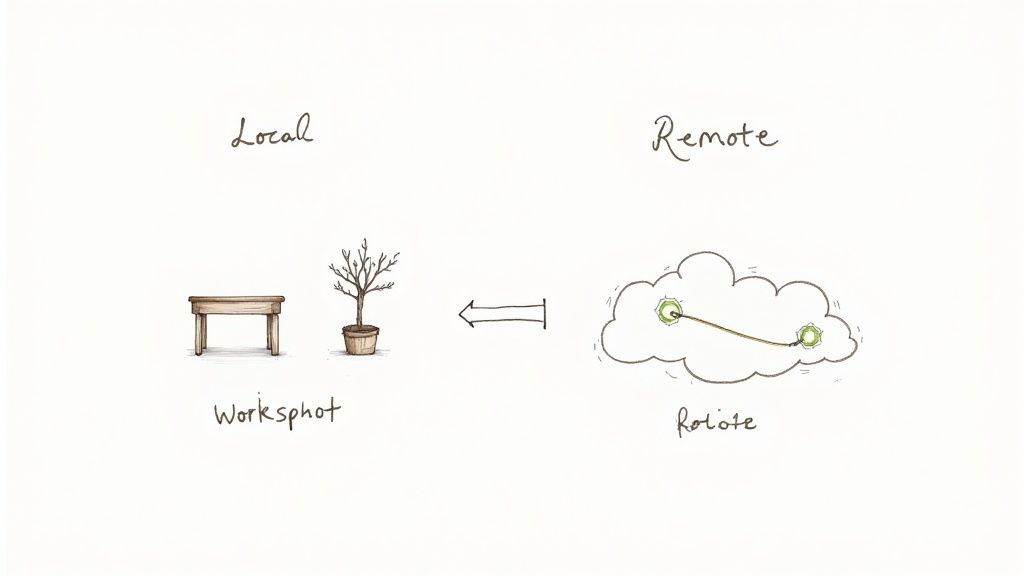
Think of your local repository as your own private workshop. It’s a space where you can create, modify, and even break things without worrying about disrupting anyone else's progress. Local branches are your personal sandboxes, perfect for experimentation.
This isolation is incredibly freeing. You can spin up a new branch to build a feature, refactor some hairy code, or hunt down a tricky bug. If an idea turns into a dead end, you can just discard the branch. Poof. Gone. No one on your team ever has to know. It’s a completely risk-free environment for innovation.
The Role of Remote Repositories
Remote branches, on the other hand, live on a shared server like GitHub and act as the official, synchronized blueprint for the project. When you finally share your work, you're essentially presenting your polished changes for team review and integration. This is where the real collaboration happens.
The remote repository is the single source of truth. It ensures everyone is building from the same baseline and that all contributions are merged in a controlled, deliberate way—usually through pull requests.
By separating local and remote work, Git empowers developers to work in parallel. A team of ten can work on ten different features simultaneously without stepping on each other's toes, a process that would be chaotic in a centralized system.
This structure also makes you faster. Since most of your day-to-day operations—committing, switching branches, viewing history—happen on your own machine, they are incredibly quick. You only need to interact with the remote server when you're ready to sync up, either by pulling down updates or pushing your own.
Getting the hang of git pull and git fetch is a big part of this. For a deeper dive, check out our guide on the differences between git fetch vs git pull. This clear separation of concerns is truly fundamental to an efficient and scalable Git workflow.
Alright, let's get our hands dirty and start branching on your local machine. This is your private workshop, where you have complete control to experiment without affecting anyone else's work.
The most direct and modern way to spin up a new branch is with the git switch command. It was introduced back in Git version 2.23 to bring some much-needed clarity to how we handle branches.
Imagine you've just been assigned a ticket to build a new login form. You'd pop open your terminal, navigate to your project, and run a single, intuitive command:
git switch -c feat/user-login
This one-liner tells Git to do two things: create a new branch named feat/user-login and immediately switch over to it. The -c flag is just a neat shorthand for --create. It’s a clean, single-purpose tool, which is a huge improvement over its predecessor.
The Old Way Still Works, But...
Before git switch became the go-to, developers everywhere used git checkout -b feat/user-login. You'll still see this command plastered all over old tutorials, Stack Overflow answers, and legacy project documentation. And to be clear, it works just fine. It does the exact same thing.
The problem with git checkout is that it’s a bit of a Swiss Army knife. It's used for switching branches, but also for restoring files and even detaching your HEAD pointer. This overloaded functionality often tripped up newcomers and, if we're being honest, even seasoned pros on an off day.
The Git maintainers made a smart move by introducinggit switch. They essentially split up the old command's duties. Now,git switchis purely for moving between branches, and its sibling,git restore, is for handling files. Usingswitchmakes your intention crystal clear and your workflow that much safer.
Once you run the command, Git gives you immediate feedback, confirming you're in your new, isolated environment.
Switched to a new branch 'feat/user-login'
And just like that, you’re off the main branch. You're now free to code your new feature. Every commit you make will be safely recorded on feat/user-login, leaving the primary codebase pristine until you're ready to share your masterpiece. This simple command is the first critical step to effectively git create branch local and remote.
Pushing a Local Branch to a Remote Repository
So, you've committed your changes locally. Great! But right now, that branch only exists on your machine. The next step is to share it with the world—or at least with your team—by pushing it to the remote repository.
This is how your work becomes visible, enabling collaboration, code reviews, and everything else that makes Git so powerful.
The first time you push a new branch, the command is a little different than your subsequent pushes. Here’s the command you'll use:
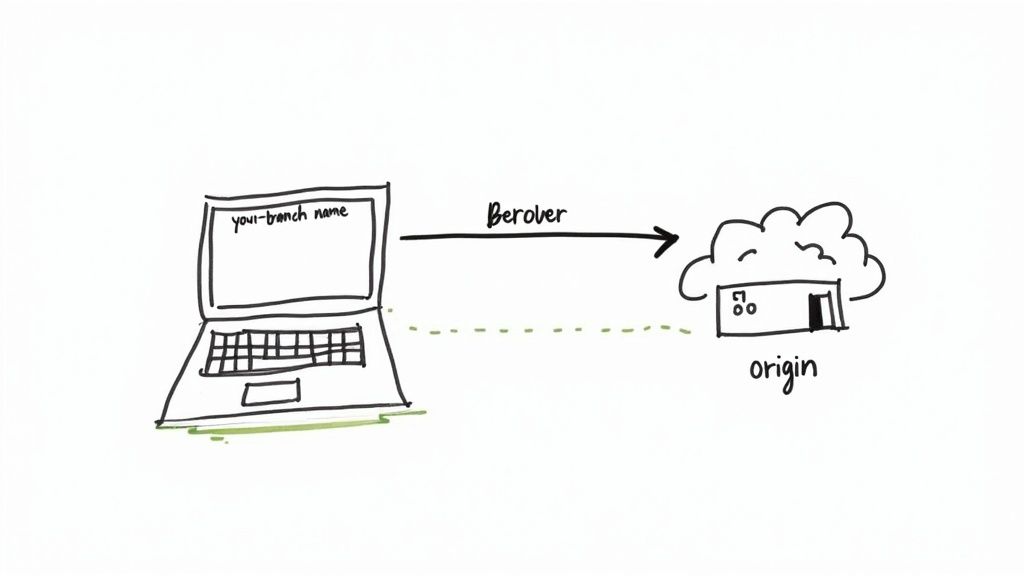
git push -u origin your-branch-name
This command tells Git to take your local branch and upload it to the remote server, which is almost always named origin by default. This is the crucial moment where you git create branch local and remote, bridging the gap between your computer and the central repo.
The Magic of the Upstream Flag
What’s that -u flag doing in there? It’s a shortcut for --set-upstream, and it’s a huge time-saver.
Using -u the first time you push a branch creates a tracking relationship between your local branch and its new remote counterpart. Think of it like telling your local branch where its "home" is on the server.
By setting the upstream, you’re creating a bond between your localfeat/user-loginand the remoteorigin/feat/user-login. This connection simplifies your future workflow, as Git will now know exactly where to push updates and pull changes from for this specific branch.
Once that connection is made, your life gets easier. You no longer need to specify the remote and branch name every time. Subsequent pushes are as simple as typing git push. Git just knows where to send the changes.
So, after that initial push, all future updates can be sent with a simple:
git push
What You'll See in the Terminal
When you run that first push command, Git will give you some feedback to confirm everything worked. The output will look something like this:
- It will count and compress the objects it's sending.
- You'll see a line confirming a
[new branch]was created on the remote. - Most importantly, it will confirm that the tracking connection was successful.
It'll spit out a line like: branch 'feat/user-login' set up to track 'origin/feat/user-login'.
This message is your green light. It means your branch is now safely backed up on the remote server, and your local setup is perfectly configured for easy syncing from here on out.
Adopting Smart Branch Naming Conventions
Once you git create branch local and remote, the name you choose gives it an identity. Let's be honest, a branch named update is next to useless. It tells your team nothing and just adds to the noise. But a name like feat/user-login-validation? That instantly tells the whole story, keeping your project history clean and incredibly easy to follow.
Getting your team to adopt a consistent naming convention is one of the most powerful habits you can build. It’s not just about being tidy; it’s about clear, unambiguous communication. When anyone can glance at the branch list and know exactly what's being worked on, collaboration just clicks into place.
Categorizing Your Work with Prefixes
A simple but brilliant strategy is to use prefixes to categorize the type of work being done on a branch. This gives you immediate context and is a standard practice in professional development for a very good reason—it works.
A well-structured prefix system turns your branch list from a random mess of names into an organized, at-a-glance project status board. It’s a small bit of discipline that pays off big time in clarity.
Here’s a quick rundown of some of the most common prefixes your team can start using today:
Branch Naming Convention Examples
| Prefix | Purpose | Example Branch Name |
|---|---|---|
feat/ |
Adding a new feature | feat/add-dark-mode |
fix/ or bugfix/ |
Squashing a bug | fix/login-button-bug |
docs/ |
Making documentation changes | docs/update-readme |
refactor/ |
Improving code without changing behavior | refactor/optimize-api-queries |
test/ |
Adding or updating tests | test/add-user-auth-tests |
chore/ |
Routine maintenance or build tasks | chore/update-npm-dependencies |
Adopting these prefixes immediately makes your repository more intuitive for everyone, from senior developers to new hires.
A couple of other pro tips: always use hyphens (-) to separate words. They’re URL-friendly and just plain easier to read in a terminal than underscores or camelCase. Also, aim for descriptive but concise names. A branch called bugfix isn't helpful, but fix/resolve-api-timeout-error is perfect. It’s these small habits that build a professional, understandable Git history that your future self—and your entire team—will thank you for.
Common Questions About Git Branching
Even with a solid workflow, a few questions always seem to pop up when you're creating and managing branches. Let's tackle some of the most common hurdles developers run into. Getting these right will keep you moving forward with confidence.
Modern vs. Traditional Commands
One frequent point of confusion is the difference between git switch -c and git checkout -b.
At the end of the day, both commands do the same thing: they create a new branch and immediately switch you over to it. The real difference is intent. git checkout is an older, overloaded command that also handles restoring files, which can sometimes lead to mistakes if you're not careful.
git switch was introduced in Git 2.23 as a safer, more focused command built purely for branch operations. While checkout -b still works perfectly fine, getting into the habit of using switch -c is the modern best practice. It makes your action unambiguous.
Troubleshooting a Missing Remote Branch
Pushed your new branch but don't see it on GitHub? This is a classic "first push" issue that trips up a lot of people.
First, double-check that you're actually pushing to the correct repository with git remote -v. It's a simple sanity check. Next, make sure you used the full git push -u origin your-branch-name command. That -u flag is critical for the initial push because it tells Git to establish a tracking connection between your local branch and the new remote one. A simple git push won't work until that link is created.
A final tip: Sometimes, it's just a minor display lag. A quick browser refresh on the GitHub repository page can often resolve the issue instantly, revealing your newly pushed branch.
Post-Merge Cleanup
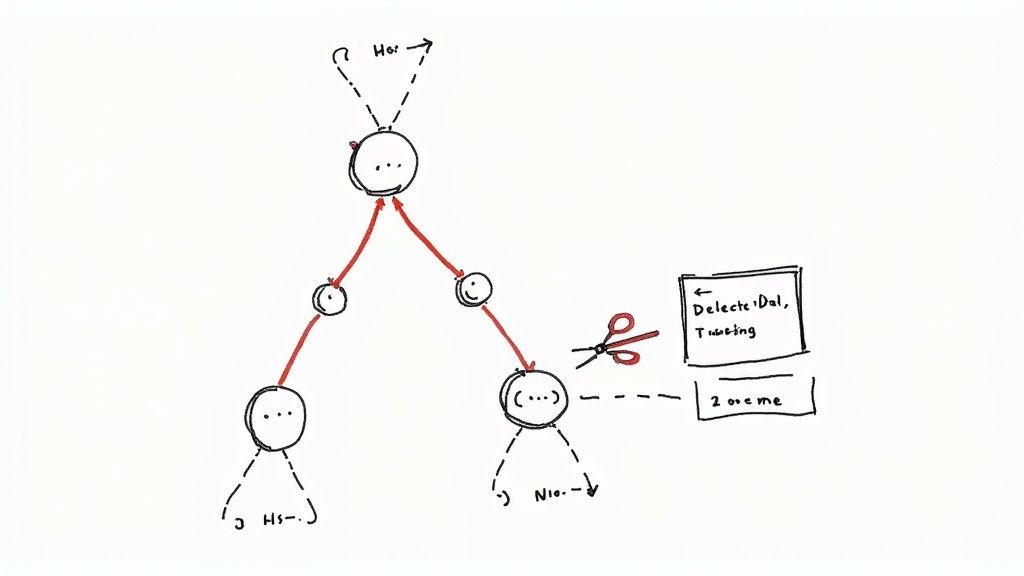
Keeping your repository tidy isn't just for show—it's a crucial habit for a healthy project. So, what do you do with that old feature branch after your pull request is merged?
Proper cleanup involves two simple steps. First, you'll want to delete the local copy using git branch -d your-branch-name. For a deep dive into this process, you can explore more about how to delete a Git branch safely.
Once the local branch is gone, you just need to remove the remote branch with git push origin --delete your-branch-name. Done.
At Mergify, we automate these tedious parts of your workflow. Our Merge Queue ensures your pull requests are always up-to-date and merge conflict-free, saving your team valuable time and preventing broken builds. Discover how Mergify can streamline your development cycle.