
Master the Jenkins #CICD Pipeline: Complete Guide

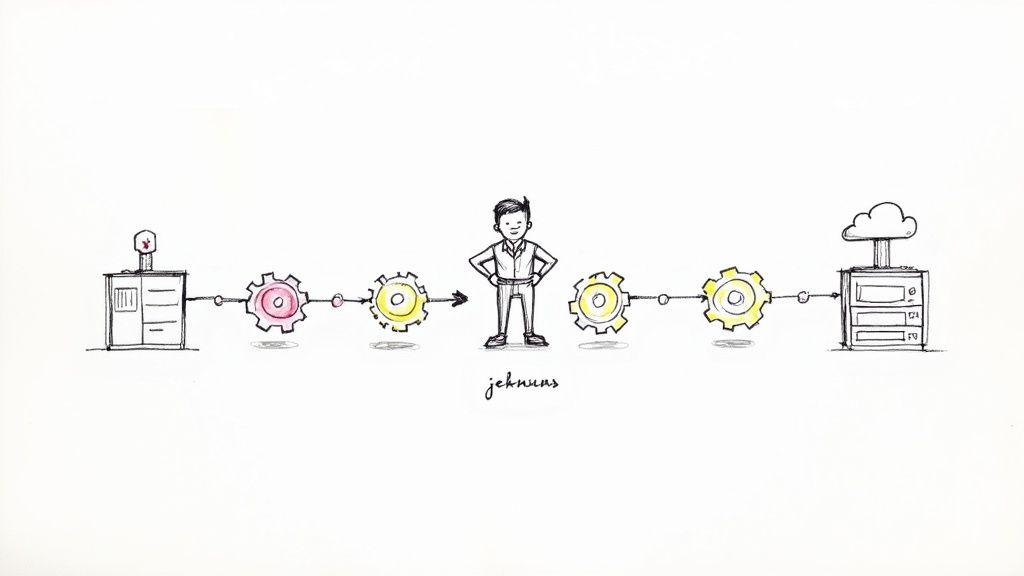
A Jenkins CI/CD pipeline is the workhorse that automates getting your code from version control, through builds and tests, and finally out to production. It’s been a staple in DevOps for years, largely because of its incredible flexibility and a massive ecosystem of plugins that let you build just about any workflow you can dream up.
Why Jenkins Still Powers Modern CI/CD
With so many new DevOps tools on the market, you might think of Jenkins as a classic. But there’s a reason it’s still the go-to for so many enterprise teams. While other platforms might offer a slicker UI or simpler setup, Jenkins really shines when you need absolute control over a complex process. It's an automation engine first, and a CI/CD tool second.
That distinction is everything. It means a Jenkins #CICD pipeline isn't locked into a set of predefined steps. Instead, it can orchestrate almost any task you throw at it, making it perfect for those unique, real-world scenarios that don't fit into a neat box.
Where Jenkins Excels Today
Jenkins’ real value pops up in situations where other tools just can’t keep up. Its open-source DNA and sheer extensibility mean it can adapt to pretty much any requirement, which is why countless organizations rely on it for their most critical automation tasks.
Here are a few places it really stands out:
- Highly Regulated Industries: Think finance or healthcare, where compliance and audit trails are non-negotiable. With Jenkins, you can build custom stages for security scanning, evidence collection, and manual approval gates right into the pipeline.
- Complex Hybrid-Cloud Setups: For companies juggling infrastructure across on-prem data centers and multiple cloud providers, Jenkins can act as the central control plane. A single pipeline can trigger deployments to AWS, Azure, and your own servers.
- Legacy System Integration: Many large companies still depend on older, non-standard systems. Thanks to its massive plugin library, Jenkins can often talk to technologies that newer, more opinionated tools simply ignore.
This flexibility is why it’s still so widely used. As of August 2025, 32,750 verified companies across manufacturing, finance, and IT services use Jenkins. This data just underscores its lasting position as a top-tier CI/CD automation server.
I hear people call Jenkins outdated, and that’s a huge misconception. A modern Jenkins setup using Declarative Pipelines and Docker is just as powerful and efficient as any new tool—it just gives you way more control.
And that control is the key difference. While there are tons of great CI/CD tools comparison out there, Jenkins gives you a blank canvas. This is a massive win for teams that need to build a pipeline perfectly molded to their development lifecycle, instead of trying to cram their process into a tool’s limitations.
Key Stages in a Modern Jenkins CI/CD Pipeline
To really appreciate how Jenkins works, it helps to break down the core stages that make up a typical, modern pipeline. From the moment a developer commits code to the final deployment, each stage has a specific job to do.
Below is a table that maps out these essential stages, their primary goals, and the common tools or Jenkins plugins you'll likely encounter for each.
| Pipeline Stage | Primary Goal | Common Jenkins Plugins/Tools |
|---|---|---|
| Source/Commit | Trigger the pipeline automatically on a code change (e.g., git push). |
GitHub, GitLab, Bitbucket, SCM API Plugin |
| Build | Compile source code, resolve dependencies, and create a runnable artifact. | Maven, Gradle, NodeJS Plugin, docker build command |
| Unit & Integration Test | Run automated tests to verify code correctness and component interactions. | JUnit, PyTest, Cobertura Plugin, JaCoCo Plugin |
| Static Analysis | Scan code for bugs, vulnerabilities, and code style violations. | SonarQube, Checkstyle, PMD, Warnings NG Plugin |
| Artifact Storage | Store the built artifact (e.g., JAR, Docker image) in a central repository. | Artifactory, Nexus, Docker Hub, Amazon ECR |
| Deploy to Staging | Deploy the application to a pre-production environment for further testing. | SSH Agent Plugin, kubectl, Ansible Plugin |
| End-to-End Testing | Run automated tests against the deployed application in a staging environment. | Selenium, Cypress, Postman, Cucumber Reports |
| Deploy to Production | Release the new version to live users, often using a controlled strategy. | Blue/Green Deployment, Canary Release, Kubernetes CLI Plugin |
This flow provides a solid foundation for a robust and reliable delivery process. Each stage acts as a quality gate, ensuring that only high-quality, well-tested code makes its way to your users.
Before you can start crafting that slick Jenkins CI/CD pipeline, you’ve got to lay a solid foundation. Getting your environment set up correctly from the jump will save you a world of headaches down the line. One of the first forks in the road is deciding how to run Jenkins itself—as a standalone service or neatly packaged in a Docker container.

For most new projects I've worked on, a Docker-based Jenkins setup is the way to go. It gives you a clean, reproducible environment that isn't fussy about the underlying operating system. That kind of portability is a lifesaver; you can spin up an identical Jenkins master on your local machine or in the cloud with almost no friction.
A standalone installation, on the other hand, might make more sense for established teams with dedicated infrastructure and specific OS-level dependencies they can't avoid. Be warned, though: it demands more hands-on maintenance and can easily lead to the classic "it works on my machine" nightmare if you're not careful.
Installing Core Plugins for Pipeline Success
Once Jenkins is up and running, its real muscle comes from its massive plugin ecosystem. You don't need to go on a plugin-installing spree. You just need a handful of essentials to get a modern CI/CD workflow off the ground. The initial setup wizard actually does a decent job of suggesting a good starting set.
At the bare minimum, make sure you have these installed and enabled:
- Pipeline: This is the big one. It’s what lets you define your entire build, test, and deploy process as code inside a
Jenkinsfile. - Git: An absolute must-have for pulling source code from your repos, whether they're on GitHub, GitLab, or Bitbucket.
- Docker Pipeline: This plugin is your best friend for running pipeline stages inside Docker containers. It’s a best practice for creating isolated, consistent build environments.
Installing them is a breeze. Just head over to Manage Jenkins > Plugins > Available, search for each plugin by name, and click install. A quick restart later, and you're good to go. If you want a deeper look at what a complete pipeline looks like, check out this guide on designing a modern CI/CD pipeline to see the kinds of stages you'll be building.
A rookie mistake is to install dozens of plugins right away. Just start with the essentials for your first CI/CD pipeline. You can always add more as your needs evolve, which keeps your Jenkins instance lean and way easier to manage.
Baseline Security Configuration
Finally, don't sleep on basic security, even if this is just a test instance. An open Jenkins server is a massive security hole waiting to be exploited. Your very first move should be to flip the switch on security and set up an authentication method.
Go to Manage Jenkins > Security and tick the box for Enable security. For most teams, the built-in Jenkins’ own user database is a perfect starting point. Create an admin user for yourself and, crucially, make sure you disable anonymous read access. This one simple step prevents random people from snooping on your pipeline configurations or console logs, which often contain sensitive info.
Proper security isn't just an afterthought; it’s a non-negotiable part of any professional setup.
Alright, let's move from setting things up to actually getting something done. The real heart of any modern Jenkins #CICD pipeline is the Jenkinsfile. This is just a text file that lives right alongside your source code, and it defines your entire automation process from start to finish.
We're going to stick with the Declarative Pipeline syntax. Why? Because its clean, structured format is way easier to pick up and, more importantly, to maintain down the road.
Think of the Jenkinsfile as the blueprint for your software delivery. It tells Jenkins exactly what to do, where to do it, and in what order. By checking this file into your Git repository, your pipeline itself becomes version-controlled, just like your application code. This isn't just a nice-to-have; it's a cornerstone of how modern DevOps works.
The Core Structure of a Jenkinsfile
Every Declarative Jenkinsfile follows a simple, predictable structure. It all kicks off with a pipeline block, which wraps the whole definition. Inside that, you lay out the key sections that control the workflow, like the agent, stages, and steps.
This predictable layout is what makes Declarative pipelines so readable. Even someone who's never touched Jenkins before can glance at a well-written Jenkinsfile and get the gist of the build process.
This diagram shows a simplified flow of a typical pipeline defined in a Jenkinsfile, from the moment code is committed all the way to deployment.
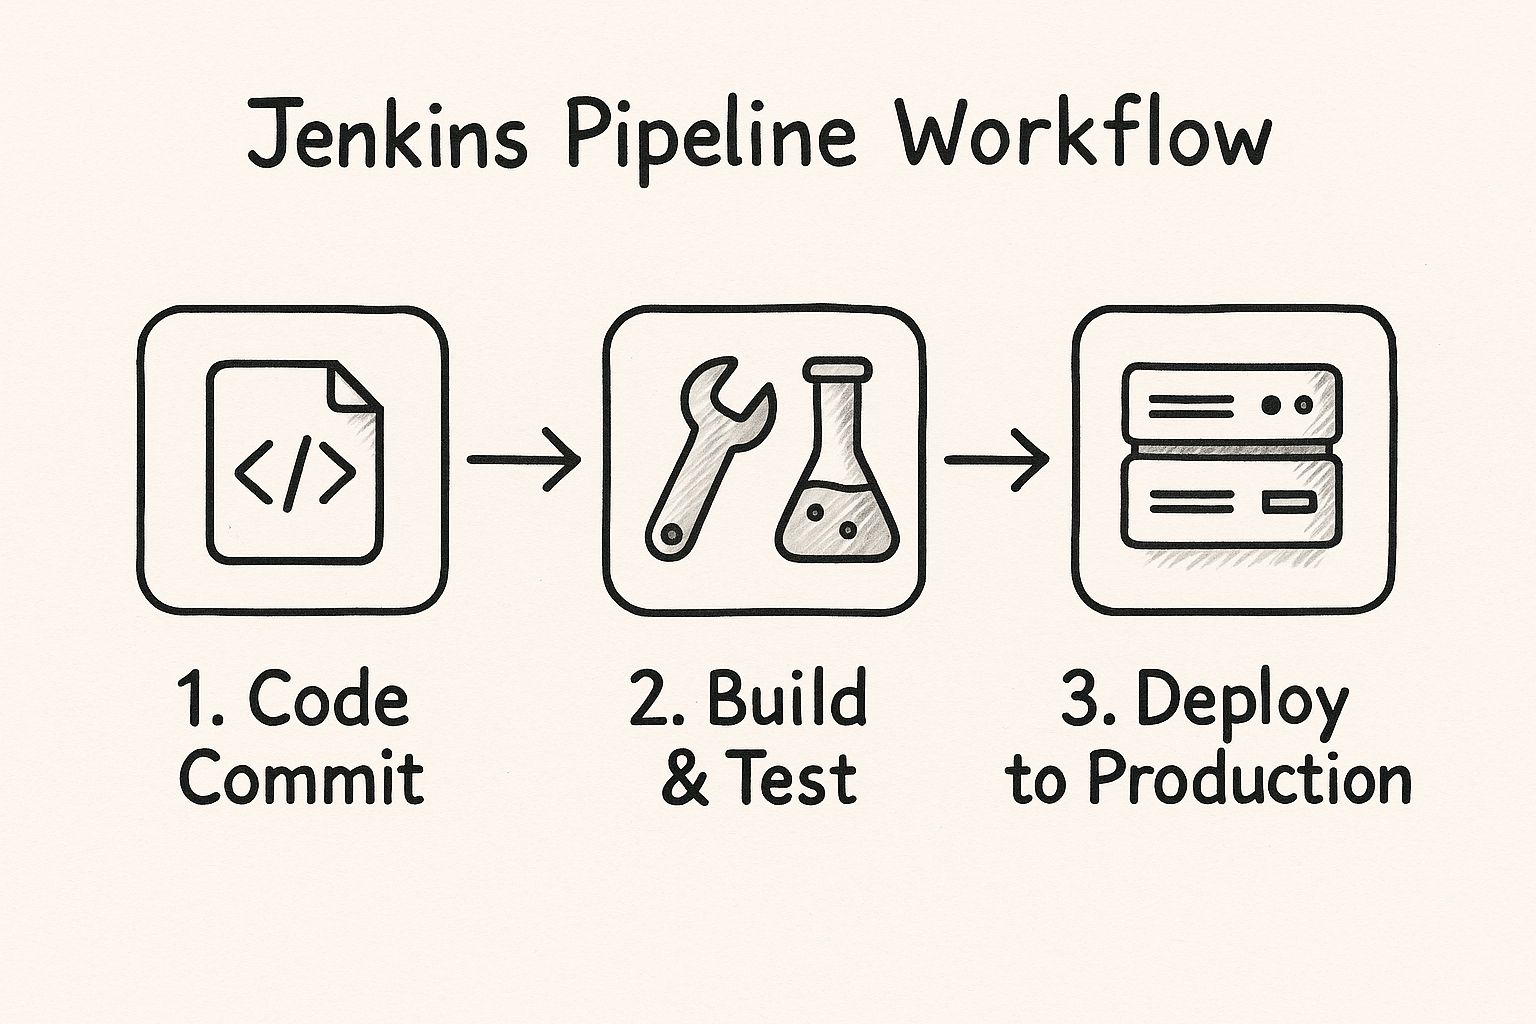
You can see how each stage acts as a quality gate, making sure the code is thoroughly checked before it can move on to the next step.
Let's break down the essential pieces you'll use to build your first pipeline. We'll put together a simple but complete example for a typical Node.js application.
Defining Your Build Environment with Agents
The first thing you’ll usually define is the agent. This is a crucial instruction that tells Jenkins where to run your pipeline. You've got a few options, but agent any is the simplest. It just tells Jenkins to grab any available executor and get to work.
But for a more robust setup, you'll want to specify a Docker container as your agent. This is a game-changer because it guarantees your build runs in a clean, consistent, and isolated environment every single time.
For a Node.js project, your agent definition might look something like this:
agent { docker { image 'node:18-alpine' } }
That one line tells Jenkins to pull the node:18-alpine Docker image and run all the following steps inside a container based on that image. This is how you kill the classic "it works on my machine" problem once and for all.
Creating Sequential Stages and Steps
The stages block is where the action happens. It's a collection of individual stage blocks, with each one representing a distinct phase of your pipeline—think "Build," "Test," or "Deploy." Jenkins will run these stages in the exact order you define them.
Inside each stage, you define the actual commands in a steps block. These are the specific actions Jenkins will take.
Let's flesh out a more complete example for our Node.js app:
pipeline {
agent { docker { image 'node:18-alpine' } }
stages {
    stage('Checkout') {
        steps {
            // This step checks out your code from the Git repository
            git 'https://github.com/your-username/your-repo.git'
        }
    }
    stage('Install Dependencies') {
        steps {
            // Runs npm install to get all required packages
            sh 'npm install'
        }
    }
    stage('Run Tests') {
        steps {
            // Executes the test suite defined in your package.json
            sh 'npm test'
        }
    }
    stage('Archive Artifacts') {
        steps {
            // Saves the build output for later use (e.g., deployment)
            archiveArtifacts artifacts: 'build/**', followSymlinks: false
        }
    }
}
}
This Jenkinsfile is a solid, reusable template for a standard CI process. Each stage is self-contained and handles a single job, from checking out code to saving the final build artifacts. That modularity makes the pipeline easy to read, debug, and expand later on.
This complete example gives you a practical and effective Jenkins #CICD pipeline. It checks out code, installs dependencies, runs tests, and archives the results. Once you get a handle on these fundamental building blocks—pipeline, agent, stages, and steps—you'll have the foundation to adapt this pattern and create powerful, automated workflows for any of your own projects.
Advanced Pipeline Strategies That Scale
So, you've got your basic Jenkins #CICD pipeline up and running. It's reliably building and testing your code, which is a great start. Now, it's time to go from a functional pipeline to an exceptional one. This is where we start refining for speed, cutting down on maintenance, and making sure it all fits perfectly into your team's workflow.
These are the techniques that truly scale.
One of the most powerful tools in your arsenal for this is the Shared Library. Imagine you have ten different microservices, and every single Jenkinsfile needs a step to shoot a Slack notification on failure. Instead of copying and pasting that code into ten separate files (and having to update all ten later), you define it once in a Shared Library. Then, you just call it from any pipeline. This is a total game-changer for keeping your automation DRY (Don't Repeat Yourself).
Speeding Up Builds with Parallel Stages
As your app gets bigger, your test suite inevitably follows suit. Waiting for unit, integration, and end-to-end tests to run one after another can turn a quick five-minute build into a thirty-minute coffee break. That's a huge drag on productivity. This is exactly where parallel execution becomes a necessity, not a luxury.
By wrapping your stages in a parallel block within your Jenkinsfile, you can tell Jenkins to run them at the same time. A classic example is running static code analysis and your unit tests simultaneously, since they don't depend on each other. It’s a simple change that can slash your pipeline's total run time.
Here’s what that looks like in practice:
stage('Parallel Tests') {
parallel {
stage('Unit Tests') {
steps {
sh 'npm run test:unit'
}
}
stage('Integration Tests') {
steps {
sh 'npm run test:integration'
}
}
}
}
This little block tells Jenkins to fire off both the 'Unit Tests' and 'Integration Tests' stages at the same time, potentially cutting the time spent on testing in half. If you want to dive even deeper, our guide on CI/CD pipeline optimization has a ton more ideas for performance tuning.
Managing Secrets and Notifications Securely
I can't stress this enough: hardcoding API keys, passwords, or tokens directly into your Jenkinsfile is a massive security risk. The only right way to handle this sensitive data is with the Jenkins Credentials Plugin. This plugin lets you store secrets safely inside Jenkins and then inject them into your pipeline as environment variables when needed.
Never, ever commit secrets to version control. Using the Credentials Plugin keeps them out of your code entirely, making your pipeline secure and portable. You just reference a credential by its ID without ever exposing the actual value.
Finally, a pipeline that fails in silence isn't very helpful. Setting up notifications with post-build actions is crucial for keeping your team in the loop. The post section of a Jenkinsfile is perfect for this, letting you run different steps based on how the pipeline finished.
always: This block runs no matter what, which is perfect for cleanup tasks.success: Use this to ping a Slack channel when a new version is successfully deployed.failure: This is the most critical one. Send immediate alerts, maybe with a direct link to the build logs, the moment something breaks.
This focus on advanced, scalable practices is a big reason why Jenkins still dominates in larger organizations. While a JetBrains survey found that 41% of companies use Jenkins, its adoption is way higher in medium and large enterprises that need this deep level of customization for their complex workflows.
When you combine these strategies—Shared Libraries, parallel stages, secure credentials, and automated notifications—you're no longer just writing a simple script. You're building a professional-grade automation engine.
No matter how buttoned-up your Jenkins #CICD pipeline is, it’s going to fail. That’s not a maybe; it’s a guarantee. Broken builds are just part of the deal. The real skill is knowing how to get to the root of the problem fast, so you can get your pipeline—and your team—back on track.

Your first port of call, every single time, should be the Jenkins console output. I know, it can look like an intimidating wall of text, but all the clues you need are in there. A pro tip: don't just scroll to the bottom. Find the first red line or ERROR message and start reading up from there. This gives you the context of what Jenkins was trying to do right before everything went sideways.
Pinpointing Common Errors
After a while, you start to see the same kinds of errors crop up again and again. Recognizing these patterns is half the battle. In my experience, a handful of usual suspects are behind most pipeline headaches.
- Script Security Exceptions: If you see
org.jenkinsci.plugins.scriptsecurity.sandbox.RejectedAccessException, your pipeline tried to run a Groovy method that Jenkins hasn't approved. The fix is straightforward: a Jenkins admin needs to go into the In-process Script Approval section and give that method signature the green light. - Agent Connection Timeouts: The log just hangs on "Waiting for agent to connect..."? That's almost always a node issue. You'll want to check if the agent machine is actually online, has enough memory or CPU, or if its Jenkins service decided to take a nap.
- Credential Errors: These often disguise themselves as
gitcommand failures or HTTP 401/403 errors when your build tries to pull down dependencies. Go back and double-check that you’re using the correct credentials ID in yourJenkinsfileand that the credentials themselves haven’t expired or been revoked.
The 'Replay Pipeline' feature is an absolute lifesaver for quick debugging. Instead of committing a potential fix, pushing it, and waiting for the whole pipeline to run again, you can edit the Jenkinsfile right in the Jenkins UI and re-run the failed build. It's a massive time-saver for testing a fix.
Visualizing the Problem
If you’re more of a visual person, the Blue Ocean UI plugin is a must-have. It takes that dense, text-based console output and turns it into a clean, graphical view of your pipeline, highlighting exactly which stage failed. You can click on any red stage and jump straight to the relevant logs, which helps you zero in on the problem without all the noise.
Security is always a top concern, as a poorly configured Jenkins pipeline can accidentally leak sensitive credentials. This risk only gets bigger as DevSecOps practices become more common. Still, Jenkins’ sheer flexibility has cemented its role in complex environments where custom, powerful workflows are more important than the out-of-the-box convenience of newer platforms. If you're curious, you can get a better sense of the current landscape of CI/CD tools and see how they all stack up.
Frequently Asked Jenkins Pipeline Questions
As you get your hands dirty building out a robust Jenkins #CICD pipeline, you start running into the same questions over and over. These aren't just about syntax; they're the practical, real-world problems that come up when you're trying to design a pipeline that actually works for your team.
We've pulled together some of the most common ones we hear to give you straight, actionable answers.
What Is the Difference Between Declarative and Scripted Pipelines
This is a classic. Think of it as choosing between a pre-built Lego set with instructions versus a bucket of miscellaneous bricks.
Declarative Pipeline is the Lego set. It gives you a clean, structured syntax that’s much easier for everyone on the team to read and understand. For most projects, this is where you should start. Its clear format makes the pipeline's flow obvious at a glance, which is a huge win for maintainability.
Scripted Pipeline, on the other hand, is the bucket of bricks. It's pure Groovy code, giving you immense power and flexibility to build complex, dynamic logic that Declarative just can't handle. But that power comes with a price—it demands solid programming skills and can be a nightmare for new folks to debug.
How Do I Trigger a Pipeline from a GitHub Push
The best way to wire up GitHub and Jenkins is with webhooks. It's a simple push notification system. You just go into your GitHub repo’s settings, add a new webhook, and point it to your Jenkins server’s webhook URL. Now, GitHub will ping Jenkins every time new code gets pushed.
Then, you just need to tell your pipeline to listen for that ping. A simple triggers block in your Jenkinsfile does the trick:
pipeline {
agent any
triggers {
githubPush()
}
stages {
// Your build and test stages go here
}
}
This little bit of configuration creates a seamless, event-driven connection. The moment a developer pushes a commit, your Jenkins #CICD pipeline kicks off automatically. No polling, no waiting.
When Should I Use a Jenkins Shared Library
The second you find yourself copying and pasting the same chunk of Groovy code from one Jenkinsfile to another—that's your cue. Stop right there and build a Shared Library.
This usually happens with common tasks like:
- Sending Slack notifications
- Running security scans with a specific tool
- Deploying to a staging environment
A Shared Library is your best defense against pipeline code duplication. By centralizing common logic, you make your pipelines easier to maintain, enforce consistency across projects, and can update a core function in one place instead of twenty.
It's a game-changer for keeping things DRY (Don't Repeat Yourself).
Can I Run My Pipeline Stages Inside a Docker Container
Yes, and you absolutely should. This is a non-negotiable best practice for any modern Jenkins setup. By defining agent { docker { image '...' } } at the top of your Jenkinsfile or within a specific stage, you're telling Jenkins to spin up a clean, isolated Docker container for those steps.
Why does this matter so much? It completely eliminates the dreaded "it works on my machine" problem. It guarantees a consistent build environment every single time, makes your pipelines portable, and prevents nasty dependency conflicts between different projects running on the same Jenkins agent.
Ready to stop wrestling with pull request backlogs and chaotic CI runs? Mergify's merge queue automates the entire process, ensuring your main branch stays green while your developers stay focused on coding. See how our intelligent automation can streamline your workflow.


