
Jenkins with GitHub A Modern CI CD Guide

Connecting Jenkins with GitHub is pretty much a foundational move for any modern CI/CD setup. It's how you build that automated bridge between your code repository and your build server. When you integrate these two powerhouses, you empower your team to automatically trigger builds, run tests, and deploy applications every single time code gets committed.
Why Jenkins and GitHub Are Better Together
Pairing Jenkins with GitHub isn't just a technical tweak; it's a strategic decision that completely changes how you ship software for the better. This combination is the heart of a solid Continuous Integration and Continuous Delivery (CI/CD) pipeline, turning what was once a manual, error-prone headache into a smooth, automated workflow.
The real magic happens when GitHub’s world-class version control meets Jenkins' incredible automation capabilities. Every git push or pull request can instantly kick off a predefined pipeline.
The Automation Advantage
This direct connection gives developers immediate feedback, which is absolutely critical in an agile environment. Instead of waiting hours—or even days—to find out if a change broke the build, your team knows within minutes. This rapid feedback loop drastically speeds up development and boosts code quality.
A few of the key wins include:
- Automated Quality Gates: You can automatically run unit tests, integration tests, and static code analysis on every single commit. This ensures only high-quality, vetted code ever gets merged.
- Reduced Manual Handoffs: No more tapping a colleague on the shoulder (or sending a Slack message) to run a build or deployment. This cuts down on friction and the potential for human error.
- Consistent Build Environments: Every build runs in a clean, consistent environment. This is a game-changer for getting reliable and reproducible results every time.
Jenkins, which first hit the scene back in 2011, is an incredibly versatile open-source automation server. Its true power is its extensibility. With a library of over 1,800 plugins, it can integrate with just about any tool in the DevOps world, especially GitHub.
By connecting these systems, you shift quality control from a reactive, end-of-cycle task to a proactive, continuous process that's built directly into your development workflow.
Here’s a quick rundown of the core benefits you'll see.
Jenkins and GitHub Integration Core Benefits
| Benefit | Impact on Development Workflow |
|---|---|
| Automated Builds | Every push to a repository can automatically trigger a Jenkins build, removing manual steps and delays. |
| Instant Feedback | Build statuses are reported directly back to GitHub pull requests, letting developers see pass/fail results right where they work. |
| Enhanced Code Quality | Automated testing on every commit catches bugs early, preventing them from being merged into the main branch. |
| Faster Delivery Cycles | The entire process from commit to deployment can be automated, significantly speeding up the release of new features. |
Ultimately, this integration makes it possible to deploy features with far greater confidence.
When every merge request is automatically put through its paces, the main branch stays stable and is always ready for a release. Before you settle on your setup, it's always a good idea to check out some CI/CD tools comparisons to see where Jenkins stands in the wider ecosystem. At the end of the day, this integration is about more than just tools—it’s about building a culture of quality and speed.
Setting Up Your Environment for Success
A good Jenkins and GitHub integration doesn't just happen—it starts with a solid foundation. Before you even think about connecting repositories or writing a single line of pipeline code, spending a few minutes on prep work can save you hours of headaches later. Think of this as your pre-flight checklist.
Your Jenkins instance lives and dies by its plugins. While there are over 1,800 plugins available, you don't need to go crazy. In fact, installing dozens of plugins you might use can seriously bog down your instance. I've seen it happen plenty of times.
For our purposes, you really only need to focus on a couple of essentials. Head over to your Jenkins dashboard under Manage Jenkins > Plugins and make sure you have these installed:
- GitHub Integration: This is the big one. It's the primary plugin that enables the deep, two-way communication between Jenkins and GitHub, handling things like build status updates right in your pull requests.
- Git: This one’s a no-brainer. It gives Jenkins the fundamental ability to pull source code from your Git repositories, including those hosted on GitHub.
These two plugins will get you 90% of the way there for most standard CI/CD workflows. You can always circle back and add more specialized plugins as your needs evolve.
Securing the Connection with a Personal Access Token
With your plugins ready, the next step is crucial: creating a secure connection so Jenkins can talk to GitHub. You can't use anonymous access for private repositories, and plugging in your personal password is a huge security faux pas. The right tool for the job is a GitHub Personal Access Token (PAT).
When you go to create your token in GitHub (it’s under Developer settings), fight the urge to grant it sweeping permissions. The principle of least privilege is your best friend. For a typical CI setup, you only need a couple of specific scopes:
repo(full control of private repositories): This is essential. Jenkins needs it to check out code, manage branches, and push build statuses back to GitHub.admin:repo_hook(read/write access to repository hooks): This scope is what allows Jenkins to automatically create and manage the webhooks that trigger your builds. It's the key to real automation.
Heads up: Once you generate the token, copy it immediately and store it somewhere safe temporarily. For security reasons, GitHub will only show it to you once. If you navigate away or lose it, you’ll have to generate a new one.
Now for the final piece of the puzzle: storing that token securely in Jenkins. You should never hardcode secrets in your build scripts or job configurations. It's a disaster waiting to happen. Instead, navigate to Manage Jenkins > Credentials.
Here, you'll want to add a new "Secret text" credential. Just paste your PAT into the "Secret" field and give it a descriptive ID you’ll remember, like github-pat-ci. This tucks the token away securely, letting you reference it by its ID in your jobs without ever exposing the actual key. It’s a simple but vital step to ensure your setup is both functional and secure from day one.
Making the Connection to Your GitHub Repo
Okay, you've got the plugins installed and your Personal Access Token (PAT) is tucked away safely as a Jenkins credential. Now for the fun part: actually linking Jenkins and GitHub. This is where we tell our Jenkins job how to find your GitHub repository, pull down the code, and confirm the two are talking.
First things first, let's create a new job in Jenkins. From your dashboard, hit "New Item." I usually give it a descriptive name, something like my-app-ci-pipeline, and then I always choose Pipeline as the job type. Why Pipeline? It's incredibly powerful and lets you define your entire build process as code in a Jenkinsfile, which is a practice we'll dive into more later.
Pointing Jenkins to Your Code
Once you're in the new Pipeline job's configuration page, scroll down to the "Pipeline" section. By default, the Definition dropdown is set to "Pipeline script." We're going to change that.
Switch it to Pipeline script from SCM (which stands for Source Code Management). This is a critical change. It tells Jenkins, "Don't look for a script I've pasted in here; go fetch your instructions from a Jenkinsfile inside my Git repo."
As soon as you make that change, a new set of options will pop up. This is where the real connection happens.
- SCM: Go ahead and select Git.
- Repository URL: This one's easy. Just grab the
.gitURL for your repository straight from its homepage on GitHub and paste it in. - Credentials: This is where our earlier prep work pays off. Click the dropdown and find the credential ID you created for your PAT (it might be named something like
github-pat-ci). Jenkins will now use that token to securely authenticate with your GitHub account.
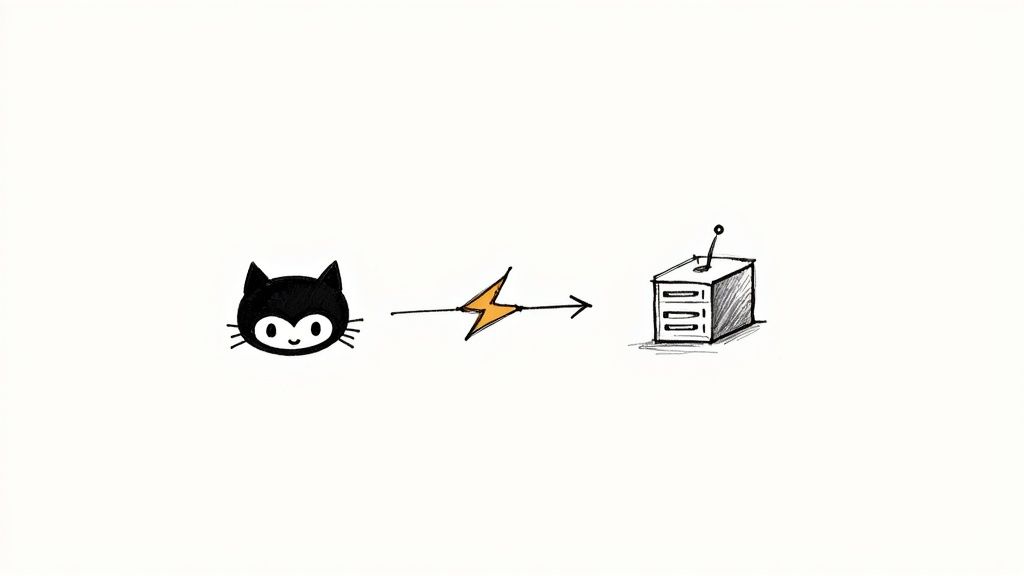
The whole process is a pretty straightforward flow, from token to repo to trigger.
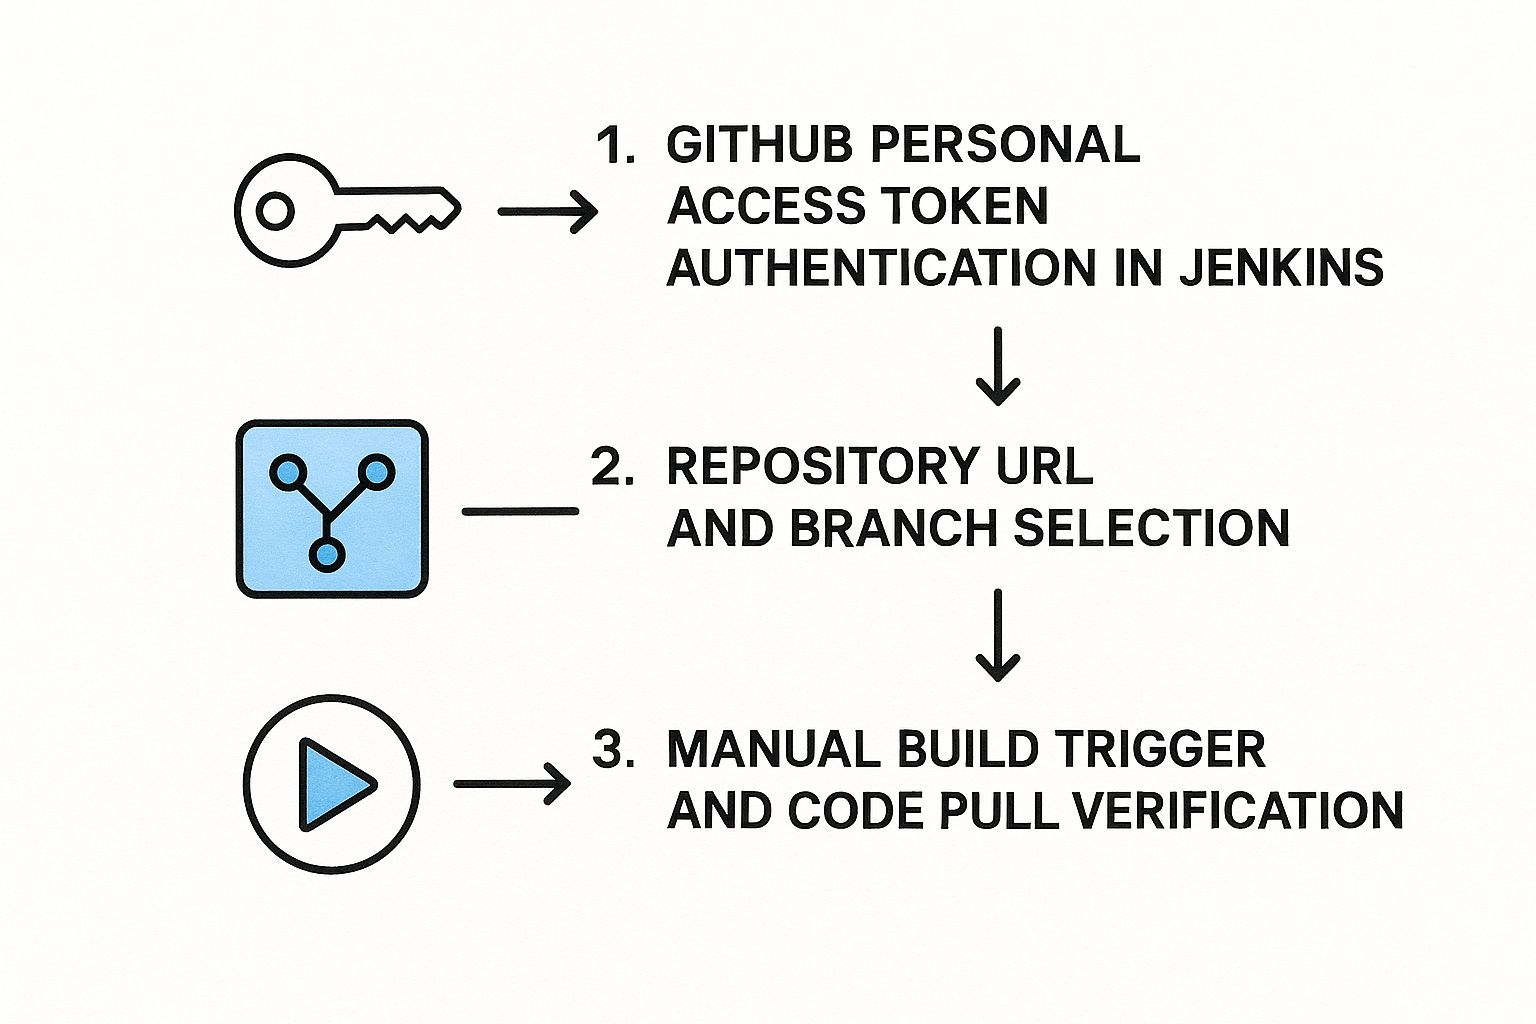
This just shows how the secure token, repository details, and the eventual build trigger all work together to get your code from GitHub into a Jenkins workspace.
Finally, look for the Branches to build section. You need to tell Jenkins which branch to watch. A really common and effective pattern here is to use */main or */master. That little asterisk is a wildcard, telling Jenkins to build any branch named main no matter what the remote is called (like origin/main).
Getting this initial manual connection right is the absolute foundation of your CI/CD setup. It confirms that Jenkins has the permissions and the path it needs to access your code. Nail this now, and you'll save yourself a world of "repository not found" headaches later on.
With the SCM all configured, click "Save."
Now for the moment of truth. On the job's main page, find and click Build Now. Keep an eye on the "Build History" panel on the left. If you've set everything up correctly, a new build will kick off and should quickly turn blue, which means success. If you're curious, you can click on the build number and look at the "Console Output" to see the log where Jenkins checks out your code from the branch you specified.
That first successful build is a huge milestone. It’s the proof you need that the Jenkins with GitHub integration is fundamentally working. From this solid base, we can start automating the entire workflow, starting with webhooks. If you're new to the whole process, I'd highly recommend getting familiar with the best practices for a GitHub pull request, since that's the centerpiece of the automated feedback loop we're about to build.
Automating Your Workflow with Webhooks
Manually clicking “Build Now” is great for a quick sanity check, but it's not going to cut it for a real CI/CD pipeline. The real magic happens when your code changes instantly trigger your pipeline. That's where webhooks come in.
Think of a webhook as a simple notification. Instead of Jenkins constantly polling GitHub and asking, "Got anything new?", GitHub proactively tells Jenkins, "Hey, a developer just pushed some code!"
This "push" model is way more efficient and gives you the immediate feedback loop every development team craves. Getting this set up is a two-part dance: first, we'll configure the webhook in GitHub, then we’ll tell our Jenkins job to listen for it.
Configuring the Webhook in GitHub
Let's jump over to your GitHub repository. Find your way to Settings > Webhooks and click that big "Add webhook" button. This is where we tell GitHub where to send its notifications.
You'll see a form with a few fields that are critical to get right. Nail these, and your automated workflow will be solid.
- Payload URL: This is the big one. It has to point directly to your Jenkins server. The standard format is
http://YOUR_JENKINS_URL/github-webhook/. Just a heads-up, your Jenkins instance needs to be accessible from the public internet for this to work. - Content type: You'll want to select
application/json. Jenkins is built to handle the rich JSON data GitHub sends, which is packed with useful info about the event. - Secret: It’s technically optional, but I highly recommend setting a secret. Think of it as a password. You'll create a random string here and then add the same string to your Jenkins job. This lets Jenkins verify that the incoming request is actually from your GitHub repo and not some random actor on the internet.
Once those are filled in, you just need to decide what triggers the webhook. You could get fancy, but for a standard CI pipeline, "Just the push event" is exactly what you need. This ensures a build kicks off every single time new code is committed. Simple and effective.
Updating Your Jenkins Job to Listen
With GitHub ready to send notifications, the last piece of the puzzle is telling your Jenkins job to actually listen for them.
Head back to your Pipeline job's configuration page in Jenkins. Look for a section called "Build Triggers" and check the box for GitHub hook trigger for GITScm polling.
That's literally it.
By checking that box, you're telling Jenkins to pay attention to that webhook URL we just set up. Now, when a push event happens, GitHub sends its payload, the trigger catches it, and your build kicks off automatically. No more manual clicks.
Setting up a webhook properly transforms your CI process from a manual chore into a fully automated, event-driven workflow. This is the heart and soul of an effective Jenkins with GitHub integration.
With all the automation wired up, it's time to tell Jenkins what to actually do. This is where the Jenkinsfile comes in, and it's a game-changer. It lets you define your entire build, test, and deployment process in a single file that lives right in your code repository.
This whole concept is called Pipeline as Code, and it’s a massive improvement over clicking through endless menus in the Jenkins UI. When your pipeline is just a text file, it becomes reviewable, versionable, and shareable—just like the rest of your application code. This is absolutely fundamental for a modern Jenkins with GitHub workflow.
Getting a Handle on Declarative Pipeline Syntax
We're going to stick with the Declarative Pipeline syntax. It's the modern, recommended way to write a Jenkinsfile, offering a much cleaner and more structured format than the older Scripted syntax. Honestly, it just makes the file easier to read and write, especially if you're new to this.
A basic Declarative Pipeline has a really straightforward structure:
pipeline: The main block that wraps everything.agent: Tells Jenkins where to run the job.agent anyis the simplest form, meaning "just grab any available agent."stages: This contains all the sequential parts of your process.stage: A specific phase in your pipeline, like 'Build' or 'Test'. You can name these whatever makes sense for your project.steps: The actual commands that run inside astage.
This clear hierarchy gives you a great at-a-glance overview of your entire CI process.
A Practical Jenkinsfile Example
Let's look at a real-world example for a standard Node.js app. This Jenkinsfile will check out the code from GitHub, install all the project dependencies, and then run the automated tests. All you have to do is create a file named Jenkinsfile (with a capital 'J') in the root of your repository.
pipeline { agent any
stages {
    stage('Checkout Code') {
        steps {
            // This handy step automatically pulls the code from your GitHub repo
            checkout scm
        }
    }
    stage('Install Dependencies') {
        steps {
            // Just a standard shell command to get all the npm packages
            sh 'npm install'
        }
    }
    stage('Run Tests') {
        steps {
            // Kicks off the test script you've defined in package.json
            sh 'npm test'
        }
    }
}
}
This simple file is the blueprint for your automation. The checkout scm step is a built-in Jenkins command that grabs the source code from the repository you linked in your job configuration. The sh steps are for running shell commands—in this case, your typical npm commands.
This file-based approach is all about consistency. Anyone on your team who clones the repo gets the exact same build process, which finally puts an end to the classic "it works on my machine" headache. Your CI pipeline is now truly reproducible.
It's also super easy to adapt this for other programming languages. For a Java project using Maven, you'd swap npm install with mvn clean install. Working with Python? You'd probably use pip install -r requirements.txt. The core structure stays the same, giving you a solid foundation to build on for any project.
If you're ready to tackle more complex scenarios, our complete guide on building a CI/CD pipeline with Jenkins dives into more advanced examples and strategies.
Common Questions About Jenkins and GitHub
Even with a perfect setup, you're bound to run into questions when you start tying Jenkins with GitHub. Let's walk through a few of the most common ones I hear. This isn't just about troubleshooting; it's about getting a better feel for how these tools work together to make your life easier.
One of the first things people want to know is if Jenkins can update the pull request status directly in GitHub. The answer is a big yes. In fact, this is one of the most powerful features of the integration, giving developers that instant feedback loop right where they're working.
When a pipeline kicks off for a pull request, Jenkins sends status checks back to GitHub—you'll see them as "pending," "success," or "failure." This means your team can immediately see if their changes broke the build without ever having to leave the GitHub interface.
Can I Use Jenkins with GitHub Enterprise?
Absolutely. Jenkins plays just as nicely with a self-hosted GitHub Enterprise Server as it does with the cloud-based GitHub.com. The only real requirement is making sure your Jenkins instance can talk to your GitHub Enterprise instance over the network.
When you're setting up the connection in Jenkins, you'll just point it to the API endpoint for your private enterprise server instead of the public GitHub API URL.
- Authentication: The process is identical—you’ll still use a Personal Access Token (PAT).
- Webhooks: Your GitHub Enterprise server has to be able to send a signal to your Jenkins server's webhook URL.
This flexibility makes Jenkins a solid choice for companies with strict security policies or data residency rules that require a self-hosted environment.
At the end of the day, the core principle is the same: Jenkins needs a reachable endpoint and the right credentials. As long as you have those two things, it doesn't care where GitHub is hosted.
Another point of confusion I see often is the difference between a multibranch pipeline and a standard pipeline job. Think of a multibranch pipeline as the smarter, more automated big brother. Instead of pointing to a single, static branch, Jenkins automatically scans your entire GitHub repository for branches.
From there, it creates and manages a child job for every single branch that has a Jenkinsfile in it. This is a game-changer for a few reasons:
- New feature branches automatically get their own CI pipeline. No manual setup needed.
- When a branch is deleted, Jenkins automatically cleans up the corresponding pipeline job.
This dynamic approach keeps your Jenkins environment tidy and guarantees every branch is tested consistently, all without you lifting a finger. If you have more than one developer on a project, a multibranch pipeline is almost always the best way to handle a Jenkins with GitHub workflow. It’s how you scale your CI process without creating a management nightmare.
Ready to automate your pull requests and optimize your CI/CD pipeline beyond the basics? Mergify provides powerful merge queues and protections to ensure your codebase stays stable and your team stays productive. Stop wasting time on manual merges and reduce CI costs. Learn more at Mergify.


