
Master Git Fetch All Branches for Seamless Syncing

We’ve all been there. You run a quick git pull expecting a simple update, but instead, you're thrown into a maze of unexpected merge conflicts from someone else's unfinished work. It’s a frustrating and common scenario.
There's a much safer way: git fetch. This command downloads all the latest changes from the remote repository without immediately trying to merge them into your working branch. This simple step gives you a crucial moment to pause and see what everyone else has been working on before you integrate it with your own code.
Why You Should Fetch Instead of Pull

Think of git fetch as a reconnaissance mission for your code. It updates your local copy of the remote repository—specifically, the remote-tracking branches like origin/main or origin/feature-x. Your own local branches, like main, remain completely untouched.
This separation is the magic here. It creates a safe, isolated space for you to review all the incoming changes without disrupting your current workflow.
This approach is invaluable on a busy, collaborative team. Imagine you're just getting back to work after a week off. Your team has been pushing code, creating, and merging multiple new branches. Instead of blindly pulling everything and hoping for the best, you can use git fetch to get a complete, up-to-date picture of the remote repository.
A Safer Way to Sync
With all the new data fetched, you can easily inspect the changes on any remote branch. You can check the commit history, spot potential conflicts, and then decide exactly when and how to integrate the new code. It's a much more deliberate process that helps prevent the "merge madness" that so often comes with an automatic git pull.
The key difference really boils down to control. For a deeper dive into this topic, you can explore the nuances between git fetch vs git pull in our detailed comparison.
To help illustrate the point, here's a quick breakdown of how these two commands differ in practice:
Git Fetch vs Git Pull Quick Comparison
| Action | Git Fetch | Git Pull |
|---|---|---|
| What it does | Downloads new data from a remote repository. | Downloads new data and immediately integrates it. |
| Impact on local work | Does not change your local working branches. | Changes your local working branch with a merge or rebase. |
| Workflow | Allows you to review changes before merging. | Automates the merge, potentially causing conflicts. |
| Safety | Considered safer as it's non-destructive. | Can be risky if remote changes are unexpected. |
Ultimately, fetching gives you the foresight to handle integrations smoothly.
Using git fetch is like peeking at the answers before a test. It gives you the information you need to prepare, ensuring you can merge new code smoothly and confidently without derailing your progress.This command is a cornerstone of daily development for a reason. In fact, some analyses of Git usage show that around 75% of developers run either git fetch or git pull at least once a day to keep their projects in sync. This just goes to show how essential a safe synchronization strategy is for any modern development team.
How to Fetch All Branches from Remotes
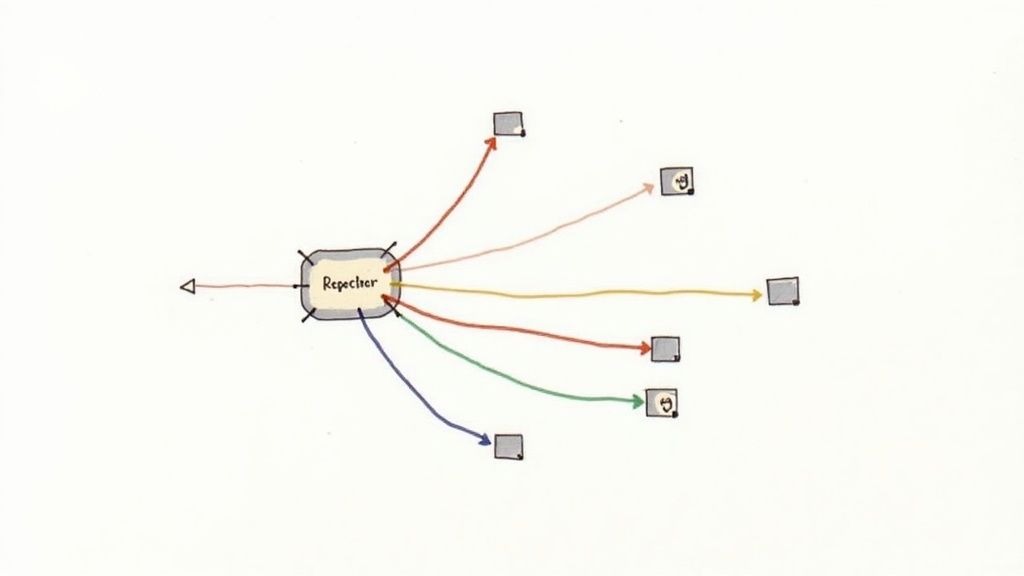
When you're working on a project with multiple remote repositories, you need a full picture of what's happening everywhere. The quickest way to get up to speed is with git fetch --all. This one command is your go-to for contacting every single remote you're tracking—like origin, upstream, or any others you've configured—and pulling down all new data from their branches.
Think of it as the most thorough way to sync your local repo's knowledge of the outside world.
Just pop open your terminal and run it:
git fetch --all
Git will then show you each remote it's checking and give you a summary of any new branches and updated commits it downloaded. The best part? This command doesn't touch your local working branches, so your current work stays completely safe and uninterrupted.
This infographic breaks down just how straightforward the process is.
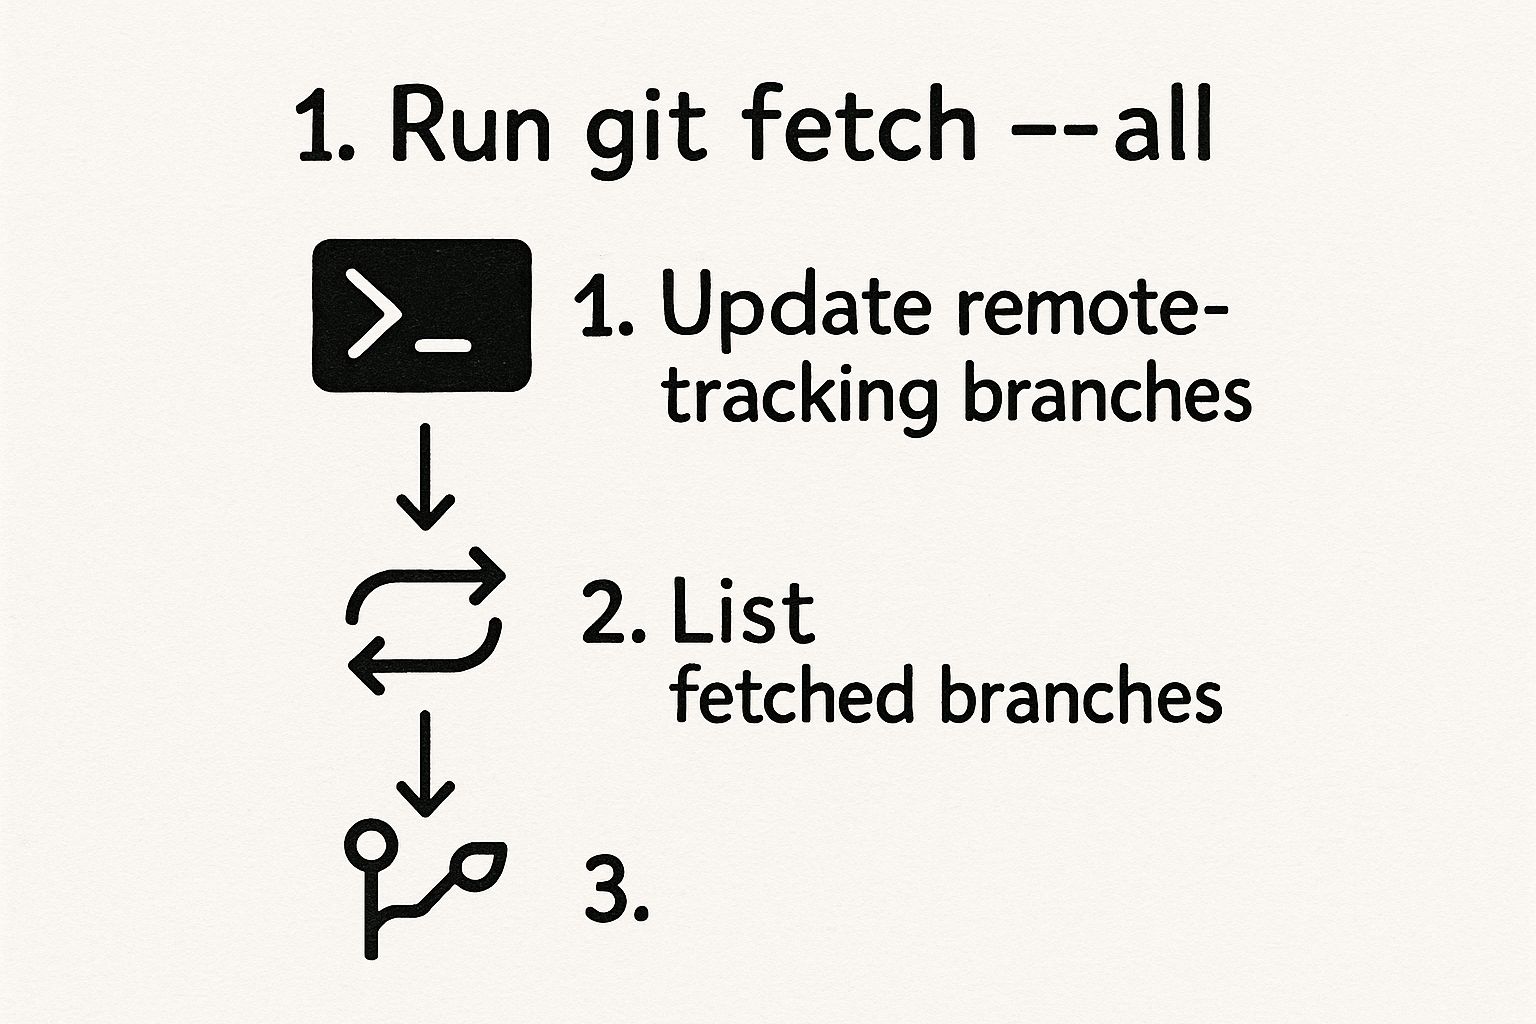
As you can see, it's a simple download-and-update flow that gives you a complete, up-to-date view of the entire project's state across all remotes.
Fetching from a Specific Remote
While git fetch --all is a powerful tool, you'll probably find that most of your day-to-day work revolves around a single remote, usually the one named origin. In this much more common scenario, you can fetch all branches from just that specific remote. It's a bit more efficient since it tells Git to ignore any other remotes you might have set up but don't care about at the moment.
The command is just as simple:
git fetch origin
This tells Git to connect only to origin and download all its branch and tag data. The result is pretty much the same as using --all, but it's nicely scoped to one repository. This command has become indispensable as projects have scaled. Today, it’s not uncommon for large repositories to have over 100 active branches, which makes a smart fetch strategy crucial. You can actually dig into repository data like this using the GitHub statistics API documentation.
A classic real-world example is code review. Before you dive into a teammate's pull request, running git fetch origin is the first step. It guarantees you have their latest commits, allowing you to check out their branch locally and test it thoroughly without messing up your own work.Once you've fetched the new branch, you'll want to switch to it. If you need to make sure your local version is an exact copy of the remote, our guide on how to overwrite a local branch with its remote version has some great tips for starting from a clean slate.
Keep Your Repository Clean with Pruning
As you keep working and using git fetch, you'll eventually notice something messy happening. Your local list of remote-tracking branches just keeps growing, but it never seems to shrink. This happens because Git holds onto a local reference even after a branch has been merged and deleted on the remote server.
This digital clutter can quickly become a real headache. Imagine trying to find an active branch when your list is clogged with a dozen old origin/feature- branches that were deleted weeks ago. The fix is surprisingly simple: just add the --prune flag to your fetch command.
git fetch --prune
This tiny addition tells Git to do some essential housekeeping. Before it fetches all the new updates, it first checks the remote and gets rid of any local tracking branches that no longer exist on the server. The result? A clean, accurate list that perfectly mirrors the remote's current state.
Why Pruning Is a Game-Changer for Team Workflows
In any fast-moving development team, branches are created, merged, and deleted all the time. If you don't prune regularly, your local branch list turns into a graveyard of stale references, making it tough to know what's actually in progress.
Running git fetch --prune ensures your local environment is a true reflection of the remote, which is critical for avoiding confusion or accidentally basing new work on an outdated branch.
Behind the scenes, git fetch syncs remote refs/heads/ to your local refs/remotes/origin/ namespace. Yet, it's estimated that only about 30% of developers make pruning a regular habit, leaving a lot of room for better repository hygiene. You can get into the nitty-gritty of how fetch works on git-scm.com.
Pruning isn't just about being tidy; it’s about maintaining accuracy. A clean branch list means that when you go to check out a branch, you're only seeing what's relevant and active right now.
Making this a habit is a small change that delivers a huge impact, especially when you pair it with other cleanup routines. For more tips on keeping your workspace organized, check out our guide on deleting your merged branches.
If you're working in a massive repository where every second counts, you can even speed things up. Adding the --jobs flag lets Git fetch from a remote using multiple parallel threads, which can dramatically cut down your sync time.
Make Fetching Automatic in Your Git Config
Let's be honest, constantly typing flags like --all or --prune gets old fast. Why not just tell Git how you want it to behave and make it the default? You can actually tweak your Git configuration to streamline your workflow, saving yourself a ton of keystrokes and making every fetch consistent.
The trick is to modify your Git config for a specific remote, which is almost always origin. By adjusting its "refspec," you can tell Git to always grab every single branch, not just the ones you're already tracking locally.
Modifying the Remote Refspec
To get git fetch to act like it's fetching all branches from your main remote, you just need to run a single configuration command. It's a one-time setup that changes how origin works for you from now on.
Just pop open your terminal inside your repository and run this:
git config remote.origin.fetch '+refs/heads/:refs/remotes/origin/'
That command might look a little intimidating, but all it's really doing is telling Git: "For the remote named origin, map all branches from its refs/heads/ directory to my local refs/remotes/origin/ directory." The * is just a wildcard, making sure every branch gets included. Once you run that, a simple git fetch will pull down updates from all branches on origin, automatically.
I've seen team leads encourage this exact configuration to standardize how developers sync with the central repository. It's a small change, but it really cuts down on the chances of someone missing a new feature branch because they forgot a flag.
You can even see the change for yourself. Just open your project's .git/config file and look for the [remote "origin"] section. You'll spot the new fetch line right there. It's a fantastic little tweak that makes a powerful command even more convenient for your day-to-day work.
Troubleshooting Common Fetching Errors

Even the most straightforward Git commands can throw a wrench in your workflow from time to time. When you try to fetch everything and hit a snag, it's usually due to a few common culprits that, thankfully, are pretty easy to fix.
One of the errors I see most often is the dreaded fatal: repository '...' not found. Nine times out of ten, this points to a simple typo in the remote's URL or an authentication issue. I've seen this happen countless times when a developer gets a new laptop and forgets to add their SSH key to their GitHub or GitLab account.
Another common pain point is when a branch you know exists on the remote just doesn't appear locally after a fetch. This can happen if your local configuration isn't set up to track all branches automatically or if there's a mismatch in naming conventions.
Pinpointing the Problem
Let’s break down the most likely issues you'll run into and how to sort them out fast. A methodical approach can turn a frustrating error into a quick fix.
- Authentication Failures: This is a big one. It happens when your credentials, like an SSH key or a personal access token, aren't configured correctly. Always double-check that your keys are properly added to your account on the remote server.
- Incorrect Remote URL: A simple
git remote -vwill show you exactly what URLs your remotes are pointing to. It's the first thing you should check. Make sure they are correct and that you can actually access them. - Firewall or Network Issues: This is especially common in corporate environments. Company firewalls or proxies can sometimes block the ports Git uses to communicate. If you suspect this is the case, you might need to configure Git to work through a proxy.
Remember, Git's error messages, while sometimes cryptic, are your best starting point. They often contain the exact clue you need to figure out if the problem is with authentication, connectivity, or the repository address itself.
By tackling these potential issues one by one, you can usually get your fetch errors resolved and get back to syncing your code without much trouble.
Answering Common Questions About Fetching
As you start working git fetch into your daily routine, you'll probably run into a few questions. Getting a handle on the small differences between similar commands is what separates the pros from the novices and helps you use Git with confidence.
Git Fetch vs. Git Fetch --all
One of the first things that trips people up is the difference between git fetch and git fetch --all. It’s pretty straightforward once you see it in action.
Think of the standard git fetch as your go-to command for a single remote—which, 99% of the time, is just origin. It dials up that one repository and updates all of its tracking branches.
The --all flag, on the other hand, is for when you're juggling multiple remotes. It contacts every single remote repository you’ve configured. This is super useful if you're collaborating on an open-source project and have both an origin (your fork) and an upstream (the main project) remote. If you only ever work with origin, the two commands do the exact same thing.
Do Fetched Branches Become Local Branches?
Here’s a big misconception: many developers think fetching new branches automatically creates local, workable versions on their machine. That's not how it works, and for good reason—it’s a built-in safety measure.
When you git fetch all branches, Git only updates your remote-tracking branches. These are essentially read-only pointers to what’s on the remote, like origin/feature-xyz. Your actual local branches are left completely untouched.
To start working on that new code, you have to explicitly check it out and create a local branch yourself. You’d run something like git checkout -b feature-xyz origin/feature-xyz. This separation is crucial because it guarantees that changes from the remote never mess with your work unexpectedly.
This two-step dance—fetch, then checkout—is exactly what makes fetching so much safer than pulling. It puts you in the driver's seat, letting you decide precisely when and how new code enters your local workspace.
Can Pruning Be Automated?
Running git fetch --prune is great for cleaning up stale branches, but it's also easy to forget. For better repository hygiene, you can—and should—set it and forget it.
Just run this one-time command: git config --global fetch.prune true.
This tells Git to automatically clean up any remote-tracking branches that no longer exist on the remote every single time you fetch. It's a simple configuration change that keeps your branch list tidy and accurate without any extra thought.
At Mergify, we're obsessed with making development workflows more efficient. Our merge queue and CI optimization tools are designed to automate the tedious parts of your pull request process, saving you time and preventing broken builds. Find out how Mergify can streamline your code integration today.


