
Git Merge Branch into Another Branch Explained


Merging branches is one of the most fundamental things you'll do in Git. At its core, it's pretty simple: you switch to the branch you want to update (the "target"), and then you run the git merge <feature-branch> command. This simple action is what weaves all the separate lines of work back together into a unified history.
Think of it as the moment a feature stops being an experiment and officially becomes part of the main project.
The Core Workflow of Merging Git Branches
So, how do you actually git merge branch into another branch? Let’s walk through the standard process of bringing a feature you've been working on back into the main development line. It's a routine every developer gets very familiar with.
The first, and most critical, step is to make sure you're on the receiving branch. It's a surprisingly common mistake to accidentally run the merge from your feature branch, which can create a real mess.
Before you do anything else, switch to your target. If you're merging into your primary codebase, that's usually the main branch.
git checkout main
Now, before you merge, it's a great habit to pull down the latest remote changes. Someone on your team might have pushed an update you don't have yet. A quick git pull syncs you up and can save you from easily avoidable conflicts down the road.
Executing the Merge Command
Once you’re on the correct, updated branch, the merge itself is just one command. You tell Git to merge and specify the name of the branch you want to pull in.
Let's say your new feature lives on a branch called new-user-auth. The command is as simple as:
git merge new-user-auth
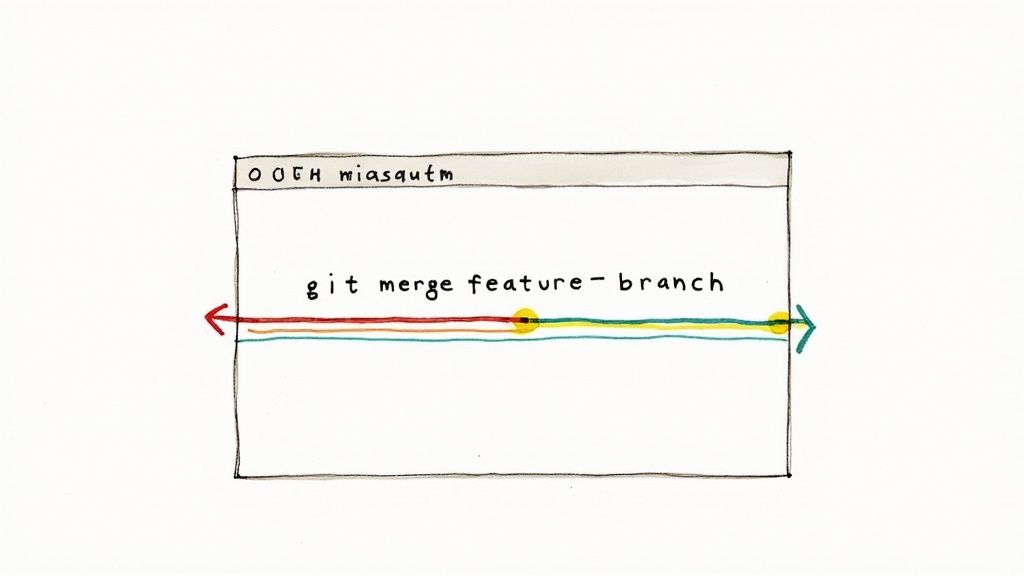
Git then takes the history from new-user-auth and integrates it into your current branch (main).
This simple, three-step workflow is something you'll do countless times.
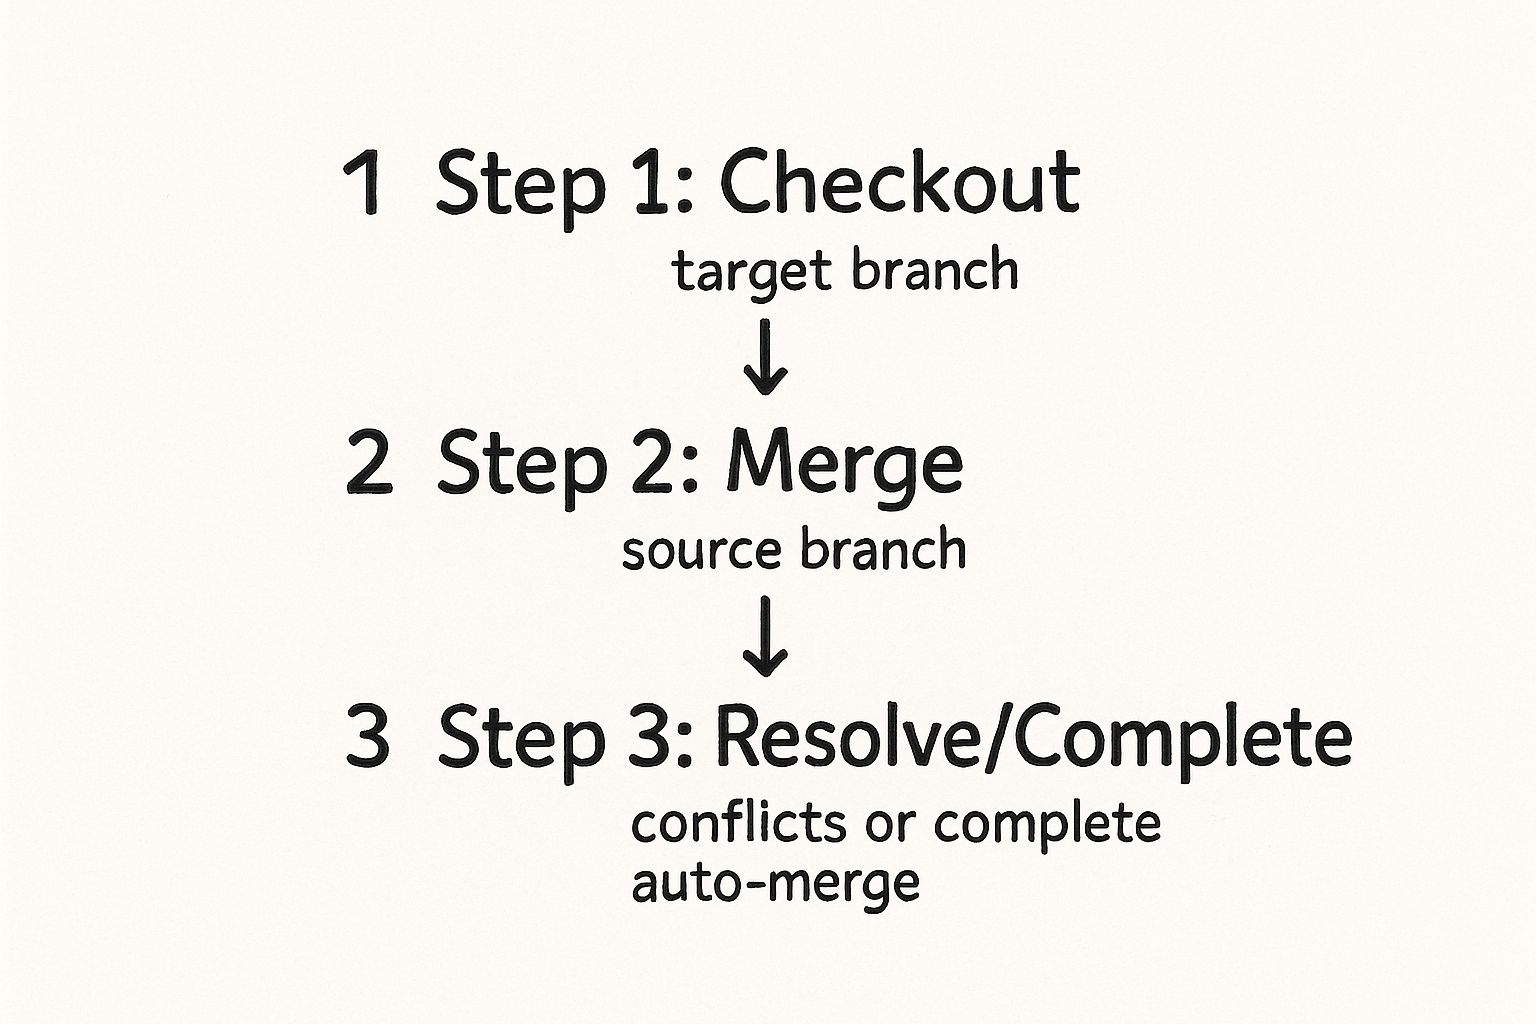
It’s a straightforward flow: prepare your local branch, run the command, and you're done—assuming everything goes smoothly, of course.
To help you keep track, here’s a quick rundown of the essential commands for a standard merge.
Core Git Merge Commands at a Glance
| Command | Purpose | Example Usage |
|---|---|---|
git checkout <branch> |
Switches your active working directory to the specified branch. | git checkout main |
git pull |
Fetches changes from the remote repository and merges them into your current local branch. | git pull origin main |
git merge <branch> |
Integrates the specified branch’s history into your current branch. | git merge new-user-auth |
This table covers the bread-and-butter commands you'll use for nearly every merge you perform.
Understanding the Fast-Forward Merge
Sometimes, when you merge, you might see a "fast-forward" message. This isn't a special command you run; it’s an optimization Git does automatically under the right conditions.
A fast-forward merge happens when the tip of your main branch is a direct ancestor of your feature branch—meaning no new commits have been added to main since you created your feature branch. Instead of creating a new "merge commit," Git just moves the main branch pointer forward to the latest commit on your feature branch.
The result is a perfectly clean, linear history. It's the ideal scenario. If you're interested in diving deeper into the history of Git's merging strategies, W3Schools has a great primer.
How to Navigate and Resolve Merge Conflicts
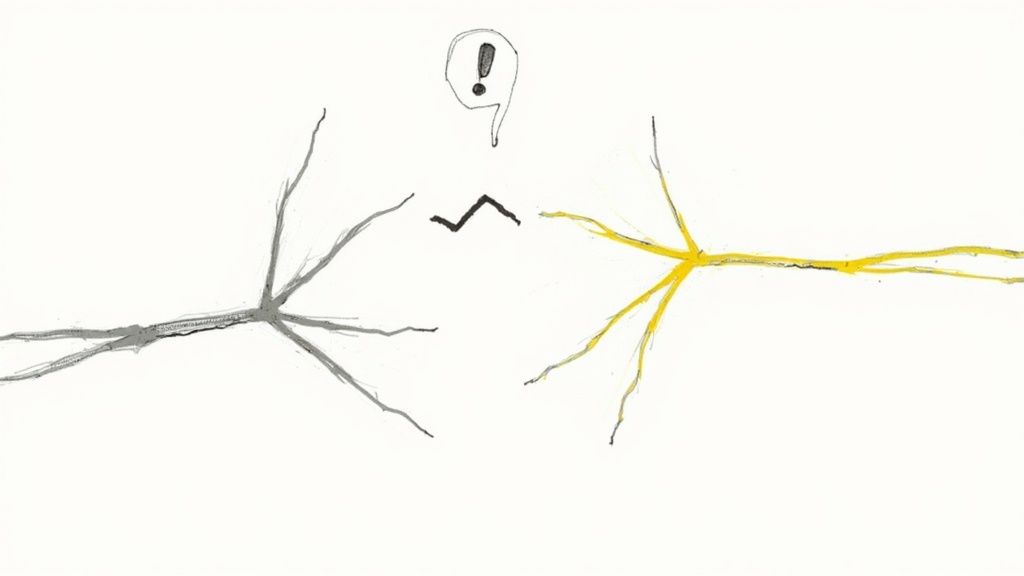
Sooner or later, you'll try to merge a branch and Git will pump the brakes, announcing a conflict. This isn't a bug or an error; it's a completely normal part of working on a team. A conflict is just Git's way of saying, "Hey, you and someone else edited the exact same lines in a file, and I need a human to make the final call."
When this happens, Git actually goes into the conflicted files and adds special markers to show you exactly where the competing changes are. Your job is to pop open those files, look at the differences, and decide how to combine them.
Identifying and Understanding Conflict Markers
First things first, you need to see which files are causing the problem. A quick git status will give you a clear list under a heading called "Unmerged paths".
Open up one of those files, and you'll find a block of text that looks something like this:
<<<<<<< HEAD
// Code from your current (target) branch
// Code from the incoming (feature) branch
feature-branch-name
These markers fence off the area of disagreement. The code between <<<<<<< HEAD and ======= is what's in your current branch. The code between ======= and >>>>>>> feature-branch-name is what you're trying to merge in.
Here’s a great example of what this looks like inside a code editor.
The highlighted sections are Git’s way of showing you the two different versions it couldn't figure out how to reconcile on its own.
Your mission is to manually edit this block. You'll need to delete all the conflict markers (<<<<<<<, =======, >>>>>>>) and leave behind only the code you want to keep. Sometimes you'll pick one version, sometimes the other, and often you'll craft a new version that combines the best of both.
Finalizing the Merge
Once you've edited all the conflicted files and you're happy with the outcome, you need to let Git know you've resolved everything. You do this by staging the files you just fixed.
git add conflicted-file-1.jsgit add another-conflicted-file.html
After you've staged all the files, you seal the deal with a git commit. Git usually pre-populates a commit message for you, like "Merge branch 'feature-branch-name'," which is often all you need. This single commit wraps up the process to git merge branch into another branch, and just like that, the changes are successfully integrated.
Because Git relies on you to handle these situations, it's a good practice to merge changes frequently. This helps keep conflicts small and manageable. For a look at more advanced techniques, the official Git documentation website is an excellent resource.
For a deeper dive into different resolution techniques, check out our guide on how to resolve a merge conflict in Git.
Choosing Your Merge Strategy: Merge vs. Rebase
Knowing how to merge one branch into another is a core Git skill, but understanding which strategy to use is what really separates a clean project from a chaotic one. When it’s time to bring your feature branch back into the fold, you’ve got two main options: a standard merge or a rebase.
They both get the job done, but they tell very different stories about your project's history.
A standard git merge creates a brand-new "merge commit" that ties the histories of the two branches together. This is the most straightforward approach. It preserves the exact chronological context of your work, showing precisely when a feature branch diverged and was later integrated. Think of it as the complete, unabridged story of your development process.
On the other hand, git rebase works by taking the commits from your feature branch and replaying them, one by one, on top of the latest commit from your target branch. This rewrites history to create a perfectly linear, clean-looking log, as if all the work happened in a single, straight line.
Making the Right Choice
So, which one should you choose? Honestly, it often boils down to team preference and project policy. There’s no single right answer, just trade-offs.
Most teams lean towards merging. Developer surveys show that roughly 65% of professional developers prefer merge in collaborative settings because it maintains a true historical record. That fidelity is invaluable for code reviews and figuring out why changes were made months later. The other 30-35% often favor rebase for its clean, easy-to-read commit history. It can make navigating the project’s evolution much simpler.
To help you decide which is a better fit for your workflow, here’s a quick comparison.
Comparison of Merge vs Rebase Strategies
This table breaks down the key differences to help you choose the right branch integration strategy for any given situation.
| Attribute | Git Merge (with merge commit) | Git Rebase |
|---|---|---|
| Commit History | Non-linear, graph-like. Preserves the exact history of branches. | Linear and clean. Rewrites history to appear as a single timeline. |
| Traceability | Excellent. Easy to see where feature branches started and were merged. | Difficult. The original branch-off point is lost after the rebase. |
| Collaboration | Safe for shared/public branches. It's a non-destructive operation. | Risky on shared branches. Rewriting public history can create chaos. |
| Complexity | Simple and straightforward to use and understand. | More complex. Can lead to tricky conflict resolution if used improperly. |
| Use Case | Integrating a feature branch into a shared branch like main or develop. |
Keeping a local feature branch up-to-date with changes from main. |
Ultimately, the best approach often isn't choosing one over the other, but using both where they make the most sense.
Pro Tip: A common and safe best practice is to rebase your local feature branches to keep them up-to-date with the main branch, but always merge them into shared branches likemainordevelop. Never rebase a branch that others are working on, as rewriting shared history can cause serious problems for your teammates.
This hybrid approach gives you the best of both worlds: a clean, linear history for your own feature development and a preserved, non-destructive history for the main codebase.
For a deeper technical dive, check out our in-depth article on the distinction between Git merge vs rebase.
Proven Practices for a Smooth Merge Workflow
Knowing the right commands is only half the battle when you git merge branch into another branch. The real art is building a workflow that makes merging a frequent, low-risk, and almost boring part of your daily routine. Adopting a few key habits can turn merges from a source of stress into a seamless process.
One of the most powerful practices I've seen is keeping branches small and short-lived. A branch should represent a single, focused piece of work—one feature, one bug fix. When a branch sprawls into weeks of changes, the eventual merge becomes a high-stakes event, often tangled in complex conflicts that are a nightmare to unravel.
This approach ensures that bringing your changes back into the main line is just another small, incremental step, not a monumental task.
Proactive Conflict Resolution
Here's a game-changing habit: resolve potential conflicts on your own terms before you even try the final merge. Don't wait for the main branch to tell you there’s a problem. Be proactive.
Before you’re ready to merge your feature branch into main, do the opposite—update your feature branch with the latest changes from main.
- Switch to your feature branch:
git checkout my-feature-branch - Pull the latest from main:
git pull origin main
This simple sequence pulls the newest commits from your target branch into your working branch. If any conflicts exist, they'll pop up right there, in your own isolated environment. Now you can fix them at your own pace without blocking the main codebase or anyone else.
By handling conflicts on your feature branch first, you ensure that the final merge into main will be a clean, fast-forward merge whenever possible. This simple reversal of the flow puts you in complete control.
Communication Is Key
Finally, never underestimate the power of simply talking to your team. A quick message like, "Hey, I’m about to refactor the authentication module, so it might touch a few core files," can prevent hours of merge hell later.
When your team knows what major changes are happening in parallel, everyone can plan their work around it.
By combining small, focused branches with proactive updates and clear team communication, you'll create a workflow where merges are no longer a dreaded bottleneck. They become a smooth, predictable part of collaborative development.
How to Undo a Merge When Things Go Wrong
Even the most careful developers merge something they wish they hadn't. Maybe a feature introduced a nasty bug, or you simply realized the changes weren't quite ready for primetime. It happens.
Knowing how to safely back out of a merge is just as critical as knowing how to git merge branch into another branch in the first place. Think of it as your safety net.
The right way to undo a merge hinges on one simple question: have you pushed it to a shared repository? The answer completely changes the safest path forward. If the merge only exists on your local machine, you have a lot more freedom. But once it's out in the wild, you need to be careful not to mess up the history for everyone else.
Using Git Revert for Shared Branches
When a bad merge has already been pushed, git revert is your best friend. It’s the safest way to undo changes on a shared branch like main or develop.
Instead of deleting history, git revert creates a brand-new commit that does the exact opposite of the merge commit. This preserves the project's history, which is crucial for team collaboration. Everyone can see what happened and why.
To do this, you'll first need the commit hash of the merge you want to undo.
- Find the hash with a quick
git log. - Then, run this command:
git revert -m 1 <merge-commit-hash>
The -m 1 flag is important—it tells Git which parent to keep. In most cases, you'll want to keep the history from your main branch, which is what 1 represents. This new "revert" commit can be pushed like any other change, safely backing out the problematic code.
Using Git Reset for Local Changes
If you've merged a branch locally but haven't pushed the changes yet, you can reach for git reset. This is a much more powerful—and destructive—command. It actually rewrites history, which is why you should never use it on shared branches.
git reset essentially turns back time. It moves your branch pointer to a previous commit, making it as if the merge never even happened. This is great for cleaning up your local history before you share it.The most common command is git reset --hard HEAD~1. This moves your current branch back one commit, completely wiping out the local merge. Because this erases history, only use it on commits that nobody else has pulled down.
For a deeper dive into both methods, you can learn more about undoing a merge in Git and see more examples of when to use each approach.
FAQs About Merging Branches
When you're getting the hang of git merge, a few questions almost always come up. Getting clear on these early will make your daily workflow a whole lot smoother.
What Happens to My Feature Branch After a Merge?
After a successful merge, your feature branch doesn't just vanish. It hangs around in the repository, completely untouched, unless you decide to delete it.
Most teams I've worked with make it a habit to delete merged branches. It's good housekeeping and keeps the repository from getting cluttered with old, integrated branches.
You can safely clean up a local branch once it's merged with this command:git branch -d feature-branch-name
The cool thing about the -d flag is that Git will only let you delete the branch if its changes are fully integrated. It's a nice little safety net against accidentally deleting work that hasn't been merged yet.
Can I Merge a Branch That Has Uncommitted Changes?
Nope. Git will stop you right in your tracks. It requires a clean working directory before you can start a merge. If you have any uncommitted changes on your target branch, Git halts the process to make sure your work doesn't get overwritten.
Before you can merge, you'll need to either commit those changes or stash them away temporarily using git stash.
It all comes down to safety. Git is designed to prevent you from losing local work during a merge. By enforcing a clean state, it ensures that your uncommitted changes are protected before it starts combining branch histories.
How Is a Merge Different From a Pull Request?
This one trips people up all the time. A git merge is a command you run locally on your machine. It's the core Git operation that integrates changes from one branch into another.
A Pull Request (or PR), on the other hand, is a feature of collaborative platforms like GitHub or GitLab. It’s essentially a formal request to perform a git merge.
Think of a PR as a wrapper around the merge process. It’s where your team can conduct code reviews, discuss the changes, and run automated checks before the merge actually happens. In a team setting, the PR manages the merge, turning it into a collaborative event.


