
A Developer's Guide to Git Merge Requests


A Git merge request is how you formally propose to add your code changes to a project. Think of it as a structured request to integrate new code from your working branch (a "feature branch") into one of the main project branches, like main or develop.
This process is truly the cornerstone of modern, team-based software development.
The Role of Merge Requests in Modern Development
Imagine the chaos if every developer on a team could push their code directly into the main branch whenever they wanted. It would be a recipe for disaster. A Git merge request acts as a crucial checkpoint, turning a simple code contribution into a transparent, collaborative, and organized event.
It’s not just about pushing code. It's about ensuring quality and keeping the project's history clean and understandable.
Picture an author submitting a new chapter to an editor. The editor doesn't just slot it into the book. They review it, check for errors, and suggest improvements. A merge request serves the exact same purpose for code. It creates a dedicated space for discussion, automated checks, and formal approval before anything becomes a permanent part of the codebase.
A Hub for Collaboration and Quality Control
The real magic of a merge request is how it centralizes so many different activities into a single, cohesive workflow. It’s a complete record of a proposed change, containing everything a reviewer needs to make an informed decision.
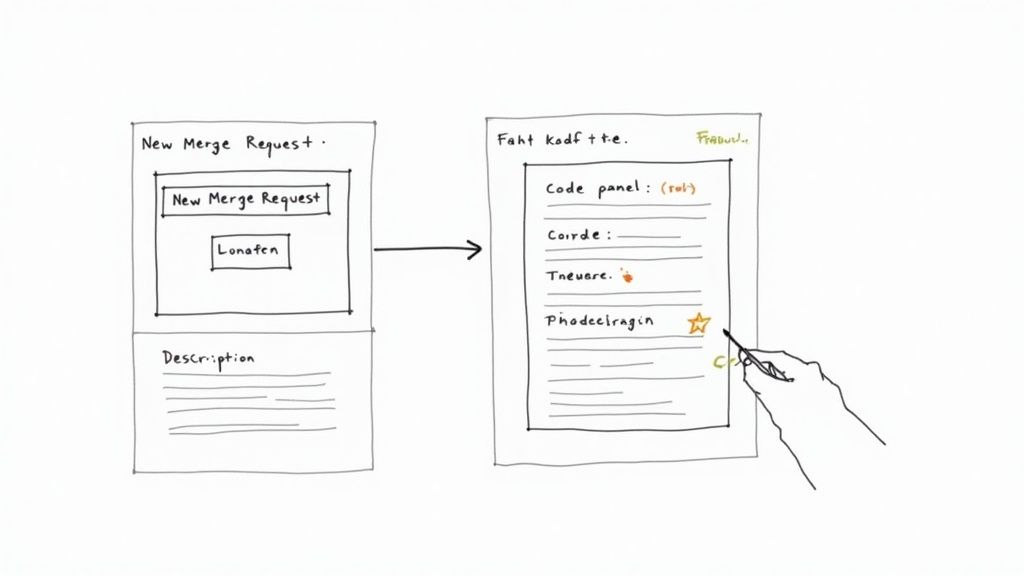
Here’s a look at a typical merge request interface in GitLab:
This single view neatly organizes the title, description, individual commits, CI/CD pipeline status, and the discussion thread where the team collaborates.
This structured process unlocks several key benefits:
- Code Review: Teammates can examine changes line-by-line, leaving comments and suggesting improvements right where the code lives. This peer review is vital for catching bugs early and spreading knowledge across the team.
- Automated Checks: The moment a merge request is opened, it can trigger CI/CD pipelines to automatically run tests, security scans, and code style checks. This gives everyone immediate, unbiased feedback on the code's health.
- Discussion and Context: The description and comments section provide the "why" behind the code, often linking back to issue trackers or project management tickets to give the full story.
A well-managed merge request workflow prevents broken code from ever reaching the main branch. It establishes a powerful quality gate that enforces standards automatically, safeguarding the stability of the entire application.
This table breaks down the core elements you'll find in almost any merge request.
Core Components of a Git Merge Request
| Component | Purpose |
|---|---|
| Title & Description | Summarizes the "what" and "why" of the change, providing context for reviewers. |
| Source & Target Branch | Defines which branch the changes are coming from and where they are going. |
| Commits | Lists all the individual commits included in the proposed change. |
| CI/CD Pipeline Status | Shows the results of automated tests, builds, and other quality checks. |
| Reviewers & Assignees | Designates who is responsible for reviewing and ultimately merging the code. |
| Comments & Discussion | A thread for line-by-line feedback, questions, and collaborative problem-solving. |
Mastering these components is non-negotiable for any developer who wants to contribute effectively to a team.
This systematic approach is especially essential for distributed teams. Platforms like GitLab provide detailed analytics, allowing managers to track metrics like the number of merge requests opened and the average time to merge, offering valuable insights into team productivity.
For more complex workflows, tools can automate this process even further. Understanding what is a merge queue can show you how high-performing teams eliminate integration bottlenecks and keep development moving fast.
Merge Request vs. Pull Request: Unpacking the Jargon
It’s one of the most common points of confusion when you’re navigating the Git ecosystem. Is it a merge request or a pull request?
The simple answer is: they're the same thing. The difference is just branding.
Think of it like soda versus pop. Depending on where you are in the world, you might use a different word, but everyone knows you're talking about a fizzy drink. The core function—proposing, reviewing, and integrating code changes into a branch—is identical, no matter what it's called.
Once you know how to handle one, you know how to handle them all.
Different Platforms, Different Names
So, why the two names? It all comes down to the big Git hosting platforms and the terminology they chose when they first built their collaboration tools.
Here’s a quick rundown of who uses what:
- GitLab calls it a Merge Request (MR). Their name focuses on the end goal: to merge your new code into a target branch.
- GitHub and Bitbucket use the term Pull Request (PR). This name describes the action from the repository maintainer's point of view—they are being asked to pull your proposed changes into their codebase.
This table makes the platform-specific language crystal clear:
Platform Terminology: Merge Request vs. Pull Request
| Feature/Concept | GitLab | GitHub | Bitbucket |
|---|---|---|---|
| Code Change Proposal | Merge Request (MR) | Pull Request (PR) | Pull Request (PR) |
| Primary Goal | Merging a feature branch | Requesting a code pull | Requesting a code pull |
| Common Acronym | MR | PR | PR |
Ultimately, whether you're opening an MR or a PR, you're kicking off the same critical workflow.
No matter the label, the core purpose remains the same: to create a formal, trackable process for code review and integration. Don't let the jargon get in your way. The skills you build crafting a great Git merge request are directly transferable to pull requests, and vice versa.
A developer who masters merge requests on GitLab can jump over to GitHub and feel right at home with its pull request system. For a deeper dive into the history behind these terms, check out our guide on pull request vs. merge request terminology.
This lets you work confidently across any Git platform, focusing on what truly matters—shipping high-quality, well-reviewed code.
The Complete Merge Request Workflow Step by Step
To really get the hang of collaboration in Git, you need to understand the lifecycle of a merge request. The whole dance, from a spark of an idea to getting that code safely into the main project, can be broken down into a few clear phases.
Let's walk through the playbook, stage by stage, so you know exactly what’s happening.
It all starts on your local machine, not in some fancy web UI. The very first move is always to create a new branch for your changes. This is non-negotiable; it walls off your work from the main codebase, preventing any messy accidents or instability while you're in the middle of things.
First, get up to date with the main branch
git checkout main
git pull origin main
Now, create and switch to your new branch
git checkout -b feature/new-user-authentication
With your new branch ready to go, you can start coding. As you make progress, get into the habit of creating small, logical commits with crystal-clear messages. Think of each commit as a single, self-contained change—it makes life so much easier for your teammates when they have to review your work.
From Local Commits to an Open Request
Once you’ve polished off your feature and pushed the branch up to the remote repository, it's time to make your proposal official by creating a merge request. Over in your Git hosting platform (like GitLab or GitHub), you'll kick off a new merge request, setting your feature branch as the source and main (or maybe develop) as the target.
Picking the right reviewers is huge. You want to tag teammates who know the part of the code you’re touching or who can offer a solid second opinion. And please, don't skimp on the title and description. They're your chance to explain the "what" and the "why" behind your changes right from the start.
At its heart, the process is a collaborative loop, just like this flow shows.

This visual nails the back-and-forth of assigning, reviewing, and approving—the core activities that keep your code quality high.
During the review, your teammates will drop comments and suggest improvements. You'll then respond to that feedback by pushing new commits to your branch, which automatically updates the merge request for everyone to see.
Finalizing and Merging the Code
Once all the discussions are wrapped up, your CI pipeline is green, and the reviewers have given their thumbs-up, you're ready to merge. You typically have a couple of ways to do this:
- Merge Commit: This approach keeps a full, detailed history by preserving every single commit from your feature branch and adding one new merge commit. It’s thorough, but it can make the main branch’s history a bit noisy.
- Squash and Merge: This is the tidy option. It bundles all your feature branch's commits into a single, clean commit on the main branch. The result is a much neater and easier-to-read history.
If your team is passionate about maintaining a perfectly straight, linear history, rebasing is another tool in the arsenal. We dive deep into the pros and cons in our guide comparing Git merge vs. rebase strategies.
After the merge, there’s just one last bit of housekeeping: delete your feature branch. It keeps the repository clean and signals that the work is officially done.
Creating Merge Requests That Get Approved Faster
A great Git merge request isn't just a code dump—it's a conversation starter. It's also one of the most powerful tools you have for respecting your teammates' time. The faster a reviewer can grasp what your changes do and why you made them, the faster your work gets approved and into the main branch.
Think of it this way: the goal is to eliminate friction. Every time a reviewer has to stop and ask, "What does this do?" or "Why did you change this?" it introduces a delay. A well-crafted merge request anticipates these questions and answers them upfront, turning the review from a frustrating interrogation into a smooth, efficient collaboration.
Write a Title That Tells a Story
Your merge request title is the first impression. It’s what everyone sees in their notification feed, so it needs to be descriptive and instantly make sense. Vague titles like "Bug fix" or "Updates" are next to useless; they force the reviewer to start digging through code just to figure out what’s going on.
Instead, get into the habit of using a clear, consistent format. A fantastic approach is to lead with the type of change, reference the ticket number, and then give a quick summary.
- Bad Title:
Fixing button - Good Title:
Feat(TICKET-123): Add primary CTA button to user dashboard
See the difference? The second title tells you it's a new feature, links it directly to TICKET-123, and explains precisely what it does. Your reviewer gets all that context before even opening a single file.
Craft a Description That Explains the Why
The description is where you lay out the crucial context behind your work. This is your chance to explain not just what you changed, but why you changed it. A solid description acts as a mini-guide, walking reviewers through your thought process and the problem you set out to solve.
Your merge request description should be a love letter to your future self and your teammates. When someone looks at this change six months from now, the description should give them all the context they need to understand its purpose.
To make your descriptions truly effective, make sure you include these key pieces:
- Problem Statement: Briefly explain the issue or feature request that started it all.
- Solution Overview: Describe your approach. Why did you choose this specific solution over others? What are the key changes?
- Visual Aids: For any UI changes, always include screenshots or GIFs. A picture is truly worth a thousand lines of CSS code.
- Testing Instructions: Spell out how a reviewer can test your changes locally to confirm everything works as expected.
This level of detail is non-negotiable for maintaining quality and speed. With over 100 million developers pushing code to more than 420 million repositories on platforms like GitHub, clear communication isn't just a nice-to-have; it's what keeps the entire system from grinding to a halt. You can dig into more of these massive numbers by checking out these in-depth GitHub statistics.
Automating and Safeguarding Your Merge Workflow
Let's be real: manually reviewing every single line of code and running local tests for each change is a drag. More than that, it's completely unsustainable for any team that wants to move quickly. A modern Git merge request workflow leaves those manual checks in the dust by embracing automation, turning your process into a powerful, self-defending quality gate.
This is exactly where Continuous Integration and Continuous Delivery (CI/CD) pipelines come into the picture. Instead of waiting for a human to clone a branch and run tests, you can set up your repository to do it automatically the second a merge request is opened. Think of it as an immediate, unbiased first line of defense against regressions and simple mistakes.
Building an Automated Quality Gate
By plugging a CI/CD pipeline into your merge requests, you create an essential safety net. Every proposed change gets put through a rigorous, automated vetting process before a human reviewer even needs to lay eyes on it.
This automated workflow usually hits a few key stages:
- Automated Testing: It runs your entire test suite—unit, integration, and end-to-end tests—to make sure the new code doesn’t break anything that already works.
- Linting and Code Style Checks: This automatically enforces consistent coding standards across the whole team, catching formatting quirks or potential errors on the fly.
- Security Scans: It scans for common vulnerabilities, exposed secrets, or dependencies with known security flaws, stopping insecure code in its tracks.
This kind of setup gives your team instant feedback and catches problems early. It saves countless hours that would otherwise be torched on manual verification and rework.
Enforcing Standards with Branch Protections
Automation is only half the story; enforcement is the other critical piece. Most Git platforms, like GitLab, let you set up branch protection rules for your most important branches, like main or develop. These rules are non-negotiable conditions that absolutely must be met before a merge request can be completed.
Branch protections act as the unblinking guardians of your codebase. They ensure that no single person can bypass established quality standards, making your merge process consistent, secure, and reliable.
Some of the most common protection rules include:
- Requiring CI Checks to Pass: This is the big one. It physically blocks the merge button until all automated tests and checks come back green.
- Mandating Reviewer Approvals: You can require one, two, or even more approvals from specific team members before a merge is even possible.
- Preventing Force Pushes: This disables the ability to rewrite the history of the protected branch, which is crucial for preserving a clean and auditable log of changes.
When you combine smart automation with strict protections, you free up your developers to focus on what they do best: building great features. They can work confidently, knowing the system will catch errors and enforce the team's quality standards. You can discover more about how AI is shaping merge request processes and the industry's move toward these powerful, centralized workflows.
Even with the best intentions, every development team eventually hits a few snags with their Git merge requests. These common hurdles can kill momentum and cause a lot of frustration, but getting to know them is the first step toward building a smoother, more resilient process.
The most common offender? The massive merge request. This is what happens when a single request tries to tackle way too much at once—a huge new feature, a refactor of three different systems, and a handful of unrelated bug fixes all rolled into one. For reviewers, it’s a total nightmare. The sheer volume of changes makes a thorough review feel impossible, which is exactly how bugs slip through the cracks. The solution is simple in theory but takes real discipline: break down big tasks into smaller, self-contained chunks.
An ideal merge request does one thing and does it well. If you can’t describe its purpose in a single, clear sentence, it’s probably too big. This approach not only speeds up reviews but makes your deployments a whole lot safer.
Resolving Merge Conflicts
Sooner or later, you'll run into the dreaded merge conflict. This happens when two developers edit the same lines in the same file, and Git throws up its hands, unable to decide which version to keep. It's not an error; it's just Git's way of saying, "I need a human to sort this out."
Fixing them is just part of the job. Here's the usual dance:
- Pull the Latest Changes: First, you’ll want to fetch and merge the latest version of the target branch (like
main) into your feature branch. - Identify Conflict Markers: Git will pepper the affected files with conflict markers (
<<<<<<<,=======,>>>>>>>), showing you exactly where the competing changes are. - Manually Edit the Files: Open up those files and edit them to combine the changes correctly, then get rid of the conflict markers.
- Commit the Resolution: Once you've sorted out the conflicts, just add the resolved files and commit them to seal the deal. Pushing that commit will update your merge request, and you’re back in business.
Overcoming Review Bottlenecks
Finally, there’s the review bottleneck—the silent killer of velocity. When a merge request just sits there for days waiting for feedback, it blocks new work and practically invites more merge conflicts as the main branch races ahead. To fix this, you have to build a team culture where code reviews are treated as a top priority. Use built-in features like reviewer assignments and automated reminders to give your teammates a gentle nudge.
For teams that are really moving fast, tools like Mergify can put the entire merge process on autopilot. This ensures that once a request is approved and passes all its checks, it gets integrated immediately without anyone having to lift a finger.
Even when your team has a solid workflow down, some questions about Git merge requests just keep popping up. Let's tackle a few of the most common scenarios you're bound to run into.
What Should I Do About Merge Conflicts?
Sooner or later, you'll hit a merge conflict. When that happens, you have to sort it out on your local machine. First, pull the latest changes from the branch you're trying to merge into (e.g., git pull origin main). Git will flag the files with conflicts for you.
Open up those files, and you'll see where the lines are clashing. Your job is to manually edit the code to resolve the differences, keeping the parts you need and discarding the rest. Once you save your changes, just git add and git commit to finalize the fix. Push your updated branch, and the conflict warning in your merge request will disappear.
How Small Should a Merge Request Be?
There's no magic number, but a merge request should always represent a single, logical chunk of work.
A good rule of thumb is that one of your teammates should be able to review it thoroughly in 15-30 minutes. Small, focused MRs are just plain easier to understand, less likely to hide bugs, and they get merged a whole lot faster.
For instance, if you’re building a big new feature, don't stuff it all into one giant MR. Break it down. You could create one merge request for the backend API and a separate one for the UI components that call it.
Can I Revert a Merged Request?
Absolutely. If you merge something and realize it was a mistake, you can easily revert it. Platforms like GitLab and GitHub even have a "Revert" button right on the page of the merged request.
Clicking that button doesn't delete the old code from history. Instead, it creates a new merge request that contains a commit perfectly undoing the original changes. It’s a clean and transparent way to backtrack, showing everyone both the initial change and its reversal without rewriting the project's history.
Ready to stop wrestling with merge bottlenecks and CI queues? Mergify automates your entire merge workflow, saving your team time and eliminating frustrating manual steps. Discover how Mergify can streamline your development process.


