
A Modern Guide to GitHub and Jenkins Integration

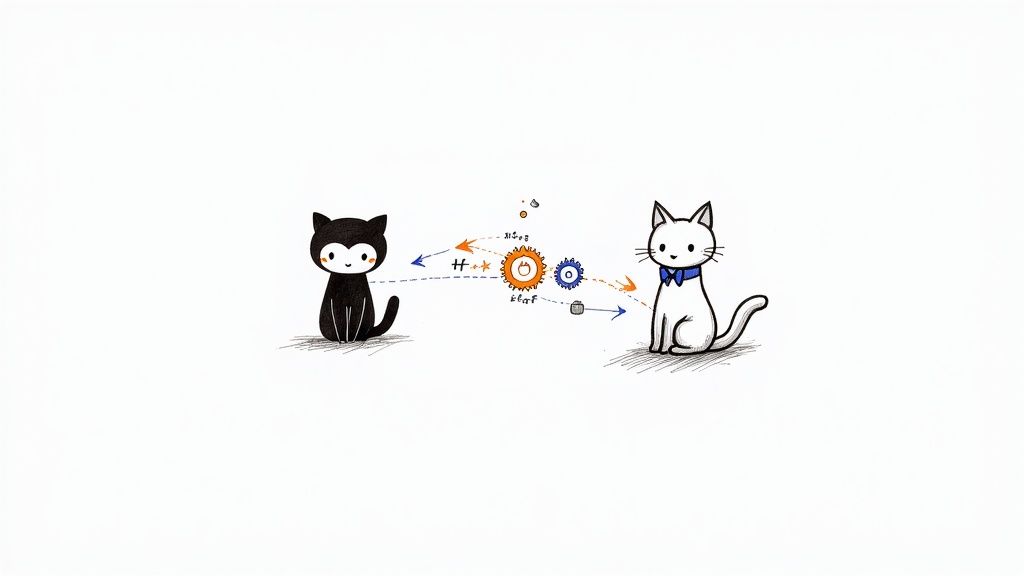
Connecting GitHub and Jenkins is pretty much a foundational move for any modern CI/CD setup. It's how you build that automated bridge between your code repository and your build server. When you integrate these two powerhouses, every single code commit can automatically kick off a build, run a battery of tests, and even deploy your application, giving developers feedback in minutes, not days.
Why Connecting GitHub and Jenkins Matters
Before we get into the nuts and bolts, let's talk about why this is such a big deal. Linking GitHub's source control with the automation engine of Jenkins isn't just about making life easier—it’s a strategic decision that fundamentally changes how quickly you can develop software. Without this connection, you’re stuck in the old world of manual handoffs and processes ripe for human error.
Think about a typical workflow without automation. A developer pushes a new feature. Now, someone has to remember to pull that code, run the tests locally, and then manually trigger a deployment. It's slow, inefficient, and a recipe for mistakes. An integrated system, on the other hand, handles all of that the second the code hits the repository.
To put it simply, connecting your version control system to your automation server is the key to unlocking true development velocity and reliability.
Let's break down what you gain from this integration.
| Core Benefits of GitHub and Jenkins Integration | |
|---|---|
| Benefit | Impact on Development Workflow |
| Automated Builds | Every commit or pull request automatically triggers a build, eliminating manual intervention and ensuring code is always in a buildable state. |
| Rapid Feedback | Developers get immediate results from tests, allowing them to fix bugs while the code is still fresh in their minds. |
| Consistent Testing | Ensures every change runs through the exact same testing process, removing the "it worked on my machine" problem. |
| Faster Release Cycles | Automation drastically cuts down the time from commit to deployment, enabling teams to ship features to users more frequently. |
| Improved Code Quality | Enforces quality gates and best practices automatically, leading to a more stable and maintainable codebase over time. |
This table just scratches the surface, but it highlights how the synergy between these two tools transforms a series of manual tasks into a smooth, automated pipeline.
The Power of Automated Feedback Loops
The real magic of a GitHub and Jenkins setup is the incredibly fast, automated feedback loop it creates. When every git push or pull request kicks off a pipeline, your team gets instant validation that their changes didn't break anything.
This automation isn't just a minor improvement; it delivers huge advantages:
- Accelerated Release Cycles: By automating the build and test stages, you chop massive amounts of time out of the development lifecycle. What used to take days of manual coordination now happens in minutes.
- Early Bug Detection: Jenkins can fire off a whole suite of tests on every single commit. This means bugs are caught almost immediately, not weeks later during a painful manual QA phase when they're exponentially more expensive to fix.
- Improved Code Quality: Continuous integration naturally encourages developers to make smaller, more frequent commits. Combine that practice with automated checks, and you end up with a much healthier and more stable codebase.
This isn't just theory; it's a proven strategy used by the highest-performing engineering teams in the world. In fact, it’s common for teams to see their development cycle times shrink by 30-50% after implementing this kind of automation. You can dig into more data on how GitHub drives innovation and development speed on their official blog.
Getting Your First GitHub and Jenkins Connection Up and Running
Alright, theory is great, but now it's time to roll up our sleeves and forge the actual link between your code and your automation server. Getting this initial connection between GitHub and Jenkins right from the start is one of those foundational steps that will save you a world of headaches later on. Let's focus on a clean, secure setup from the get-go.
First thing's first: you need to teach Jenkins how to speak GitHub's language. This is done by installing the official GitHub plugin, which is the absolute backbone of this integration. You’ll find it in the Jenkins dashboard under "Manage Jenkins" > "Plugins." This plugin is non-negotiable; without it, Jenkins has no idea how to interact with your repos, listen for changes, or report build statuses back to your pull requests.
Securing the Connection with a Personal Access Token
Once the plugin is in place, you need to establish a secure handshake between the two systems. Forget the old, clunky methods. The modern best practice is to use a Personal Access Token (PAT) from GitHub.
Think of a PAT as a specific, limited-use password. You can grant it only the permissions Jenkins needs, which is far more secure than throwing your personal account credentials into the mix.
To create one, head over to your GitHub settings, then "Developer settings," and finally "Personal access tokens." When you generate a new token for Jenkins, you’ll need to grant it these specific scopes:
repo: This gives Jenkins full control of private repositories—essential for checking out code and updating commit statuses.admin:repo_hook: This allows Jenkins to create and manage webhooks on your repository, which is critical for triggering automated builds.
After generating the token, copy it immediately. GitHub won't show it to you again for security reasons. Now, jump back over to Jenkins and store this token in the Credentials Manager. This is a huge security win because it prevents you from ever hardcoding sensitive keys directly into your job configurations. Just add a new "Secret text" credential and paste your PAT in there.
Creating Your First Jenkins Job
With your credentials securely stored, you're ready to create your first pipeline job.
When you configure the job, you'll point Jenkins to your repository's URL. Because you've already set up the plugin and the PAT, Jenkins can now securely authenticate on its own and pull your source code.
This process—installing the plugin, creating a PAT, and linking that first job—establishes a solid and secure foundation. The infographic below gives a great visual of how these core pieces fit together.
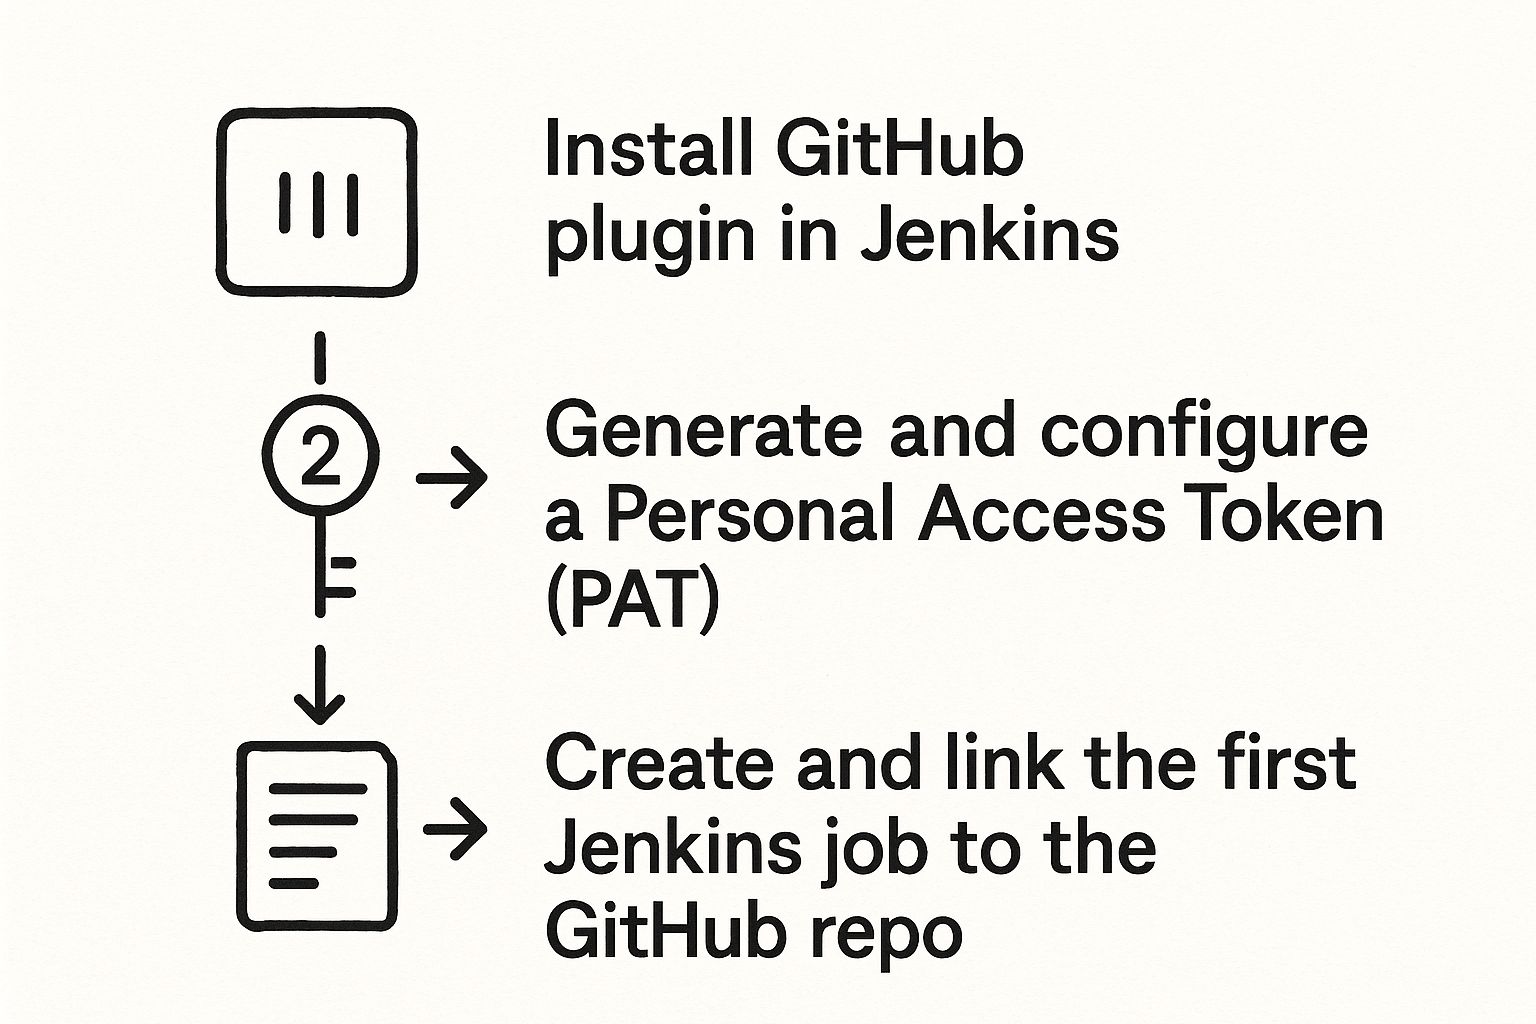
As you can see, a successful connection really comes down to these three distinct but connected actions: installation, secure authentication, and finally, job configuration.
If you're looking for a more detailed walkthrough, you can explore our complete guide to setting up Jenkins with GitHub, which dives deeper into configurations and common troubleshooting tips. This initial connection is just the beginning of your automation journey.
Automating Builds with GitHub Webhooks
Manually kicking off your Jenkins jobs is a huge drag on your workflow. If you're serious about continuous integration, you need instant, event-driven automation. This is exactly what GitHub webhooks are for. Think of a webhook as a notification system; it sends a message from GitHub to Jenkins the second something specific happens in your repository.
This push-based model is way more efficient than the old-school polling method, where Jenkins had to constantly ping your GitHub repo just to ask, "Anything new?" Polling generates a ton of useless network traffic and, worse, creates a delay between a commit and the build. Webhooks get rid of that lag, making your CI process feel immediate and responsive.
Configuring Your First Webhook
Getting a webhook up and running is surprisingly simple. Just head over to your GitHub repository’s settings and find the "Webhooks" section. From there, you'll add a new webhook and give Jenkins the details it needs to listen for events.
The most important piece of the puzzle here is the Payload URL. This is the specific address on your Jenkins server that will catch the data from the webhook. It usually looks something like http://YOUR_JENKINS_URL/github-webhook/.
Key Takeaway: Your Jenkins server has to be reachable from the public internet for this to work. If it's tucked away behind a firewall, you’ll need to set up a tunneling service or tweak your network rules to let traffic from GitHub through.
With the URL in place, you’ll need to pick the content type. For any modern Jenkins setup, application/json is the way to go. This makes sure the payload—which is packed with info about the commit, the person who pushed it, and the repo—is sent in a clean, structured format that Jenkins can easily understand.
Choosing the Right Events to Trigger Builds
A classic rookie mistake is to have your webhook listen for every single event. That's a recipe for a storm of pointless builds. You need to be more selective. For a standard CI workflow, you only want to trigger builds based on actions that mean code is ready for testing.
I'd recommend sticking to these essential events:
pushevents: This is your bread and butter. A webhook listening forpushevents fires off every time someone pushes commits to a branch. It's the best way to ensure your main development line is always being tested.pull_requestevents: This one is absolutely critical for validating changes before they get merged. Triggering a build when a pull request is opened or updated lets Jenkins run all the necessary checks and report the status right back to the PR. Your team gets immediate feedback where they need it most.
By picking your events carefully, you build a smart, efficient trigger system that only runs builds when they actually matter.
Once you hit save on the webhook, GitHub will send a little test "ping" event to your Jenkins URL. If you see a green checkmark next to your new webhook in the GitHub UI, you're golden. The connection between GitHub and Jenkins is live and ready to go.
Crafting Your First Jenkinsfile for a GitHub Project
It’s time to move beyond clicking around the Jenkins UI. A much more powerful, modern approach is waiting for you: Pipeline as Code. This is where the Jenkinsfile comes in.
A Jenkinsfile is a simple text file that defines your entire build pipeline. The beautiful part? It lives right alongside your application code in your GitHub repository.
Storing your pipeline as code is a non-negotiable best practice in modern DevOps. It makes your build process version-controlled, reviewable, and portable. Instead of recreating complex jobs by hand every time, you just check in a Jenkinsfile.
The Core Components of a Declarative Pipeline
We're going to focus on the declarative pipeline syntax. It's the recommended and more straightforward way to write a Jenkinsfile—it’s structured, easy to read, and gives you a clear framework for your CI/CD process.
Let's break down the essential building blocks you'll be using.
Every declarative Jenkinsfile starts with a pipeline block. Inside this, you'll find a few key sections that define what your pipeline does and where it runs.
agent: This tells Jenkins where to run the pipeline. The simplest option isagent any, which instructs Jenkins to grab any available agent node for the job.stages: This block is where the main body of your work lives. Think of it as a container for one or morestageblocks.stage: Eachstagerepresents a distinct phase of your pipeline, like "Build," "Test," or "Deploy." Grouping your work into stages helps visualize the workflow in the Jenkins UI.steps: This is where the real action happens. Thestepsblock inside astageholds the actual commands you want to run, like shell scripts or Jenkins-specific functions.
Once you grasp this simple hierarchy—pipeline contains stages, stages contain individual stage blocks, and stage blocks contain steps—you've unlocked the key to writing effective Jenkinsfiles.
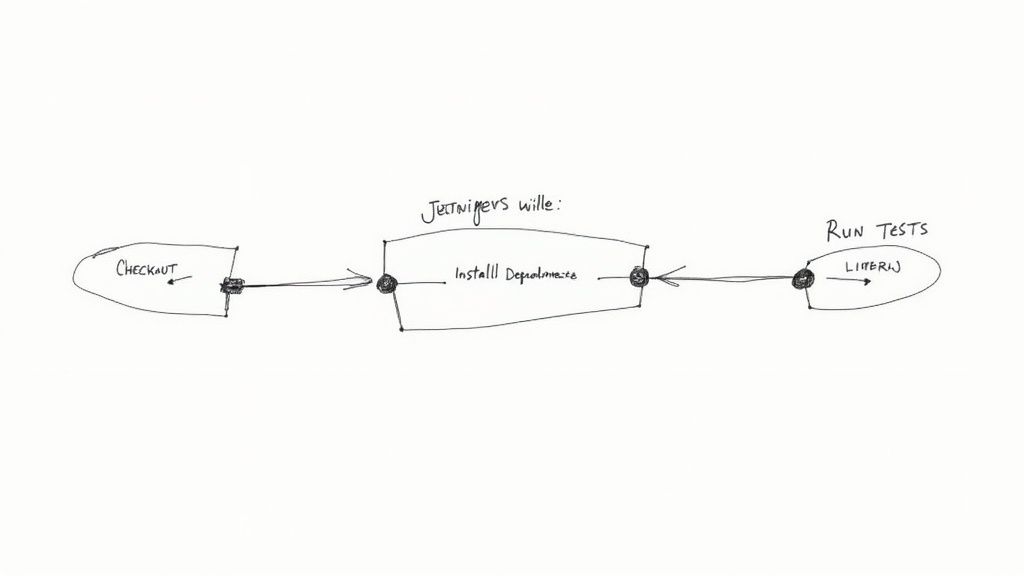
A Practical Example with a Simple Application
Let’s put this theory into practice with a Jenkinsfile for a basic Node.js application. Imagine your project has a package.json file and you’ve written some tests. Your goal is to create a pipeline that checks out the code, installs the dependencies, and runs the tests on every commit.
Here’s what that Jenkinsfile would look like:
pipeline {
agent any
stages {
    stage('Checkout Code') {
        steps {
            // This step checks out the code from your GitHub repository
            git 'https://github.com/your-username/your-repo.git'
        }
    }
    stage('Install Dependencies') {
        steps {
            // Executes a shell command to install npm packages
            sh 'npm install'
        }
    }
    stage('Run Tests') {
        steps {
            // Executes the test script defined in package.json
            sh 'npm test'
        }
    }
}
}
This simple file defines a three-stage pipeline that automates your basic CI checks. The best part? It's now a permanent part of your project's history. Anyone who clones the repository gets the exact same pipeline definition along with the source code.
This practice is standard across the vast landscape of projects on GitHub. On a platform hosting over 1 billion repositories, of which more than 420 million are public, version-controlling your CI/CD process is essential for collaboration and consistency.
Pro Tip: Keep your stages granular. Instead of one giant "Build and Test" stage, break it down. This makes it much easier to pinpoint exactly where a failure occurred, saving you valuable debugging time. For even more advanced setups, our guide on CI/CD with Jenkins and Docker can show you how to containerize these stages for ultimate portability.
Alright, once your basic pipeline is up and running, it's time to start refining the workflow. Moving from a simple setup to a professional-grade CI/CD machine means adopting practices that tighten security, shorten feedback loops, and seriously speed up your builds. These are the techniques that truly unleash the power of your GitHub and Jenkins integration.
Let's start with the most critical one: get your hardcoded secrets out of the Jenkinsfile. Storing API keys, tokens, or passwords directly in your source code is a huge security no-go. The right way to handle this is with the Jenkins Credentials Manager.
By storing sensitive data inside Jenkins, you can inject it securely into your pipelines as environment variables when a build runs. This not only protects your secrets but also makes your pipelines way more portable across different environments.
Supercharging Feedback with Build Statuses
Nothing beats immediate feedback. It’s the whole point of CI, right? You can set up your Jenkins pipeline to report the build status directly back to the GitHub pull request. This gives your development team a clear, at-a-glance view of whether their changes have passed all the checks.
This integration is invaluable for keeping your code quality high. A green checkmark is the all-clear, but a red "X" immediately tells the team something’s wrong, long before that bad code ever has a chance to get merged.
Setting this up is straightforward. You just use built-in Jenkins steps within your Jenkinsfile to update the commit status on GitHub. This creates a tight, transparent feedback loop right where your developers live—in the pull request.
Pro Tip: Don't just report pass or fail. Use the status API to send back more descriptive messages. For example, you can link directly to the Jenkins build logs or specify which stage of the pipeline failed. This saves your team critical debugging time.
Scaling with Multi-Branch Pipelines and Optimizations
As your team grows, trying to manage a separate Jenkins job for every single feature branch becomes a nightmare. This is exactly what multi-branch pipelines were built for. This awesome feature automatically discovers new branches in your GitHub repository and creates a pipeline for each one.
It’s a true set-it-and-forget-it approach that scales beautifully. When a developer pushes a new branch, Jenkins just picks it up and runs the Jenkinsfile inside it. This ensures every branch is continuously validated without anyone having to lift a finger.
So, how does this "pipeline as code" approach compare to the old-school UI method? It's a night-and-day difference.
Jenkins Pipeline Configuration Comparison
Here's a quick breakdown of why defining your pipeline in a Jenkinsfile is the modern standard, leaving the UI-based Freestyle projects in the dust.
| Feature | Freestyle Project (UI) | Pipeline as Code (Jenkinsfile) |
|---|---|---|
| Configuration | Manual configuration through the Jenkins web UI. | Defined in a text file (Jenkinsfile) stored in SCM. |
| Version Control | Not version controlled; changes are hard to track. | Fully version controlled alongside your application code. |
| Portability | Difficult to move or replicate across Jenkins instances. | Highly portable; the pipeline is part of the repository. |
| Reviewability | Changes are not part of the standard code review process. | Pipeline changes can be reviewed and approved via pull requests. |
As you can see, Pipeline as Code isn't just a preference; it's a best practice that brings your CI/CD configuration into the same reviewable, version-controlled world as your application code.
To squeeze even more performance out of your workflow, look into caching dependencies. For a Node.js project, for instance, you can cache the node_modules directory between builds so you're not downloading the same packages over and over. This simple tweak can shave minutes off your build times, especially for larger projects.
Combine that with parallel stage execution—running independent tasks like unit and integration tests at the same time—and you’ll be delivering feedback to your team faster than ever.
Common Questions About GitHub and Jenkins
When you're wrangling powerful tools like GitHub and Jenkins, you're bound to hit a few snags. It happens to everyone. Let's walk through some of the most common questions I hear, so you can get back to building a CI/CD workflow that actually works.
What if My Webhook Fails to Trigger a Build?
This is the classic "it's not working" problem. Don't worry, the fix is usually straightforward.
Your first stop should always be the webhook delivery logs in your GitHub repository settings. GitHub gives you a play-by-play of what happened, including the exact response from your Jenkins server. This log is your single best clue.
A 404 Not Found error almost always means your Payload URL is wrong—maybe a typo or an incorrect path. If you see a 500 series error, that points the finger squarely at your Jenkins server. Something on that end is unhappy.
Another huge culprit is network access. If your Jenkins instance is tucked away behind a corporate firewall, GitHub's servers simply can't reach it. You'll need to make sure your server is publicly accessible or use a tunneling service to securely poke a hole through the firewall for GitHub to talk to.
How Should I Manage Credentials for Private Repositories?
Whatever you do, never hardcode credentials or tokens directly in your Jenkinsfile. That's a security nightmare waiting to happen. The only right way to do this is with the Jenkins Credentials Manager.
Here’s the process I always follow:
- First, generate a Personal Access Token (PAT) on GitHub. Be specific about its permissions—it only needs the
reposcopes to check out code. - Next, head over to Jenkins and store this PAT as a "Secret text" credential. Give it a memorable ID.
- Finally, reference that credential's ID in your pipeline script.
This keeps your secrets out of source control where they don't belong. Jenkins will securely handle injecting them into the build environment only when they're actively needed.
A rookie mistake is giving a PAT god-mode permissions. Always stick to the principle of least privilege. Only grant the token the exact permissions Jenkins needs to do its job, and not an ounce more.
Can Jenkins Report Build Status Back to a Pull Request?
Absolutely, and you'd be crazy not to set this up. It's easily one of the most valuable features of the entire GitHub and Jenkins integration. You’re creating a super-tight feedback loop right where your developers live—inside the pull request.
To get this working, your pipeline needs to be configured to send status updates back to GitHub at different stages of the build. You can use built-in Jenkins pipeline steps to mark a commit as pending, successful, or failed.
This gives your team immediate, at-a-glance visibility. They know instantly if their changes passed the tests and are safe to merge, all without ever having to leave the GitHub UI. It completely transforms your CI process from a background task into a core part of your team's code review and quality strategy.
Stop wasting time on flaky CI and manual merges. Mergify's Merge Queue and CI Insights give you the power to batch CI runs, protect your main branch, and get deep visibility into your pipeline's health. Cut your CI costs and ship faster by visiting https://mergify.com.


