
Your Guide to Building Jenkins #CICD Pipelines

When you think of CI/CD, there's a good chance Jenkins is the first name that comes to mind. It's a powerhouse open-source automation server that essentially runs the entire software delivery lifecycle. A solid Jenkins #CICD pipeline automates everything from the moment you commit code to its final deployment, which drastically speeds up development and keeps your code quality high.
Why Jenkins Still Dominates CI/CD Automation
In a world filled with slick, new CI/CD tools, Jenkins still holds its ground as a DevOps cornerstone. Its age isn't a weakness; it's a testament to its incredible adaptability and raw power. While other platforms might offer a fancier interface out of the box, Jenkins delivers an unmatched level of flexibility that engineering teams rely on to build truly custom automation workflows.
This staying power comes from its open-source roots and a massive, active community. The real value of Jenkins is its extensibility. You're never locked into a vendor's roadmap. Instead, you can bend and shape the tool to fit your team's exact process, no matter how unique it is.
The Power of the Plugin Ecosystem
The magic behind Jenkins really comes alive with its vast library of plugins. This is what lets it integrate with practically any tool you can think of in your development process.
- Source Code Management: It plays nicely with Git, SVN, and just about anything else you're using.
- Build Tools: It supports Maven, Gradle, npm, or any custom build script you throw at it.
- Testing Frameworks: It seamlessly integrates with JUnit, Selenium, and Cypress to create automated quality gates.
- Deployment Targets: It can push your artifacts to cloud providers, container registries, or your own on-prem servers.
This massive plugin library is key—it means that as your tech stack changes over time, your Jenkins #CICD pipeline can easily evolve right along with it. A quick look at the official Jenkins homepage gives you a sense of this powerful, community-driven platform.

The screenshot gets right to the point: it’s a tool trusted by millions to build, test, and deploy great software. And while there are many options out there, a good CI/CD tools comparison often circles back to the fact that very few can match Jenkins' potential for deep customization.
Jenkins is a major player in the global CI/CD market, holding an estimated 44% market share as of 2023. With a thriving ecosystem of over 1,850 community-contributed plugins, that number is expected to climb past 47% by 2025.
This kind of market dominance doesn't happen by accident. It’s built on the trust that developers have for a battle-tested tool that consistently delivers reliable, scalable automation.
Setting Up Your Jenkins Environment for Success
A top-tier Jenkins CI/CD pipeline is only as good as its foundation. Before you even think about writing a Jenkinsfile, getting the environment right—stable, secure, and properly sized—is the single most important thing you can do. Trust me, skipping this part is a recipe for performance bottlenecks and security headaches later on.
The first big question is where Jenkins will actually live. You’ve got a few solid options, each with its own pros and cons. You could install it directly on a virtual machine, which is pretty straightforward but can get tricky to manage and scale. Running Jenkins in a Docker container is another popular choice, giving you consistency and isolation that makes it a breeze to replicate your setup. For bigger, more demanding workloads, deploying on Kubernetes offers the best scalability and resilience you can get.
Choosing Your Installation Path
If you're a small team just getting your feet wet, a simple VM or Docker container will do the job just fine. But as your team grows and you start running more jobs at once, you’ll quickly outgrow that setup. For many, a direct installation on a Linux server is the perfect starting point.
Let's walk through a typical setup on an Ubuntu system. Jenkins is a Java application, so the first thing you need is a compatible Java Development Kit (JDK). Jenkins currently plays best with JDK 17 or JDK 21.
You can get it installed in a couple of commands using the system's package manager:
sudo apt update
sudo apt install openjdk-17-jre
With Java ready to go, the next step is to add the Jenkins repository and install the application itself:
curl -fsSL https://pkg.jenkins.io/debian-stable/jenkins.io-2023.key | sudo tee \
/usr/share/keyrings/jenkins-keyring.asc > /dev/null
echo deb [signed-by=/usr/share/keyrings/jenkins-keyring.asc] \
https://pkg.jenkins.io/debian-stable binary/ | sudo tee \
/etc/apt/sources.list.d/jenkins.list > /dev/null
sudo apt-get update
sudo apt-get install jenkins
Initial Security and Plugin Configuration
Once Jenkins is installed, your immediate focus has to be security. To make sure your installation is locked down and can securely talk to other services, it's a good idea to brush up on concepts like understanding Certificate Authorities.
Your initial setup is the most critical security gate. The first time you open Jenkins in your browser, it will ask for an initial admin password to unlock it. You'll then create your own admin user. Never skip this step or continue using the default admin account.
After you’ve secured your admin access, Jenkins will prompt you to install plugins. The "Install suggested plugins" option is an excellent choice for getting started. It bundles all the essentials for a modern CI/CD workflow:
- Pipeline: This is the core plugin for defining your entire pipeline as code. It's a must-have.
- Git: You can't do much without this. It’s essential for integrating with source control like GitHub or GitLab.
- Credentials: This allows you to securely manage all your secrets, from API keys to passwords, without hardcoding them.
With these basics in place, your Jenkins environment is now a secure and functional launchpad. You're all set to start building your first automated pipeline.
Building Your First Declarative Jenkinsfile

With a stable Jenkins environment up and running, it's time to get our hands dirty. We're going to build our first real pipeline using the modern Declarative syntax. I almost always recommend this approach because its clear, straightforward structure makes it far easier to read and maintain than the older Scripted syntax.
We'll start with the basics, just to make sure everything is connected and working correctly. The initial goal is simple: create a functional Jenkins #CICD workflow that pulls code, builds it, and runs some tests. This is the heart of any automation process, and actually building it is the best way to see how Jenkins pipelines really work.
Starting with a Simple Hello World
Before we build out a multi-stage workflow, let's start with a tiny Jenkinsfile to verify our setup. This is like a "ping" to Jenkins—it confirms that Jenkins can find our pipeline definition and execute a basic command.
In the root of your Git repository, create a new file named Jenkinsfile and pop this code inside:
pipeline {
agent any
stages {
    stage('Hello') {
        steps {
            echo 'Hello World! The pipeline is running.'
        }
    }
}
}
This snippet just defines a pipeline that can run on any available agent. It has a single stage called 'Hello' that prints a confirmation message to the console log. It's a small but absolutely crucial first step.
A declarative Jenkinsfile provides a structured, predictable framework for your automation. By defining the "what" rather than the "how," you create pipelines that are easier for the entire team to understand, review, and extend.To make things even clearer, let’s quickly break down the key building blocks you’ll be using in a Declarative Pipeline.
Key Jenkinsfile Declarative Directives
| Directive | Purpose | Example Usage |
|---|---|---|
pipeline |
The root block that encloses the entire pipeline definition. | pipeline { ... } |
agent |
Specifies where the entire pipeline, or a specific stage, will execute. | agent any or agent { docker 'node:16-alpine' } |
stages |
A wrapper for one or more stage directives. |
stages { ... } |
stage |
Defines a distinct part of your workflow, like 'Build' or 'Test'. | stage('Build') { ... } |
steps |
Contains a sequence of one or more steps to be executed in a stage. |
steps { sh 'npm install' } |
This table is a good quick-reference for the essential pieces. You’ll see them in almost every Jenkinsfile you encounter.
Adding Build and Test Stages
Okay, our "Hello World" worked. Now we can build something a bit more realistic. A typical workflow involves checking out code, building the application, and running automated tests. Let's expand our Jenkinsfile to include these logical stages.
We'll add a 'Build' stage to simulate installing dependencies and a 'Test' stage to kick off a test script. This structure starts to mirror a real-world software delivery process.
Here’s the breakdown of what we're aiming for:
- Checkout: Pulls the latest code from your version control system.
- Build: Executes commands like
npm installormvn package. - Test: Runs your test suite using a command like
npm test.
This modular approach is one of the most powerful features of Jenkins Pipeline. It breaks a complex process into manageable, observable steps, making it much easier to troubleshoot when something inevitably goes wrong. If you want to dive deeper into pipeline structures, our guide on using Jenkins to optimize your CI/CD pipeline is a great next step.
This practice isn't just a niche technique; it's become the standard. Between June 2021 and June 2023, Jenkins Pipeline usage soared by 79%, jumping from around 27.1 million jobs a month to nearly 48.6 million. These Jenkins project growth findings show just how heavily organizations now rely on pipeline-as-code to drive their automation.
This expanded Jenkinsfile shows a more complete flow:
pipeline {
agent any
stages {
    stage('Build') {
        steps {
            echo 'Building the application...'
            // For a Node.js project, you would use:
            // sh 'npm install'
        }
    }
    stage('Test') {
        steps {
            echo 'Running tests...'
            // For a Node.js project, you might run:
            // sh 'npm test'
        }
    }
}
}
This structure is the backbone of your automation. From here, you can add more stages for deployment, security scanning, or any other step your process needs, building out a robust and reliable Jenkins #CICD workflow.
Ending Merge Conflicts with a Merge Queue
So, you’ve got your Jenkins #CICD pipeline humming along nicely. But as the team grows, a new problem always seems to crop up. More developers mean more pull requests (PRs), and before you know it, you're knee-deep in "merge hell." Your main branch is constantly out of date, merge conflicts are a daily headache, and CI builds keep failing for seemingly no reason.
This chaos is a classic race condition. Two developers can pull the latest main, pass all their tests in isolation, and create their PRs. But if their changes overlap, whoever merges second is now working with stale code. That's when the build breaks, and everyone's day gets a little bit worse.
How a Merge Queue Protects Your Main Branch
The answer isn't to slow down development; it's to stop merging PRs directly into your main branch. Instead, you need a merge queue to act as an automated gatekeeper. Developers don't hit the merge button themselves—they just add their PRs to the queue.
From there, the queue takes complete control, methodically processing each PR:
- First, it updates the pull request with the absolute latest version of the
mainbranch. - Next, it triggers your full Jenkins CI pipeline to run against this newly updated code.
- Only after every single check passes does it finally merge the PR.
This simple process guarantees that every commit landing in main has been validated against the most recent version of the codebase. It effectively eliminates those frustrating broken builds caused by stale PRs. If you want to go deeper on this, we've got a complete guide to the GitHub merge queue.
A merge queue transforms your integration process from a chaotic free-for-all into an orderly, predictable, and safe workflow. It ensures the main branch is always green and ready for deployment.
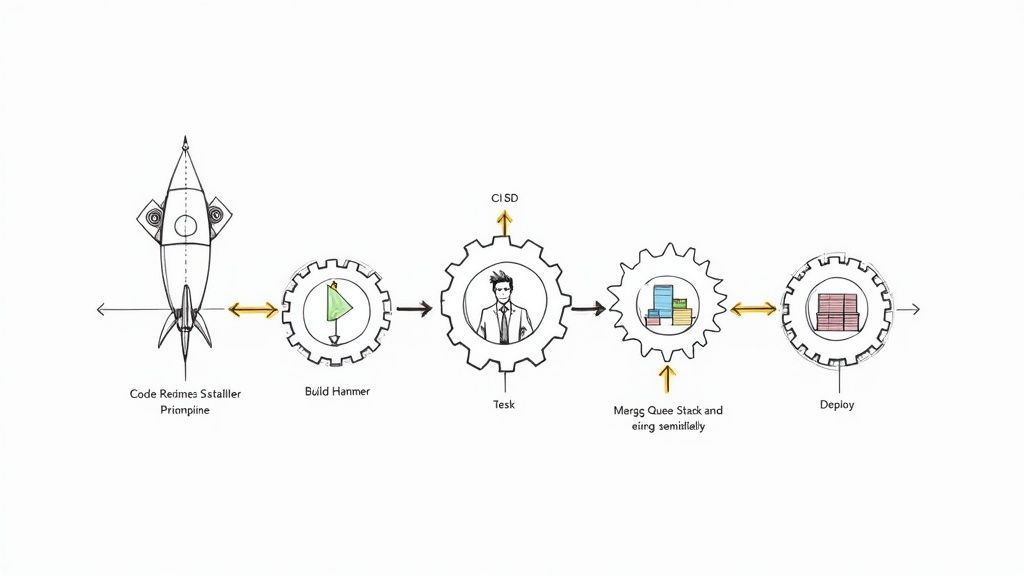
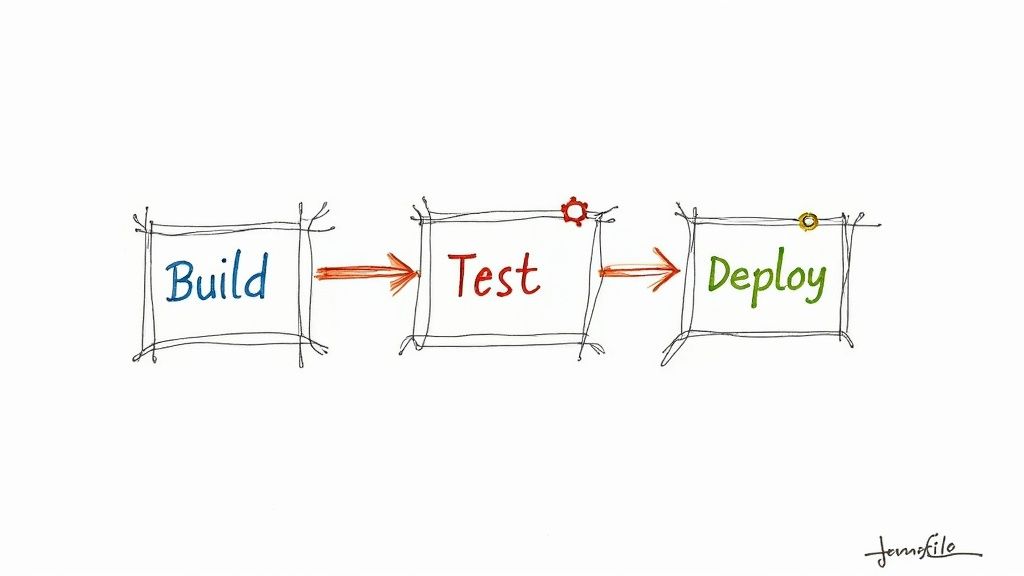
This is the standard flow you see in most Jenkins CI/CD setups, from the initial commit all the way to production.
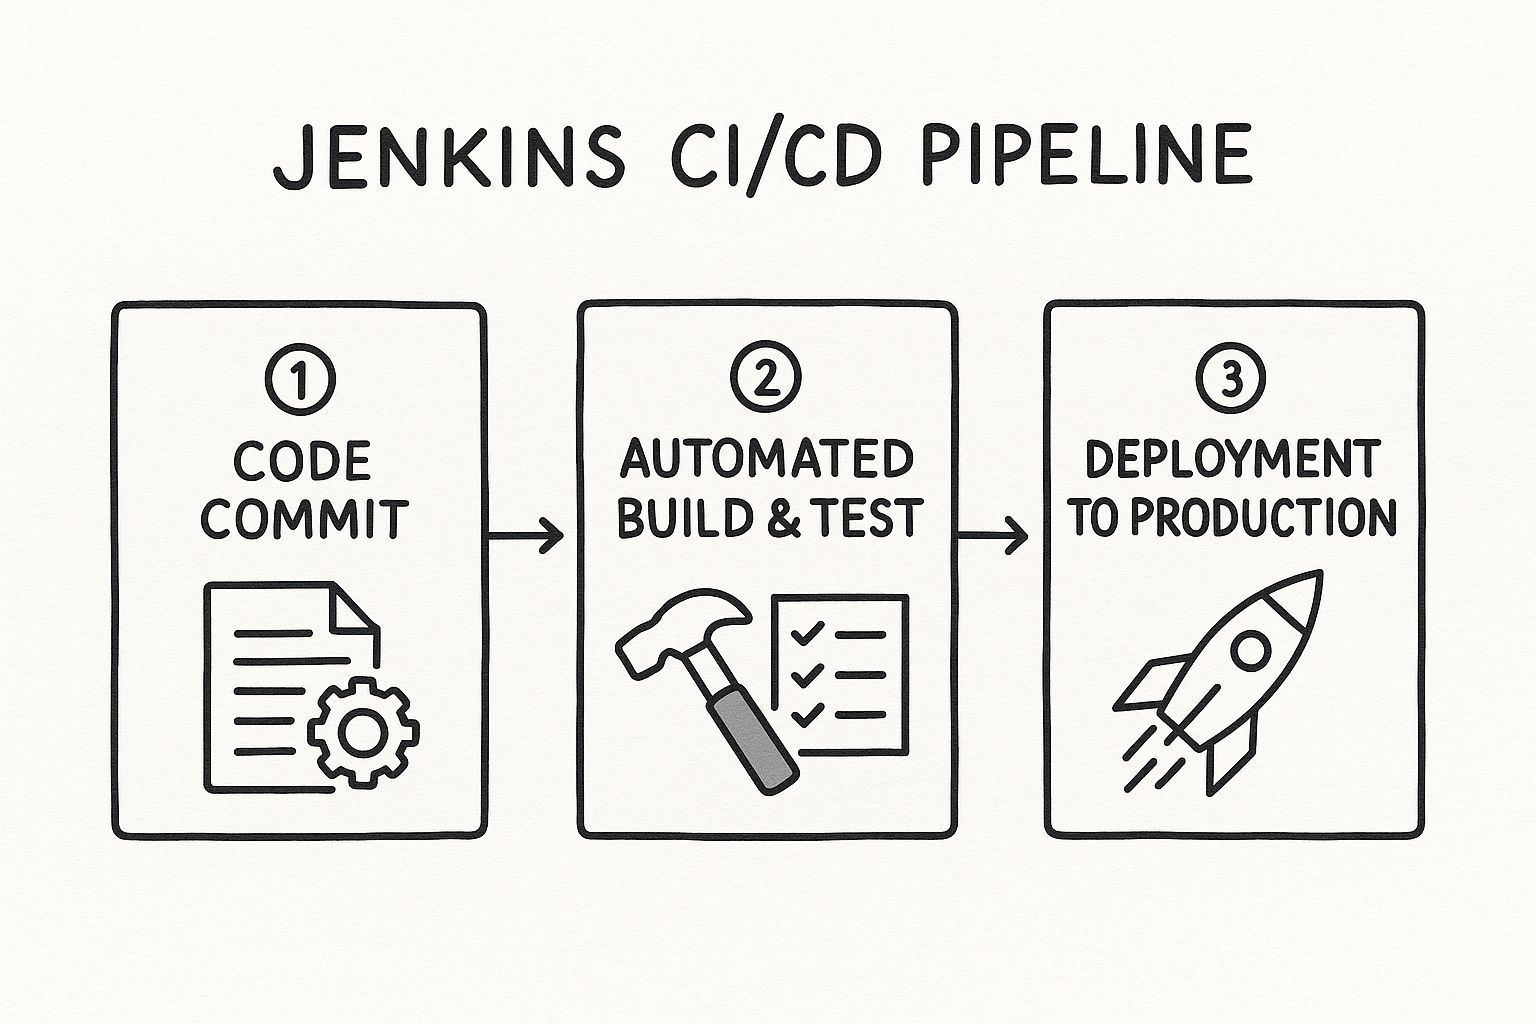
What this diagram doesn't show is the crucial validation layer a merge queue adds right before that final merge, making the entire pipeline far more robust, especially as you scale.
Optimizing Throughput with Batching
A basic, one-by-one queue is a massive improvement, but for a really fast-moving team, it can still become a bottleneck. If ten PRs are lined up, testing each one sequentially can burn a lot of time and CI resources. This is where batching changes the game.
An intelligent merge queue, like the one we've built at Mergify, can group multiple compatible PRs into a single "batch." It then tests this entire batch just once. If the tests pass, all PRs in that batch are merged at the same time, which massively boosts your team's throughput without compromising on safety.
This kind of automated code integration is quickly becoming the industry standard. The global DevOps tools market is on a trajectory to grow from $18.4 billion in 2023 to $25 billion by 2025. By pairing a smart merge queue with your Jenkins pipeline, you’re not just fixing merge conflicts—you're building a scalable and modern engineering workflow that can keep up with your team's ambition.
Alright, a basic pipeline is up and running. But let's be honest, the difference between a simple setup and a professional, enterprise-grade workflow is huge. We're talking about building pipelines that are not just functional, but secure, reusable, and blazing fast. This is where you graduate from the basics and start using the techniques that define a mature Jenkins #CICD process.
If you do nothing else, tackle secrets management first. Hardcoding API keys, passwords, or tokens directly in your Jenkinsfile is a massive security risk. Anyone with repo access can see them, and they become a nightmare to rotate or update.
Securing Your Pipeline with Credentials
Jenkins has a great built-in solution for this: the Credentials plugin. It lets you store all that sensitive info securely within Jenkins itself. You can then pull these secrets into your pipeline by referencing a credential ID, meaning the actual values are never exposed in your code or logs.
So, instead of a risky line like this:sh 'docker login -u my-user -p my-secret-password'
You wrap it in the withCredentials block, which safely injects the secret at runtime:
withCredentials([usernamePassword(credentialsId: 'docker-hub-creds', usernameVariable: 'USER', passwordVariable: 'PASS')]) {
sh "docker login -u ${USER} -p ${PASS}"
}
This simple change gets your secrets out of version control and makes managing them a centralized, secure process. It's a non-negotiable for any serious project.
Making Pipelines Flexible with Parameters
The next sign of a professional pipeline is reusability. When you hardcode values like branch names or deployment targets, you create a rigid, one-trick pony. The better way is to use parameters, which turn your pipeline into a flexible tool that can be configured on the fly.
You can define parameters right in your Jenkinsfile:
pipeline {
agent any
parameters {
string(name: 'TARGET_ENV', defaultValue: 'staging', description: 'Environment to deploy to')
booleanParam(name: 'RUN_PERFORMANCE_TESTS', defaultValue: false, description: 'Run slow performance tests?')
}
// ... your stages here
}
Now you can trigger a build with custom inputs—like deploying to production or flipping a switch to enable performance tests—all without ever touching the pipeline code itself.
Reducing Boilerplate with Shared Libraries
As your team builds out more pipelines, you'll inevitably start seeing the same chunks of code everywhere. Shared Libraries are Jenkins' answer to the "Don't Repeat Yourself" (DRY) principle. They let you define custom steps and reusable logic in a separate Git repository that any of your Jenkinsfiles can import.
Think of a Shared Library as your team's internal toolkit for CI/CD. It centralizes complex logic, enforces best practices, and drastically simplifies individual pipeline scripts, making your entire Jenkins #CICD ecosystem more maintainable.
By creating a custom step like runIntegrationTests(), you can replace dozens of lines of boilerplate with a single, easy-to-read command. This is a game-changer for maintainability.
Optimizing Performance with Parallel Stages
Finally, let's talk about speed. Slow pipelines are a major source of friction for developers and a bottleneck for your delivery cycle. One of the most effective ways to slash build times is by running independent stages in parallel. If your unit tests and integration tests don’t depend on each other, why on earth would you run them one after the other?
You can set up parallel execution very easily:
stage('Run Tests') {
parallel {
stage('Unit Tests') {
steps {
sh './run-unit-tests.sh'
}
}
stage('Integration Tests') {
steps {
sh './run-integration-tests.sh'
}
}
}
}
When you combine this with lightweight Docker agents—which spin up clean, ephemeral environments for each build—you ensure your pipelines are not just robust and secure, but also incredibly efficient.
Troubleshooting Common Jenkins Pipeline Issues
Even the most carefully crafted pipeline is going to break sometimes. That’s just a fact of life in CI/CD. The goal isn’t to prevent every single failure—it’s to get really good at figuring out what went wrong and fixing it fast. The first step to becoming a pro at this is knowing where to look when a build goes red.
Your best friend here is the Console Output. Don’t just scroll through it looking for the word "ERROR." You have to learn to read the log from the bottom up. The last few lines almost always tell you exactly which command failed and spit out an error message that points you straight to the problem.
Decoding Common Failure Scenarios
After a while, you start to see the same kinds of failures pop up again and again. Getting familiar with these patterns can cut your troubleshooting time from hours down to just a few seconds.
A really common one is a simple script failure in a sh or bat step. Maybe your npm test command bombs out. The console log will show you the non-zero exit code and whatever output the test runner gave you. This isn’t a Jenkins problem—it’s an issue with your application code or the tests themselves.
Version control is another frequent source of headaches.
- Authentication Errors: If you see messages like
Permission denied (publickey), it means Jenkins can’t talk to your Git repository. The fix is usually to double-check that the SSH keys or credentials you’ve set up in Jenkins are correct and actually have permission to access that repo. - Merge Conflicts: Did the build fail right at the checkout stage with a bunch of conflict markers? That’s a classic sign that an upstream merge wasn’t handled correctly before the pipeline kicked off.
The real key to effective troubleshooting is isolating the problem. Is it a code issue, a configuration mistake, or something wrong with the environment? The console log almost always has the answer.
Tackling Agent and Environment Issues
Sometimes, the problem isn't in your Jenkinsfile at all. It's the agent—the machine actually running the job. Seeing an error like Cannot connect to the Docker daemon is a dead giveaway that something’s misconfigured on the agent node itself. You'll want to make sure the Jenkins user has the permissions it needs to access services like Docker.
Slow pipelines are a different beast, more subtle but just as frustrating. If one particular stage is dragging on, dig into its steps. Are you downloading massive dependencies on every single run? Caching could be a game-changer. Are all your tests running one after another? You can slash execution time by running them in parallel.
By methodically reading the logs and recognizing these common failure points, you can turn pipeline problems from frustrating roadblocks into valuable learning moments.
Ready to eliminate merge conflicts and streamline your entire CI workflow? Mergify's merge queue integrates seamlessly with your Jenkins pipeline to ensure your main branch always stays green. Learn how Mergify can save your team time and CI costs.


