
GitHub Actions Workflow Dispatch Guide: Automate with Ease

In a world obsessed with full automation, sometimes you just need a big red button. That's exactly what the github actions workflow_dispatch event gives you—a way to manually kick off a workflow whenever you decide. It's the perfect tool for those critical tasks that need a human go-ahead, like deploying a last-minute hotfix or running a tricky data migration.
Why Manual Triggers Are a CI/CD Game-Changer
Look, aiming for a fully automated CI/CD pipeline is a great goal, but some jobs just don't fit that model. You wouldn't want to run a resource-hogging security scan or backfill a massive dataset on every single commit, right? That would be a huge waste of time and money.
This is where manual triggers shine. They add a crucial layer of control, turning your rigid, automated system into a flexible toolkit you can use on demand. It's a sign of a mature, well-thought-out delivery process.
When to Reach for workflow_dispatch
The real value of workflow_dispatch pops up in those high-stakes situations where timing and precision are everything. It’s about giving your team the confidence to run operations that might otherwise feel a bit risky.
I’ve seen it save the day in a bunch of scenarios:
- Hotfix Deployments: A critical bug needs to go out now, not with the next scheduled release. A manual trigger gets it done instantly.
- Data Migrations: You need to run a sensitive database update. It's much safer to trigger it yourself during a planned low-traffic window.
- On-Demand Reporting: Need to generate a massive performance report for a quarterly review? Run it once, manually, without bogging down your daily builds.
- Infrastructure Provisioning: Spinning up a temporary staging environment for a client demo is a perfect use case for a manual trigger.
GitHub introduced the workflow_dispatch event for exactly these kinds of situations. It gives you the power to run a workflow directly from the GitHub UI or API, ensuring things happen precisely when and how you want them to.
Kicking Off a Workflow from the GitHub UI
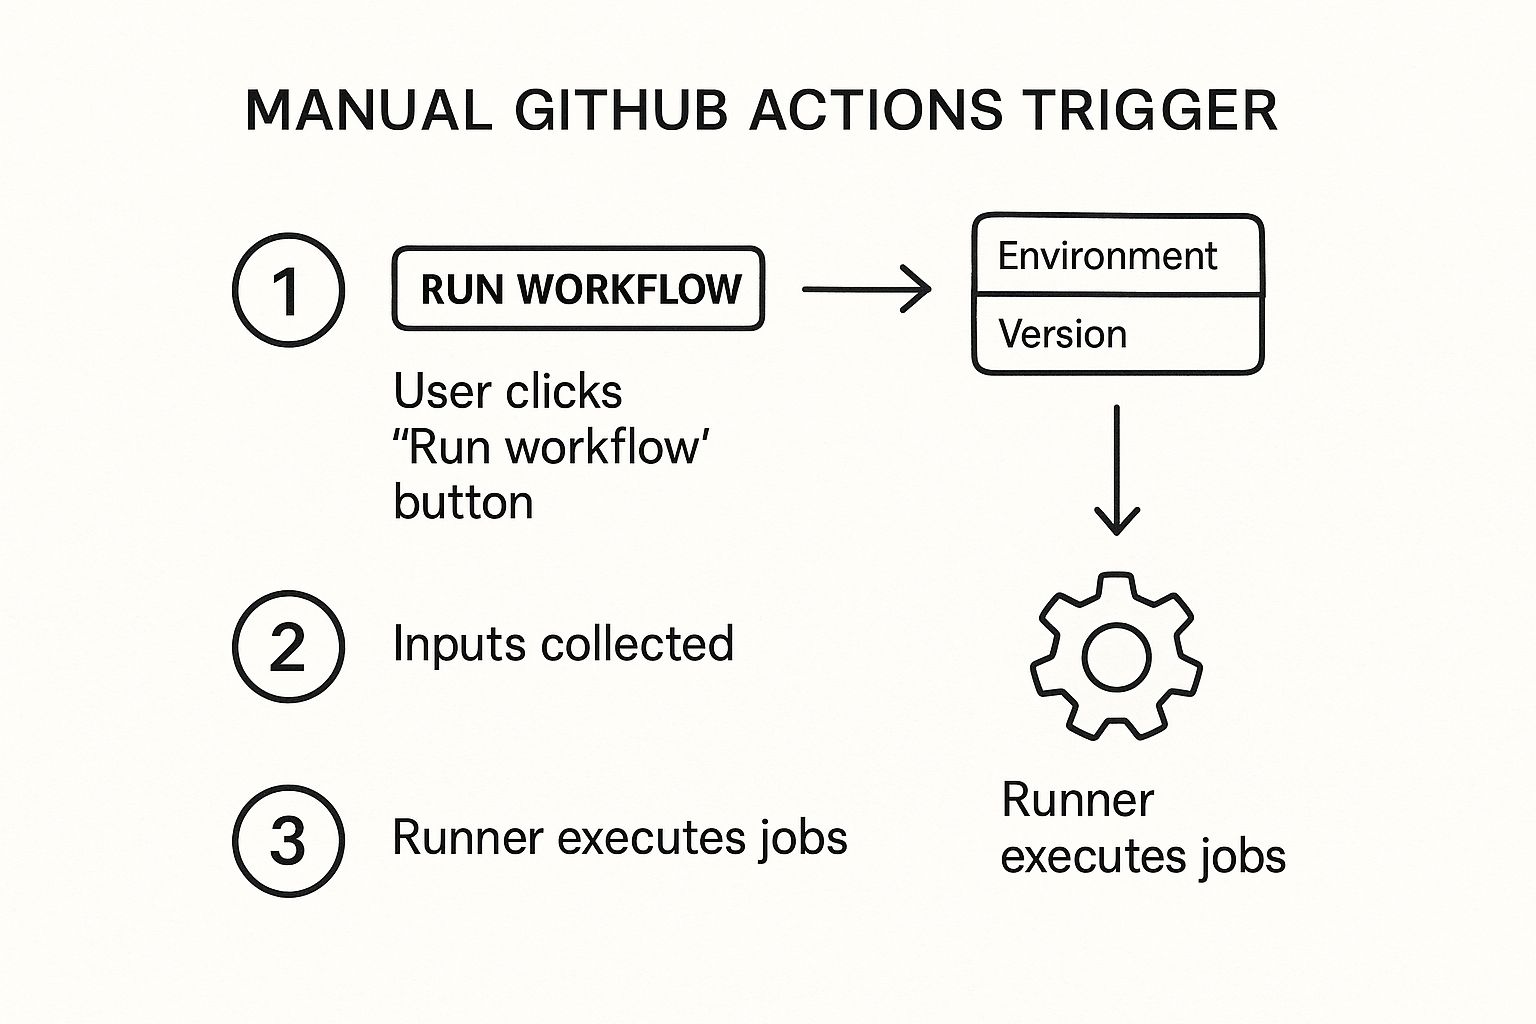
The most straightforward way to use a manual trigger is right from your repository's "Actions" tab. As soon as you add the workflow_dispatch event to your workflow file, a "Run workflow" button magically appears. Anyone on your team with write access can then click it to start the job.
Here’s what you'll see in the GitHub interface:
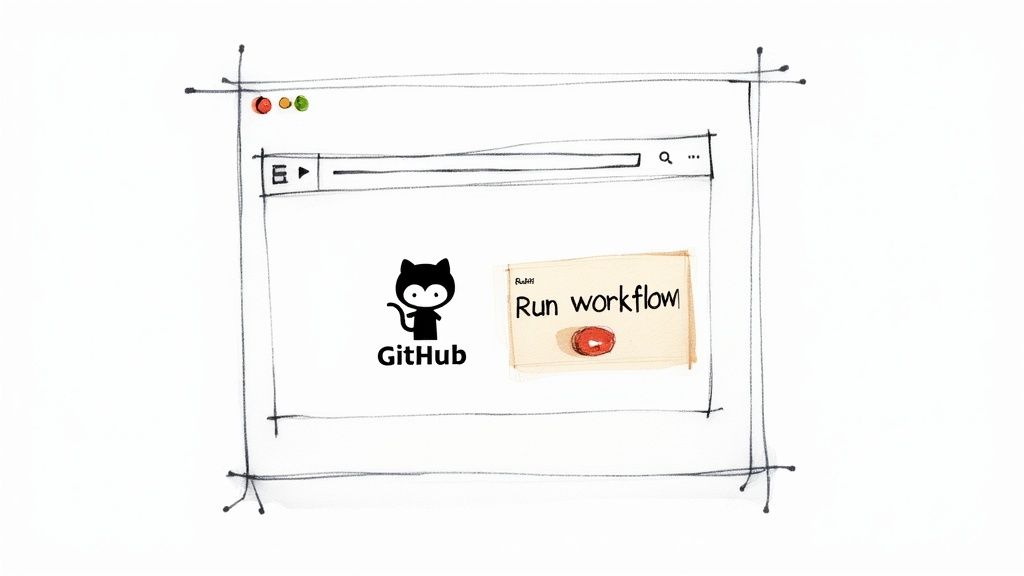
This simple button is incredibly powerful. It empowers everyone—from developers to project managers—to execute complex processes safely without ever touching the command line. It’s a huge boost for operational clarity and efficiency.
Kicking Off Your First Manual Workflow
Alright, theory is one thing, but let's actually build something. Getting your first manually triggered workflow up and running is surprisingly quick. The magic lies in a small, yet powerful, addition to your workflow's YAML file that signals to GitHub that it should show the "Run workflow" button.
We're going to start with a dead-simple example. The point isn't to create a full-blown deployment pipeline right now, but just to make sure the trigger is wired up correctly and everything works as expected. Once you have this basic building block down, adding complexity later is much easier.
The Magic Snippet: workflow_dispatch
To enable a manual trigger, you just need to add the on key to your workflow file, followed by workflow_dispatch:. That's it. GitHub is constantly watching your .github/workflows directory, and any file containing this trigger will get the manual run option in your repository's "Actions" tab.
Let's make a new file called manual-greeting.yml and place it inside your .github/workflows directory.
Here's a complete, minimal example you can copy and paste directly:
name: Manual Greeting
on:
workflow_dispatch:
jobs:
say-hello:
runs-on: ubuntu-latest
steps:
- name: Print a greeting
run: echo "Hello, world! This workflow was triggered manually."
Once you commit this file to your repository's main branch, head over to the "Actions" tab. You should now see "Manual Greeting" in the list of available workflows on the left. Click on it, and the "Run workflow" button will be waiting for you.
Making Sure It All Works
The change is immediate after you commit the file. Go ahead and click that "Run workflow" button. A small dropdown will pop up, asking which branch you want to run the workflow on. For this simple test, your default branch is perfect. Click the green "Run workflow" button inside the dropdown to get things started.
A new run for your workflow will appear. If you click into it, you'll see the "say-hello" job. After it finishes, you can expand the "Print a greeting" step and see the output you defined: "Hello, world! This workflow was triggered manually."
The Key Takeaway: Just havingon: workflow_dispatch:in your YAML file is all it takes to enable the "Run workflow" button. Even an empty block likeworkflow_dispatch: {}works just fine.
This little test proves a few important things:
- Your syntax is valid: The YAML file is structured in a way GitHub understands.
- Permissions are correct: You have the necessary rights to execute actions in the repository.
- You have a foundation: This file is now a launchpad. You can build on it by adding more intricate jobs, steps, and logic, all based on a trigger you know works.
You now have a solid, functioning model. From here, the next logical step is to evolve this static trigger into something more interactive by adding user inputs. This is where you can turn a simple button into a genuinely powerful and configurable tool for your entire team.
Using Dynamic Inputs to Create Flexible Workflows
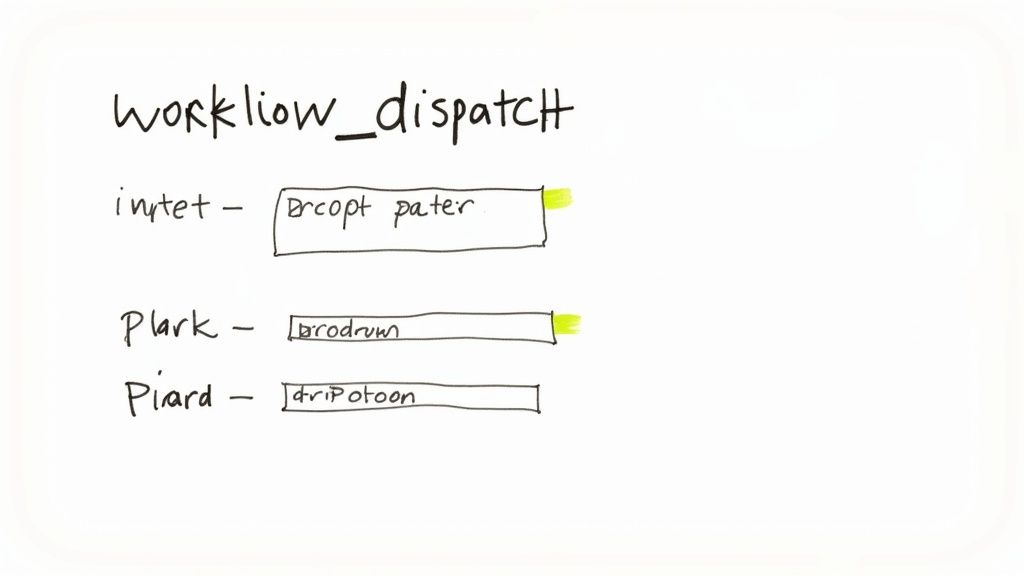
A static manual trigger is a great start, but workflow_dispatch truly shines when you introduce dynamic inputs. This feature essentially turns a simple "run" button into a small, interactive form, letting you pass custom data directly into your workflow when you kick it off. It’s the difference between a single-purpose script and a versatile, multi-tool for your CI/CD pipeline.
By defining an inputs block right under workflow_dispatch, you can prompt anyone running the workflow for crucial information directly in the GitHub UI. Think about deploying to different environments, specifying a version tag, or toggling a feature flag—all without having to touch the workflow file itself. This is a game-changer for reducing the number of nearly identical workflow files you have to maintain.
Defining Your First Interactive Form
Let’s build on our last example and add some user-configurable options. We’ll set up a workflow that simulates a deployment, but this time, it will ask the user to specify the target environment and the version tag they want to deploy. This is a classic, real-world scenario that perfectly shows off how flexible workflow_dispatch can be.
As you can see, this creates a simple, effective bridge between the person triggering the action and the automation that runs behind the scenes.
Exploring Different Input Types
When you define your inputs, you're not just limited to plain text boxes. GitHub Actions supports several input types that render different UI components, making your forms more intuitive and helping to prevent user error.
Here are the ones you'll probably use most often:
string: The default. This gives you a standard text field for any kind of free-form input, like a version number or a specific commit hash.boolean: This shows up as a simple checkbox. It’s perfect for on/off toggles, like a "force deployment" or "run tests" option.choice: My personal favorite for preventing mistakes. This creates a dropdown menu with predefined options, so you can be sure a user will select from a valid list, such asstagingorproduction.environment: A specialized dropdown that automatically lists the deployment environments you've configured in your repository. This is the safest way to ensure you’re deploying to a valid, pre-approved target.
By carefully selecting your input types, especiallychoiceandenvironment, you're building guardrails directly into your manual processes. This is a massive win for reducing the risk of human error during critical operations like a production deployment.
Configuring Your workflow_dispatch Inputs
To give you fine-grained control over the form, each input can be configured with a few key properties. Understanding these is essential for creating a smooth user experience.
| Property | Required? | Data Type | Description |
|---|---|---|---|
description |
No | string |
The text that appears in the UI to guide the user. Clear descriptions are key! |
required |
No | boolean |
Set to true if the user must provide a value before running the workflow. |
default |
No | string, boolean |
A fallback value used if the user doesn't provide one. Great for setting safe defaults. |
type |
No | string |
The data type for the input. This controls the UI element shown to the user. |
These properties work together to create a form that's not just functional but also user-friendly and less prone to errors.
Putting It All Together in a Real-World Example
Alright, let's modify our workflow file to include these dynamic inputs. The configuration below defines two inputs: environment is a required choice, and version is an optional string with a default value. We then access these values inside our job steps using the github.event.inputs context.
name: Dynamic Deployment
on:
workflow_dispatch:
inputs:
environment:
description: 'Target environment'
required: true
type: choice
options:
- staging
- production
version:
description: 'Version tag to deploy (e.g., v1.2.3)'
required: false
default: 'latest'
jobs:
deploy:
runs-on: ubuntu-latest
steps:
- name: Checkout code
uses: actions/checkout@v3
  - name: Deploy to environment
    run: |
      echo "🚀 Starting deployment..."
      echo "Target Environment: ${{ github.event.inputs.environment }}"
      echo "Version Tag: ${{ github.event.inputs.version }}"
The whole idea of using variables to configure pipelines is a cornerstone of modern CI/CD. While this example is all about GitHub Actions, you can check out this comprehensive guide on GitLab CI variables that explores very similar principles.
With this setup, anyone triggering the workflow gets a clean, simple form. It turns what could be a complex deployment process into a straightforward, guided action.
Advanced Uses for Workflow Dispatch
Once you've gotten the hang of dynamic inputs, workflow_dispatch stops being just a simple "run now" button. It starts to feel more like a core component of your internal tooling, almost like building your own little developer platform. It becomes the friendly front-end for a whole suite of powerful, on-demand tools that let your entire team get things done safely and quickly.
Think about it: you can create a whole catalog of actions for your developers. Instead of having to remember a gnarly command-line flag or track down the right script, they can just pop over to the Actions tab in GitHub. There, they'll find a pre-approved, tested workflow ready to go for all sorts of common tasks. It's a massive boost for both productivity and consistency across the team.
Building an On-Demand Operational Toolkit
What are the routine, but absolutely critical, jobs your engineering team does all the time? A lot of those are prime candidates for a workflow_dispatch trigger. These workflows essentially become a simple "pane of glass" for complex operations, hiding all the messy details under the hood.
Here are a few real-world examples I've seen work incredibly well:
- Cache Clearing: A one-click workflow that instantly purges caches in your CDN or application after a deployment goes sideways. No more fumbling for credentials in the middle of an incident.
- Report Generation: An action that securely queries a production database to pull a resource usage report for the finance department.
- One-Click Rollbacks: A lifesaver. This workflow takes a previous release tag as an input and redeploys it, giving you a lightning-fast way to recover when things go wrong.
- Seeding Staging Data: A tool for the QA team to refresh a staging environment with fresh, anonymized data before they kick off a testing cycle.
Tools like these just lower the mental overhead for everyone. They also drastically reduce the chance of someone making a mistake under pressure.
The real magic of building an operational toolkit with workflow_dispatch is that it makes these tasks accessible. It lets team members who aren't deep experts perform complex jobs with confidence, because the entire process is baked into a well-defined and peer-reviewed workflow.Triggering Workflows Across Different Repositories
Here's where things get really interesting. You can use the GitHub API to have one workflow trigger another one—even if it's in a completely different repository. This is a game-changer for anyone working with microservices, where different parts of the system live in their own repos. You can set up a central "orchestrator" repository that kicks off deployment workflows in all the downstream service repos.
A common pattern I see is a CI workflow that, upon a successful build, uses an API call to trigger a separate CD deployment workflow via workflow_dispatch. This keeps your concerns nicely separated and makes your pipelines much cleaner. To make this even easier, the community has built some great actions to handle the API calls for you. It's worth checking out a popular action for triggering workflow_dispatch events to get a feel for how they work.
This technique is also fantastic for decoupling long-running jobs. For instance, you can have a fast-running build-and-unit-test workflow that finishes in a couple of minutes. Once it's done, it can fire off an API call to start a much slower, resource-heavy integration testing workflow. This way, the slow tests don't clog up the pipeline and block more urgent builds, which is great for keeping developer feedback loops tight and even managing your CI costs.
Best Practices and What to Watch Out For
It’s one thing to build a powerful manual workflow, but it’s another thing entirely to make it secure, maintainable, and genuinely useful for your team. When you hand someone a button that deploys to production, you absolutely need guardrails in place. Without them, you're just asking for accidental deployments or unauthorized changes.
This is exactly why GitHub Environments are non-negotiable for any sensitive operation. By routing your workflow_dispatch jobs through a protected environment, you can enforce rules that require a specific person or team to approve the run before it even starts. This simple step adds a critical layer of human oversight right where you need it most.
Locking Down Your Sensitive Workflows
For any workflow that even gets close to production data, infrastructure, or anything customer-facing, security has to be your top priority. A manual trigger is incredibly convenient, but it also creates a new vector for potential mistakes or misuse.
Here are a few practices I always stick to:
- Lean on GitHub Environments: I can't stress this enough. Set up protection rules on environments like
productionto require reviewers. It's your most effective safety net. - Keep a Tight Leash on Secrets: Make sure secrets are only available to the specific jobs that need them, ideally scoped to a protected environment. You can get a much deeper look into how to protect secrets when using GitHub Actions to really tighten up your security posture.
- Grant Only Necessary Permissions: Use the top-level
permissionskey in your workflow to give your jobs the absolute minimum permissions they need. Don't hand out broad write access if a job just needs to read repository content.
The goal isn't to make workflows hard to run; it's to make them impossible to run incorrectly. A few minutes spent configuring environments can save you hours of painful incident response down the road.
Avoiding Common Pitfalls
I've seen teams make the same few mistakes over and over again when they first start using workflow_dispatch. These small missteps can lead to confusing UIs, brittle automation, and a general lack of trust in the very tools you're trying to build.
One of the most common errors is creating monolithic workflows that try to do everything. Instead of one giant, unwieldy "do-it-all" action, break your logic down. A focused workflow for "deploy-web-app" and a separate one for "run-database-migration" is infinitely more maintainable.
Another issue I see all the time is unclear input descriptions. A field labeled target is just plain ambiguous. Is that a server name? A branch? An environment? A much better description like "The deployment environment (e.g., staging, production)" removes all the guesswork. Always write your descriptions from the perspective of someone who has never seen the workflow before.
Digging into Workflow Dispatch: Common Questions
As you start weaving workflow_dispatch into your daily work, you'll inevitably run into a few common questions. I see these pop up all the time. Getting the answers right is the key to building manual workflows that are both powerful and secure.
Can One Workflow Kick Off Another in a Different Repository?
Yes, and this is an incredibly powerful pattern, especially for anyone working with microservices or complex, multi-repo projects. To pull this off, you'll need to work with the GitHub API.
The basic recipe is to create a Personal Access Token (PAT) with the right repo scope. This token acts as your authentication. You’ll want to store that PAT as an encrypted secret in the repository that’s initiating the action. From there, your workflow can use a simple tool like curl or a dedicated GitHub Action to hit the target repository's dispatches endpoint with a POST request. It's a common and effective way to orchestrate deployments across otherwise separate services.
Where Can I Find the Run History and Inputs for Manual Triggers?
GitHub keeps a detailed log of every manual run, which is a lifesaver for debugging and auditing. Just head over to your repository's "Actions" tab. Your workflow_dispatch runs are listed right there alongside all your other automated jobs.
When you click into the summary for a specific run, you'll see a section that clearly lays out all the inputs and the values that were used. This makes it super easy to track down who ran what and with which parameters—invaluable when you're trying to figure out why a specific run behaved differently.
This built-in audit trail is a critical feature, especially for compliance. It guarantees that every manual action, particularly something sensitive like a production deployment, is fully documented and traceable back to a person and their exact inputs.
Is There a Limit on How Many Inputs I Can Have?
There is. GitHub currently caps the number of inputs at 10 for a single workflow_dispatch trigger. For most situations, that’s plenty.
But what if you need more? If you bump up against this limit, the best move is to rethink your inputs. Instead of a dozen individual fields, create a single string input designed to accept a JSON object. Your workflow script can then just parse that JSON to get all the configuration it needs. It's a clean workaround that keeps your UI from getting cluttered.
How Can I Control Who Is Allowed to Trigger a Manual Workflow?
You absolutely can, and you absolutely should for any workflow that touches a sensitive system. The best tool for this job is GitHub Environments.
Here’s how it works: you create an environment, maybe call it "production," and then set up protection rules for it. These rules can require specific people or teams to sign off on any job targeting that environment. When someone tries to run your workflow_dispatch job, it will automatically pause and wait for an authorized reviewer to give it the green light. This adds a much-needed security checkpoint to your manual processes.
At Mergify, we're all about making your CI/CD pipeline smarter and safer. We help teams ship code faster and with more confidence by automating the merge queue and protecting critical branches. Learn more about how Mergify can streamline your development workflow.


