
Master GitHub Jenkins Integration for Seamless CI/CD

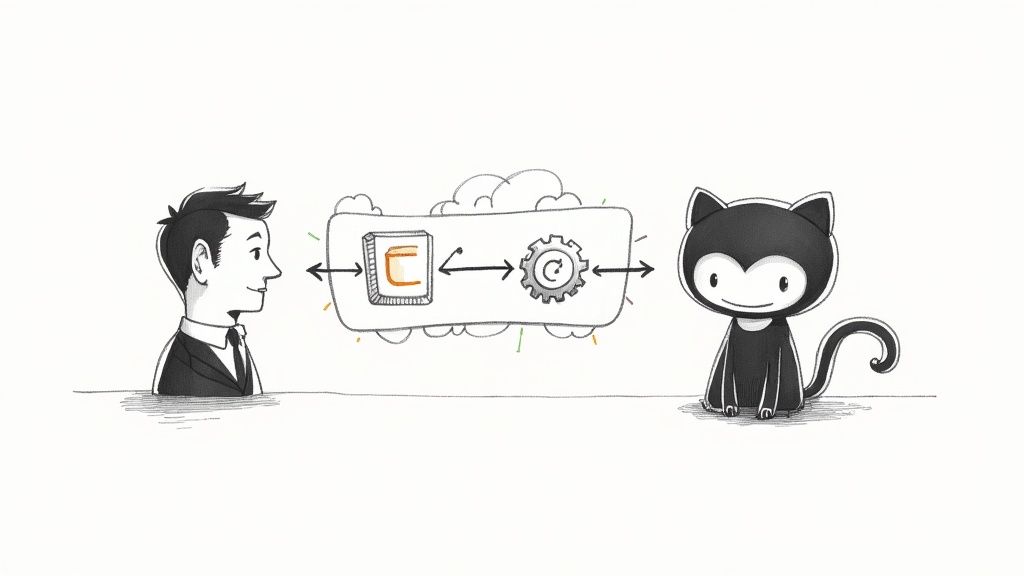
Connecting GitHub and Jenkins is the classic recipe for a powerful CI/CD pipeline. It’s all about automating the journey from code commit to deployment, and it forms the backbone of modern DevOps. The magic happens when you use webhooks to trigger Jenkins jobs directly from GitHub events, like a new push or a pull request.
Think of it as the ultimate bridge between your version control and your continuous delivery process.
The Power Couple of Modern DevOps
Pairing GitHub with Jenkins isn't just about hooking up two popular tools. It's about creating a highly responsive, automated system that fundamentally changes how you ship code, making development cycles faster and improving quality along the way.
When a developer pushes a commit, a webhook fires off a notification to your Jenkins server almost instantly. This single event can kick off a whole chain of predefined actions—a pipeline that compiles, tests, and packages your code into a deployable artifact without anyone lifting a finger.
This level of automation is what continuous integration is all about. Gone are the days of manual handoffs or waiting for nightly builds. Now, your team gets feedback in minutes. Did that last commit break something? Did a critical test fail? You'll know right away, not hours later. If you want to dive deeper, check out our guide on the advantages of continuous integration.
Why This Combination Still Dominates
I know what you're thinking—what about all the new, native CI/CD tools? While they're great, the GitHub-Jenkins setup remains a go-to for some very good reasons. Jenkins’ biggest strength is its incredible flexibility, thanks to a massive plugin ecosystem. You can integrate it with practically any tool or service you can imagine.
This is a game-changer in complex enterprise environments, especially those dealing with legacy systems, hybrid cloud infrastructure, or strict compliance rules. Imagine trying to orchestrate builds across a mix of on-premise servers and various cloud platforms. Jenkins handles that kind of complexity with ease, something a cloud-only solution might struggle with.
For many established engineering teams, Jenkins isn't just another tool; it's the central nervous system of their entire development workflow. Its power to adapt to any stack is why it remains a DevOps cornerstone.
GitHub Actions vs. Jenkins Integration
So, should you use the built-in GitHub Actions or stick with a dedicated Jenkins server? It’s a common question, and the answer depends on your team's needs. GitHub Actions is incredibly convenient. It lives right in your repo, is easy to set up, and is a fantastic choice for startups, open-source projects, or anyone who values simplicity and speed.
On the other hand, Jenkins offers a degree of control and customization that's hard to beat. Its sweet spot is managing complex, multi-stage pipelines, handling heavy build loads with distributed agents, and serving as a centralized CI/CD hub for an entire organization.
Here's a quick rundown of how they stack up.
GitHub Actions vs Jenkins Integration At a Glance
| Feature | GitHub Actions | Jenkins Integration |
|---|---|---|
| Setup & Hosting | Natively integrated into GitHub; SaaS (managed by GitHub) | Self-hosted or cloud-hosted; requires server setup and maintenance |
| Configuration | YAML files (.github/workflows) stored within the repository |
Groovy-based Jenkinsfile or configured via the Jenkins UI |
| Extensibility | Growing marketplace of actions | Massive, mature ecosystem of over 1,800 community plugins |
| Control & Customization | More streamlined and opinionated; less infrastructure control | Highly customizable; full control over the environment and build agents |
| Best For | Open-source projects, startups, teams prioritizing simplicity and repo-centric workflows | Enterprises, complex pipelines, teams needing extensive integrations and centralized control |
Ultimately, both tools have secured their place in the software world. GitHub has become the undisputed leader in version control, home to over 100 million users and 420 million repositories as of 2025. While GitHub Actions has seen massive adoption, Jenkins remains a fixture in countless companies that rely on its battle-tested power and unmatched plugin library. This enduring relevance is exactly why knowing how to integrate GitHub and Jenkins is still a critical skill for any DevOps pro.
Gathering Your Integration Essentials
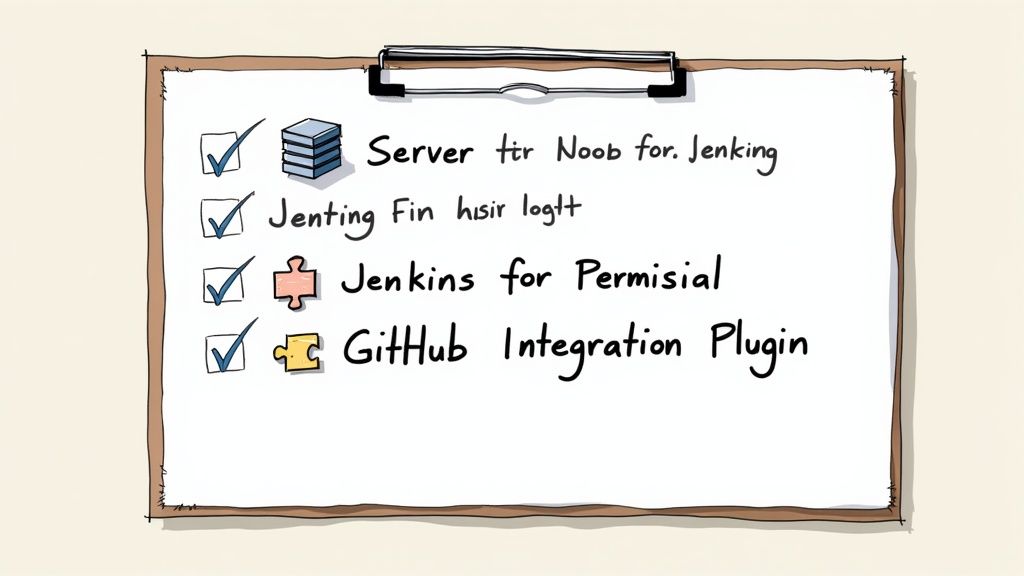
Before you even think about webhooks and pipelines, a little prep work can save you a world of headaches. A solid GitHub Jenkins integration is built on a solid foundation, so let's walk through what you need to have in place before we start connecting the dots.
Think of it like gathering your ingredients before you start cooking. Without the right pieces, you’ll spend more time fighting basic connection issues than actually building your CI/CD workflow. This setup is all about making sure both systems can talk to each other securely and efficiently.
Nail Down Your Admin Access
First things first: permissions. This might sound obvious, but it's the number one roadblock I see people run into. You'll need administrative access in two key places.
- Your GitHub Repository or Organization: You need to be able to manage repository settings, specifically to create and configure webhooks. If you can’t do this, you can’t set up the automated trigger that kicks off your Jenkins jobs. Simple as that.
- Your Jenkins Instance: You'll need administrator-level access to install plugins, manage system-wide configurations, and handle credentials. If you're on a shared corporate Jenkins server, this probably means coordinating with your DevOps or platform team.
Getting these permissions sorted out upfront means no frustrating "access denied" errors will derail you later.
Get Your Jenkins Instance Ready
Your Jenkins server is the engine of this whole operation. It needs to be properly configured and—this is critical—accessible from the public internet. GitHub has to be able to reach it to send webhook notifications.
If you’re running Jenkins on your local machine (think localhost), GitHub won't be able to find it. For this kind of setup, you'll need a tunneling service like ngrok to create a secure, public-facing URL that forwards requests to your local server. For any real-world production environment, your Jenkins server should have a stable public IP or a fully qualified domain name.
A classic mistake is forgetting about the firewall. Double-check that any network firewalls or security groups are configured to allow incoming traffic from GitHub's IP ranges on whatever port your Jenkins instance is using.
Install the Core Jenkins Plugins
A fresh Jenkins installation doesn't know how to speak GitHub out of the box. You have to teach it. That’s where plugins come in—they’re the heart of Jenkins' flexibility. With an ecosystem of over 1,800 plugins, it’s easy to get overwhelmed, but for this job, you only need a couple to get started.
Head over to Manage Jenkins > Plugins > Available plugins in your Jenkins UI and grab these two:
- GitHub Integration Plugin: This is the big one. It provides the core features that allow Jenkins to understand GitHub webhooks, push build statuses back to commits, and link everything together.
- Git Plugin: An absolute essential. This plugin gives Jenkins the ability to check out source code from any Git repository, including yours on GitHub.
These two plugins work in tandem to create the seamless communication channel you need for a robust github jenkins workflow. Once they're installed, a quick restart of your Jenkins instance will bring them online. With these essentials in place, you’re ready to start building the bridge between your code and your pipeline.
Establishing a Secure Connection
A solid GitHub-Jenkins integration hinges on one crucial element: trust. Before Jenkins can pull your code or report build statuses, GitHub needs to know it's a legitimate, authorized partner. This is where security moves from being an afterthought to the absolute foundation of your CI/CD pipeline.
It’s tempting to cut corners here, but bypassing proper credential management is a huge misstep that can expose your entire codebase.
The industry-standard way to establish this trust is with a GitHub Personal Access Token (PAT). Think of a PAT as a specific, limited-use password you can grant to an application like Jenkins. It gives Jenkins just enough permission to do its job without handing over the keys to your entire GitHub account. This principle of least privilege is a cornerstone of good security practice, and it’s non-negotiable.
Generating Your Personal Access Token
First things first, you’ll need to head over to your GitHub account. You're looking for the developer settings, where you can generate a new token. The key here isn't just creating a token, but assigning it the correct permissions, or "scopes." Granting too much access is a security risk, while granting too little will just cause your integration to fail with cryptic errors down the road.
For a robust GitHub-Jenkins connection that can manage webhooks and access repository code, you'll need to select a couple of specific scopes. My go-to configuration, which has proven effective across dozens of projects, includes these two:
repo: This is the big one. It grants full control of private repositories, allowing Jenkins to clone, fetch, and push code—the core of any build process.admin:repo_hook: This gives Jenkins permission to read and write repository hooks. It's absolutely critical for automatically creating and managing the webhooks that will trigger your builds.
This screenshot shows exactly where you'll select these permissions for your token.
Notice how GitHub provides a clear description for each scope. This allows you to be very deliberate about the permissions you grant.
Once you’ve selected the scopes, generate the token. GitHub will only show you the full token string one time. This is critical: copy it immediately and store it somewhere safe. If you navigate away from the page, it's gone for good, and you'll have to start over. Treat this token with the same care you would a password.
Storing the Token Securely in Jenkins
With your new PAT in hand, it’s time to add it to Jenkins. The absolute worst thing you can do is hardcode this token directly into a pipeline script or a job configuration. That’s a massive security vulnerability, as it exposes the secret in plain text for anyone with repository access to see.
Instead, we'll use the built-in Jenkins Credentials Manager. It's a secure vault designed specifically for storing sensitive information like API keys, passwords, and, of course, your GitHub PAT.
Getting your token into the manager is straightforward. From your Jenkins dashboard:
- Navigate to Manage Jenkins > Credentials.
- Select the
(global)domain (or another appropriate one if you have a more complex setup). - Click Add Credentials to open the form.
Now, you just need to fill out the form correctly.
Pro Tip: Always use theSecret textkind for GitHub PATs. While other options exist, this is the simplest and most secure method for a string-based token. Be sure to give it a descriptive ID likegithub-pat-for-cicdso you can easily reference it in your Jenkinsfile later.
By storing the token this way, you abstract the secret completely away from your pipeline code. Your Jenkinsfile will reference the credential by its ID, and Jenkins will safely inject the actual token at runtime. This practice not only secures your PAT but also makes your pipelines more portable and much easier to maintain. If the token ever needs to be rotated, you only have to update it in one central location—the Credentials Manager—without ever touching a single line of your pipeline code.
Alright, you've got your credentials sorted, and Jenkins can now talk to GitHub. The next step is to make this whole process automated. We don't want to be manually triggering builds, right? That's where webhooks come in, and they're the secret sauce to a truly hands-off CI/CD pipeline.
Think of a webhook as a direct line from your GitHub repository to your Jenkins server. When someone pushes new code or opens a pull request, GitHub sends a little notification—a "payload"—over to Jenkins. Jenkins hears that notification and immediately kicks off the build. It’s the magic that turns repository activity into automated action.
This is what transforms your setup from a clunky, manual process into a smooth, automated workflow.
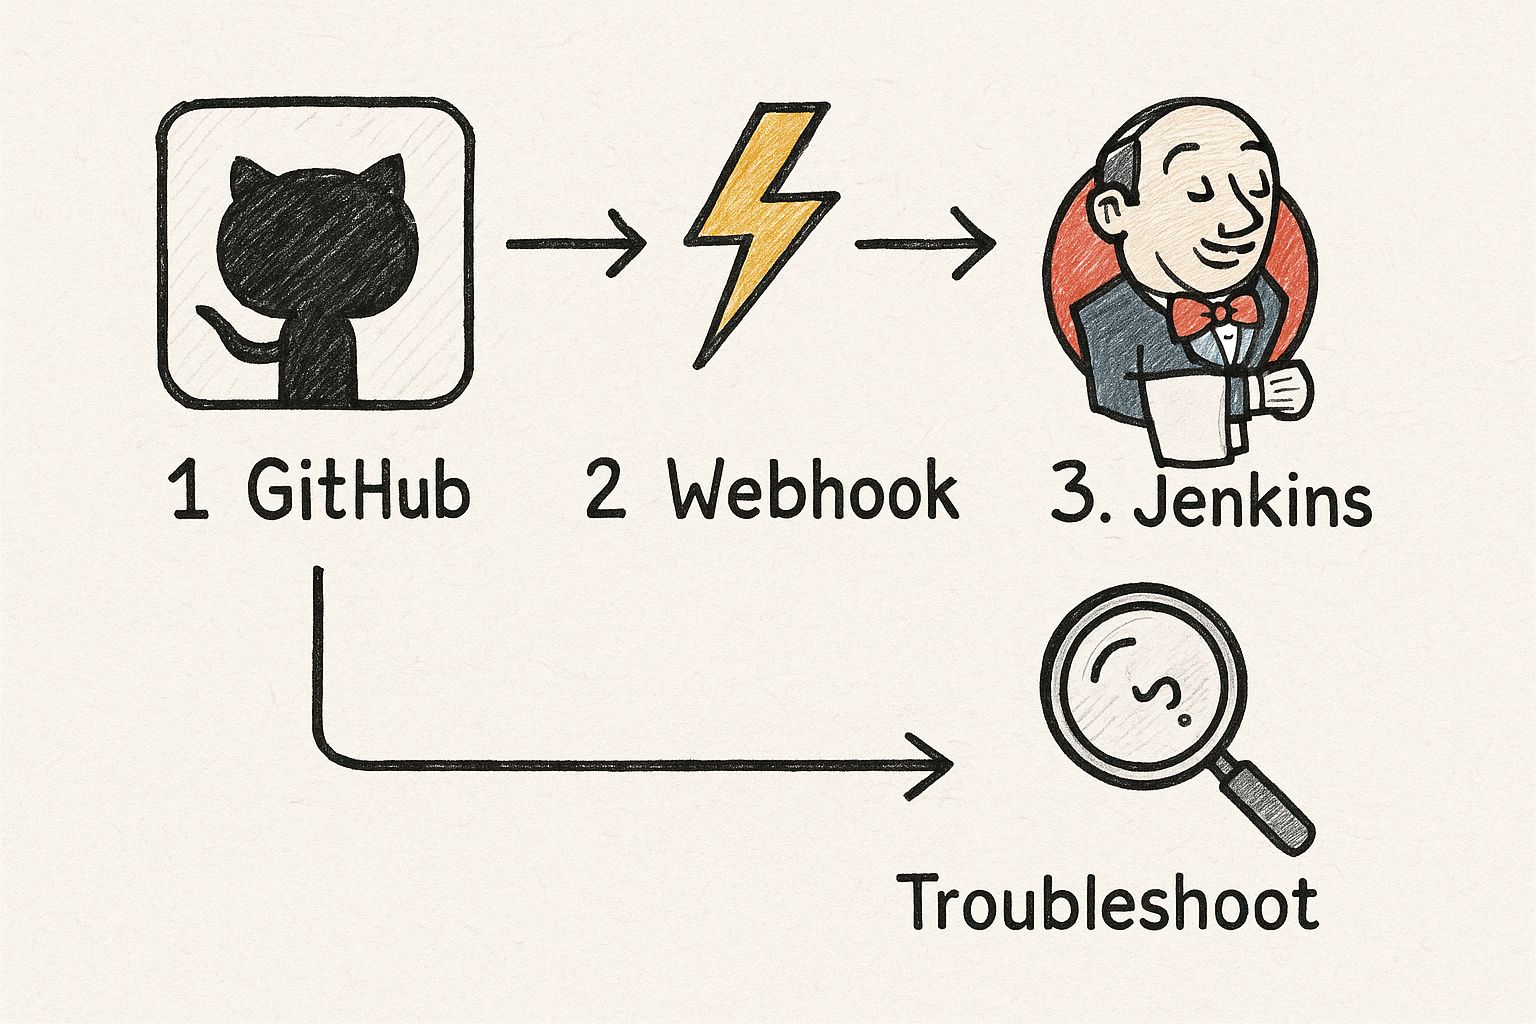
The key takeaway here is that a webhook is a simple but powerful messenger. Its success, however, hinges entirely on getting the configuration right on both ends.
Pinpointing Your Jenkins Payload URL
First things first, you need to give GitHub the right address to send its notifications. Any Jenkins instance with the GitHub plugin installed automatically exposes a dedicated endpoint just for this.
The URL almost always follows this exact pattern: http://YOUR_JENKINS_URL/github-webhook/.
Just swap out YOUR_JENKINS_URL with the public-facing URL of your Jenkins server. If you're running Jenkins locally and using a tool like ngrok to expose it to the internet, you'd use your ngrok forwarding address here. This URL is the destination for all the event data GitHub will send.
Creating the Webhook in GitHub
With the URL copied, hop back over to your GitHub repository. Go to Settings > Webhooks and hit that Add webhook button. This is where you'll tell GitHub what to send, where to send it, and when.
You'll see a form with a few critical fields to fill out:
- Payload URL: This is the most important part. Paste the Jenkins webhook URL you just identified.
- Content type: Make sure this is set to
application/json. Jenkins is specifically expecting data in this format, and anything else will cause the delivery to fail. - Secret: This is technically optional, but I highly recommend setting one. It’s just a random string of text that you also add to your Jenkins configuration. Jenkins will use it to verify that incoming payloads are actually from GitHub and not some impostor.
Next, you need to decide which events should trigger the webhook. You could listen for everything, but that gets noisy fast. A much better approach is to select "Let me select individual events." For a deeper dive into how different events can be used, this is a great resource on GitHub Actions triggers.
For a standard CI pipeline, you'll want to start with these two events:
- Pushes: Triggers a build anytime someone pushes commits to a branch.
- Pull requests: Kicks off a build when a pull request is opened, updated, or synchronized.
A classic "gotcha" here is forgetting to check the "Active" box. It's easy to miss, but if it's unchecked, GitHub will save your webhook but won't send a single notification. You'll be left scratching your head, wondering why your builds never start.
Troubleshooting Failed Deliveries
Don't be surprised if your first few webhook deliveries fail. It happens to everyone. Thankfully, GitHub gives you a fantastic tool for figuring out what went wrong. In your repository's webhook settings, click on the webhook you just made and look for the Recent Deliveries tab.
This tab is your best friend for debugging. It logs every single attempt GitHub made to send a payload to your Jenkins server. Red exclamation marks mean a delivery failed.
Click on a failed delivery, and you'll see two tabs: Request and Response. The Request tab shows you the exact payload and headers GitHub sent. The Response tab shows what your Jenkins server sent back in reply. This is where the clues are. A 403 Forbidden error often means you have a CSRF Protection issue in Jenkins. A 404 Not Found usually means your Payload URL is wrong. By checking the response, you can quickly find the root cause and get your github jenkins connection working perfectly.
Alright, with the connection between GitHub and Jenkins solid and automated, it's time to tell Jenkins what to actually do. This is where the Jenkinsfile enters the picture, turning the "Pipeline as Code" philosophy into a reality.
By defining all your build, test, and deployment steps in a file that lives right alongside your code in GitHub, you get a CI/CD process that's version-controlled, repeatable, and totally transparent for the whole team. It's a game-changer.
Let's walk through building a practical, declarative Jenkinsfile. We'll use the straightforward, Groovy-based syntax that's become the modern standard for a reason—it’s clean and easy to grasp, even if you're just starting out.
The Anatomy of a Declarative Jenkinsfile
A declarative Jenkinsfile has a predictable, logical structure. Everything is wrapped in a pipeline block, and inside that, you define the core parts of your workflow.
Here’s a simple but realistic example for a Node.js application to get us started.
pipeline {
agent any
stages {
    stage('Checkout Code') {
        steps {
            // This step checks out the source code from your GitHub repository
            checkout scm
        }
    }
    stage('Install Dependencies') {
        steps {
            // Runs npm install to get all required packages
            sh 'npm install'
        }
    }
    stage('Run Tests') {
        steps {
            // Executes the test suite defined in your project
            sh 'npm test'
        }
    }
}
}
Even this basic script creates a powerful workflow. It tells Jenkins to grab any available machine (an agent), then moves through a series of clear stages: checking out the code, installing dependencies, and running tests. If any stage fails, the pipeline halts immediately, giving you instant feedback.
Breaking Down the Key Components
To really get what’s going on here, let’s unpack those key blocks:
pipeline { ... }: This is the main wrapper for your entire declarative pipeline. Think of it as the container for your whole process.agent any: This directive tells Jenkins it can use any available agent—a machine set up to run jobs—to execute the pipeline. For more complex setups, you could specify agents with certain labels, likedockerorlinux, to ensure your job runs in the right environment.stages { ... }: This block holds a sequence of one or morestageblocks. These are the major phases of your pipeline, like "Build," "Test," and "Deploy."stage('Stage Name') { ... }: Eachstagerepresents a distinct piece of your workflow. Naming them clearly is super important because it’s how you’ll visualize your pipeline’s progress in the Jenkins UI.steps { ... }: Inside each stage, thestepsblock is where the action happens. It defines the actual commands to run, whether it's a shell command (sh), checking out code from source control (checkout scm), or using one of the thousands of steps available through Jenkins plugins.
The GitHub and Jenkins integration has long been a cornerstone of solid DevOps practices, creating a smooth, automated path for testing and deployment. It’s especially powerful for catching errors early and maintaining code quality. For instance, with Jenkins linked to GitHub, developers can trigger builds and deployments automatically every time code is pushed or a pull request is updated. You can find more insights on this powerful DevOps integration on geeksforgeeks.org.
Creating a Multibranch Pipeline Job
So you've got a Jenkinsfile. Now you need a Jenkins job to actually run it. The best tool for this job, by far, is the Multibranch Pipeline. This job type is brilliant because it automatically scans your GitHub repository, discovers every branch and pull request that has a Jenkinsfile, and creates a pipeline for each one.
A Multibranch Pipeline means you never have to manually create a new Jenkins job for every feature branch again. It’s the "set it and forget it" principle of modern CI, letting your team focus on writing code while Jenkins handles the automation in the background.
Setting one up is simple. Just create a new item in Jenkins, choose "Multibranch Pipeline," and point it to your GitHub repository. Jenkins takes over from there, scanning the repo, finding your Jenkinsfile, and kicking off the stages you defined. This approach also pairs beautifully with containerized workflows; you can explore how this fits into a bigger picture in our article on CI/CD with Jenkins and Docker.
Once you’ve got your basic pipeline humming along, it’s time to level up. Let's move beyond a simple pass/fail script and start building a CI/CD workflow that’s truly professional. These next steps are all about tightening up your feedback loops, boosting efficiency, and making the whole system easier to maintain in the long run.
The real goal here isn't just to run builds. It's to deliver rich, useful information directly to your developers right where they live—inside GitHub.
Give Developers Instant Feedback with the Checks API
One of the most powerful things you can do with a GitHub Jenkins setup is send detailed build statuses straight back to pull requests. This is all thanks to the GitHub Checks API. Instead of a single, blunt pass/fail status, you can provide granular feedback for every single stage of your pipeline—from unit tests and integration tests to code linting.
Developers see this feedback right in the pull request UI. They can immediately pinpoint what failed without ever leaving GitHub to go digging through Jenkins console logs. This creates an incredibly tight feedback loop that dramatically speeds up the entire code review and merge process. The good news? The GitHub Integration Plugin you already installed has built-in support for this, making it surprisingly easy to implement.
Keep Your Pipelines DRY with Shared Libraries
As your team or organization grows, you’ll inevitably find yourself copying and pasting the same pipeline logic across dozens of repositories. This is exactly where Jenkins Shared Libraries become a lifesaver.
Think of a Shared Library as a separate Git repository that holds all your reusable Groovy scripts. Your Jenkinsfile can then just import this library and call its functions. It’s perfect for centralizing common tasks like:
- Sending notifications to Slack or Microsoft Teams
- Running standardized security scans with tools like SonarQube
- Handling complex deployment logic for different environments (e.g., staging vs. production)
By abstracting common logic into a shared library, you start treating your pipeline code just like your application code. It becomes modular, version-controlled, and infinitely easier to manage at scale. A single change to a deployment script can be made once and instantly rolled out to every single project that uses it.
Squeeze More Performance Out of Your Builds
Slow builds are more than just an annoyance; they're a major bottleneck that frustrates developers and stalls your delivery cycle. Luckily, there are a few proven strategies to speed things up.
A great place to start is running stages in parallel. For instance, instead of running your backend and frontend tests one after the other, why not execute them at the same time? This simple change can shave a significant amount of time off your total build duration.
Another critical optimization is caching dependencies. There’s no reason to download all your packages from registries like npm or Maven on every single build. That’s just inefficient. By caching these dependencies, subsequent builds can pull them from a local store, often cutting minutes off your pipeline execution time.
Jenkins has been a cornerstone of CI/CD for years, and its massive ecosystem of plugins offers tons of ways to manage and optimize software development. If you're curious about plugin usage and other trends, you can find some fascinating data on the Jenkins infrastructure statistics GitHub page.
Gotchas and Quick Fixes for Your GitHub-Jenkins Setup
Even with a perfect setup, you can hit a few common snags when integrating GitHub with Jenkins. Let's walk through some of the most frequent questions I see and get you unstuck fast.
How Do I Fix a 403 Forbidden Webhook Error?
Ah, the dreaded 403 forbidden error. If you see this, it's almost certainly Jenkins's CSRF (Cross-Site Request Forgery) protection doing its job a little too well.
By default, Jenkins expects every request to come with a valid CSRF token, or a "crumb." Since webhooks coming from GitHub don't have this crumb, Jenkins slams the door shut and rejects the request.
The fix is usually pretty simple. Head over to Manage Jenkins > Security > CSRF Protection and just check the box for "Enable proxy compatibility." This tells Jenkins to be a bit more forgiving with requests that lack a crumb, which is exactly what we need for webhooks to work.
Why Isn't My Multibranch Pipeline Finding My Jenkinsfile?
This one's a classic. Your multibranch job runs, but it doesn't find any branches with a Jenkinsfile. Nine times out of ten, it’s one of two things.
- Wrong Credential Scopes: The Personal Access Token (PAT) you're using in Jenkins needs permission to actually scan your repository. Double-check that it has the full
reposcope in GitHub. Without it, Jenkins is flying blind. - Filename Typo: This sounds silly, but it happens all the time. The file must be named exactly
Jenkinsfile—with a capital 'J'—and it has to be at the root of your branch. A simple mistake likejenkinsfileor putting it in a subdirectory will make the scan come up empty.
A quick pro-tip: after you push a new branch with a Jenkinsfile for the very first time, you might need to manually trigger a "Scan Repository Now" in the multibranch job. Jenkins doesn't always pick it up on the first go.Can I Use SSH Instead of a PAT for Authentication?
Absolutely. You can definitely opt for an SSH key pair instead of a Personal Access Token. The process involves generating a new SSH key, adding the public key as a "Deploy Key" in your GitHub repository's settings, and then saving the private key as an SSH credential inside Jenkins.
While it's a perfectly secure method, it's often more of a hassle to manage compared to a PAT. PATs are just more straightforward, especially when your integration needs to handle things like sending build statuses back to GitHub. For a full-featured GitHub-Jenkins integration, sticking with a PAT is usually the path of least resistance.
Tired of managing complex CI pipelines and high runner costs? Mergify's Merge Queue and CI Insights help you ship code faster, reduce developer frustration, and slash your CI expenses. Learn how Mergify can automate and optimize your workflow today!


