
Master Jenkins CI GitHub Integration

Hooking up Jenkins with GitHub is one of those foundational moves that genuinely changes how a team works. It creates a seamless, automated loop where code pushed to a repository instantly kicks off builds and tests. This isn't just about automation; it's about creating a rapid feedback cycle that lets your team spot and squash bugs faster than ever.
Why Jenkins and GitHub Are Such a Powerful Combination
Pairing Jenkins with GitHub is about more than just convenience. It creates a synergy that transforms your entire development process. Think of GitHub as the central hub where your code lives and collaboration happens. Jenkins then steps in as the tireless engine that takes that code and puts it through its paces.
This duo is the bedrock of any solid Continuous Integration (CI) pipeline. A developer commits their code, and boom—Jenkins automatically grabs the changes, runs the build, executes all the tests, and reports back. This immediate validation is crucial for maintaining code quality and catching integration headaches before they spiral out of control.
Defining Clear Roles for Each Tool
To really get why they work so well together, you have to understand their distinct roles. GitHub is the undisputed champ of source code management, pull requests, and code reviews. It's the platform for collaboration.
Jenkins, on the other hand, is the master of orchestration. Its superpower is its massive plugin ecosystem, which lets it connect to pretty much any tool in your tech stack to run complex build and deployment workflows.
This separation is what makes the magic happen. GitHub manages the what (the code), and Jenkins handles the how (the automation). You get best-in-class version control married to a flexible, battle-tested automation server. Diving into the advantages of continuous integration makes it even clearer why this setup is so critical for modern teams.
Pro Tip: Don't think of it as a competition. It's a partnership. GitHub provides the triggers and the source of truth for your code. Jenkins provides the customizable, powerful backend to run any automation you can dream up.
Navigating the Modern CI Landscape
Let's be real—the CI/CD world is always changing. Tools like GitHub Actions have gained a ton of traction, especially for projects that live entirely within the GitHub ecosystem. It's just so convenient. A recent JetBrains survey even noted that while 62% of developers use GitHub Actions for personal projects, Jenkins still has a massive footprint in medium and large organizations that need serious customization.
While both Jenkins and GitHub Actions are excellent CI/CD tools, they come from different places and are often a better fit for different needs.
Jenkins vs GitHub Actions At a Glance
| Feature | Jenkins | GitHub Actions |
|---|---|---|
| Hosting | Self-hosted, offering full control over the environment. | Cloud-hosted and fully managed by GitHub. |
| Customization | Extremely high, thanks to a massive library of 1,800+ plugins. | More opinionated, with customization via community-built "Actions." |
| Configuration | Historically UI-driven, but now primarily Jenkinsfile (code). |
Defined entirely in YAML files within the .github/workflows directory. |
| Integration | Integrates with almost anything via plugins. | Natively integrated with the GitHub platform and ecosystem. |
| Best For | Complex, enterprise-grade pipelines with unique requirements. | Projects hosted on GitHub that need a quick, integrated CI solution. |
Jenkins's staying power comes from its raw flexibility. If you have unique deployment targets, complex security requirements, or need to wrangle legacy systems, Jenkins offers a level of control that newer, more opinionated tools just can't match. This makes the Jenkins CI GitHub setup a strategic choice for organizations that need a workhorse capable of handling anything they throw at it.
How to Connect Jenkins and GitHub
Before Jenkins can build anything from your GitHub repositories, you have to get the two talking to each other. It’s all about creating a secure, trusted handshake. Think of it like giving Jenkins a special key to your GitHub projects, but with strict rules about which doors it can open.
The whole connection hinges on Jenkins plugins. A vanilla Jenkins install is a blank canvas; its real power comes from a massive plugin library that lets it integrate with just about any tool you can imagine. For a solid Jenkins CI GitHub setup, the GitHub Integration plugin is your first stop. It’s the swiss-army knife that gives Jenkins the core ability to understand and work with GitHub repos, pull requests, and webhooks.
First thing's first, head over to Manage Jenkins > Plugins. Check the "Installed" tab to see if it’s already there. If not, just pop over to the "Available" tab, find it, and install it. This one plugin conveniently bundles a bunch of other dependencies, which keeps the whole setup a lot cleaner.
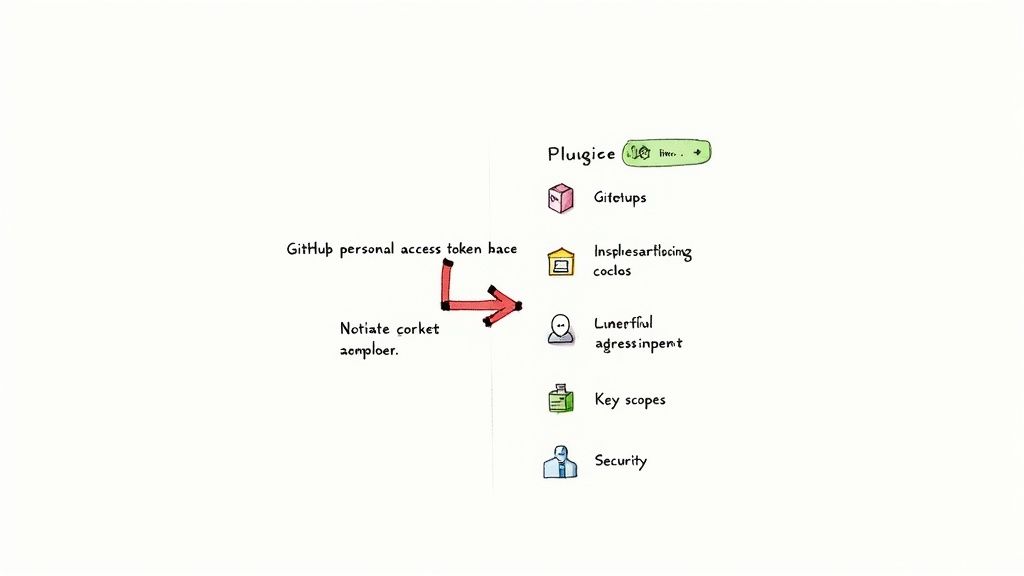
Generate a GitHub Personal Access Token
With the plugin ready to go, you need to create the credentials Jenkins will use to authenticate with GitHub. The best and most secure way to do this is with a Personal Access Token (PAT). A PAT works like a password but is far better because you can limit its permissions, a huge win for security.
Jump into your GitHub account and navigate to Settings > Developer settings > Personal access tokens > Tokens (classic). When you generate a new token, GitHub will ask you to assign specific permissions, or scopes.
For a typical CI/CD workflow, you'll need to grant these scopes:
repo: This is the big one. It gives Jenkins full control over private repositories, which it needs to check out code, post commit statuses, and comment on pull requests.read:org: If your repos live inside a GitHub organization, this lets Jenkins read organization and team membership data. Super helpful for handling permissions correctly.admin:repo_hook: This is the magic that lets Jenkins automatically manage repository webhooks. It can create, edit, and delete them, which is critical for triggering builds instantly on agit push.
Once you hit "Generate token," copy it immediately. GitHub only shows it to you once for security reasons. If you navigate away or lose it, you'll have to scrap it and generate a new one.
Securely Store Your Token in Jenkins
Whatever you do, never hardcode your PAT directly in a Jenkinsfile or a job's configuration. That's a massive security hole waiting to be exploited. Instead, you'll want to use the Jenkins Credentials Manager, which is built specifically for securely storing sensitive data like API tokens and passwords.
From your Jenkins dashboard, go to Manage Jenkins > Credentials and select the global domain. This is where you'll add the new credential.
You’ll want to choose the "Secret text" kind for your PAT. The most important part here is giving it a descriptive ID that makes sense, like github-pat-for-jenkins. This is the ID you'll reference later in your pipeline scripts, so make it easy to remember.
By pasting your token into the "Secret" field and assigning a clear ID, you've made it safely available to all your Jenkins jobs without ever exposing the token itself in plain text. This isn't just a good idea; it's a fundamental best practice for any Jenkins CI GitHub integration.
Now that your credentials are secure and ready, you can finally configure your first Jenkins job to pull code from GitHub and kick off your automation.
Letting GitHub Tell Jenkins What’s New with Webhooks
Okay, so you’ve got Jenkins and GitHub talking. That’s a great first step. But right now, Jenkins has to constantly ask GitHub, "Anything new? Anything new yet?" This is called polling, and it’s wildly inefficient.
We want to flip that script. We need GitHub to proactively tell Jenkins the second something happens. That’s exactly what webhooks are for. Think of them as the real-time notification system for your CI/CD pipeline.
A webhook is just an automated message that GitHub sends to your Jenkins server whenever a specific event happens in your repository—like a new commit being pushed. This is the magic that creates a genuine Jenkins CI GitHub workflow. A git push happens, and bam, a build kicks off instantly. No delays, no waiting for the next polling cycle. It's the difference between a system that's constantly checking for updates and one that's truly event-driven.
So, how do you set this up? Head over to your GitHub repository and jump into Settings > Webhooks. You'll want to add a new webhook, which brings you to the most important part: the Payload URL.
This URL is simply your Jenkins server's address with /github-webhook/ tacked on to the end. For instance, it might look like https://your-jenkins-server.com/github-webhook/.
This diagram breaks down the basic flow of creating the webhook in GitHub, pointing it to Jenkins, and making sure the two can actually shake hands.
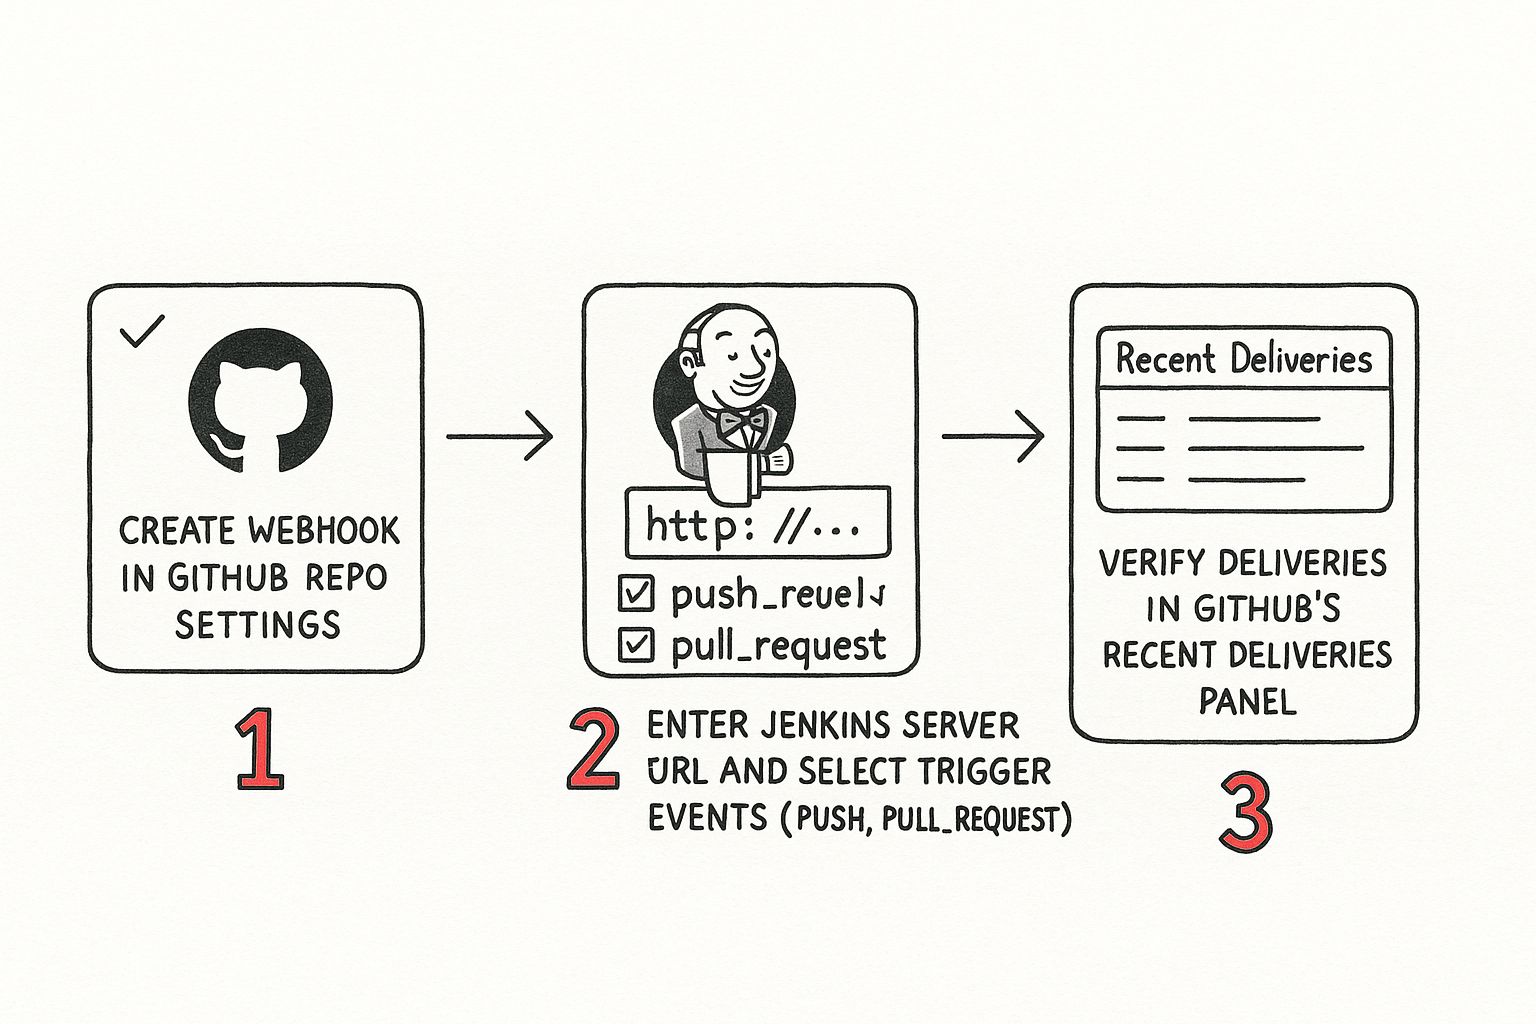
It’s pretty straightforward once you see it in action. You create the hook, give it the right URL, and then check that the messages are getting through.
Choosing the Right Trigger Events
GitHub doesn’t just send a vague "something happened" ping. You get to be very specific about which events should trigger a build, giving you precise control over your automation. While there's a whole menu of options, two are the bread and butter for almost any CI workflow:
- Push events: This is the big one. It fires every time someone pushes commits to a branch. It's your go-to for running builds and tests on your main development branch after new code lands.
- Pull request events: This one is all about quality control. It triggers when a pull request is opened, updated, or reopened. This lets Jenkins run all your tests on the proposed changes before they ever get merged, catching issues early.
For a simple pipeline, you might just select "Just the push event." If you have a more complex setup, you could "Send me everything." But for most teams, picking individual events like push and pull_request hits the sweet spot between being responsive and not creating unnecessary noise. Getting a feel for these triggers is crucial, and you can see similar concepts over in the world of how GitHub Actions triggers work.
What to Do When Webhooks Go Wrong
So you pushed a change... and nothing happened. Your build didn't trigger. Don't panic. GitHub has a fantastic, built-in debugger right where you set the webhook up.
The "Recent Deliveries" tab in your webhook’s settings is an absolute lifesaver for troubleshooting. It gives you a complete log of every time GitHub tried to send a message to Jenkins, including the request it sent and the response it got back.
If you see a little red 'X' next to a delivery, it means something went wrong. A few common culprits I’ve run into are:
- Firewall Blocks: Your Jenkins server might be hidden from the public internet. You'll need to make sure your network rules allow incoming traffic from GitHub's IP addresses.
- A Simple Typo: It happens to everyone. A small typo in the Payload URL is one of the most frequent mistakes. Double-check that it points to the correct
/github-webhook/endpoint. - Jenkins Job Isn't Listening: The job in Jenkins might not be configured to listen for SCM changes in the first place. You have to tell it to be triggered by the webhook.
By clicking on a failed delivery and inspecting the response body, you'll often see the exact error message, like a 404 Not Found or 500 Internal Server Error. This points you right to the problem, making the whole process of debugging the Jenkins CI GitHub connection much less of a headache.
Building Your First Jenkinsfile for a GitHub Repo
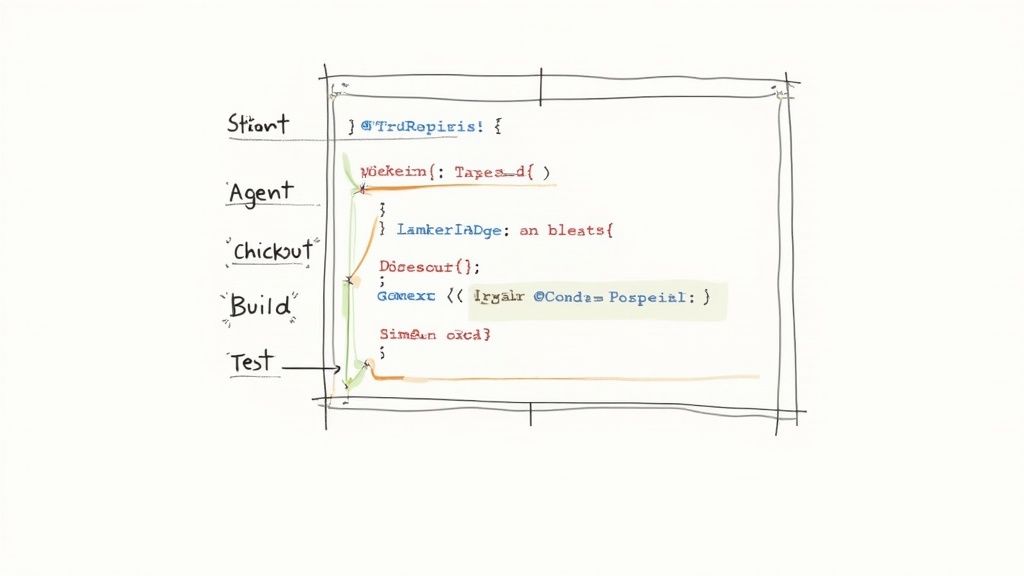
Now that Jenkins and GitHub are talking, it's time to tell Jenkins what to actually do. This is where the Jenkinsfile comes in—a simple text file that defines your entire build pipeline as code. For any serious Jenkins CI GitHub setup, this is the modern way to work.
Gone are the days of clicking through endless web forms to configure a build. "Pipeline as Code" means your CI/CD process lives right alongside your application code in your GitHub repository. It’s version-controlled, reviewable, and incredibly easy to reuse.
The shift to this model has been massive. The Jenkins project itself saw pipeline jobs grow by a staggering 79% between June 2021 and June 2023, jumping from 27.1 million to 48.6 million monthly jobs. This explosion shows just how many teams are banking on pipelines to automate their work. You can dig into more of this data on Jenkins's continued growth in the CI/CD world.
Understanding Declarative Pipeline Syntax
We're going to start with Declarative Pipeline syntax. It’s a much more structured and straightforward way to write a Jenkinsfile, which makes it perfect if you're just getting started.
At its core, a Declarative Pipeline has a clean, predictable structure. Let’s break down the essential building blocks you'll be using.
pipeline: This is the main wrapper that encloses the entire definition. Everything goes inside here.agent: This tells Jenkins where the pipeline will run.agent anyis the simplest form, letting Jenkins grab any available build node.stages: This block holds the different parts of your workflow, like "Build" or "Test." Each part gets its ownstageblock.steps: Inside eachstage, you define the actual commands to run within astepsblock.
This simple layout makes the whole process easy to read and visualize right inside the Jenkins UI.
Here's a pro tip: avoid putting tons of complex logic directly into yoursteps. A great Jenkinsfile should be an orchestrator, not the whole orchestra. Keep your real build logic in scripts (./build.sh,mvn test) and just have the Jenkinsfile call them.
A Practical Jenkinsfile Example
Let's create a real Jenkinsfile for a typical Node.js project. This pipeline will check out the code, install dependencies, and run automated tests. You'll want to save this file as Jenkinsfile (no extension!) in the root of your GitHub repository.
pipeline { agent any // Use any available Jenkins agent to run this pipeline
stages {
    stage('Checkout') {
        steps {
            // This command checks out the code from the configured GitHub repo
            checkout scm
            echo 'Source code checked out successfully.'
        }
    }
    stage('Build') {
        steps {
            // Execute a shell command to install Node.js dependencies
            sh 'npm install'
            echo 'Dependencies installed.'
        }
    }
    stage('Test') {
        steps {
            // Run the test suite defined in package.json
            sh 'npm test'
            echo 'Tests completed.'
        }
    }
}
}
Configuring the Jenkins Pipeline Job
The final piece of the puzzle is to create a "Pipeline" job in Jenkins and point it to your GitHub repository.
Head over to Jenkins and create a new item, making sure to choose the Pipeline type.
Once you're in the job configuration screen, scroll down to the "Pipeline" section. Instead of pasting the script directly, select "Pipeline script from SCM" from the dropdown menu. Choose Git for the SCM, pop in your repository URL, and that's it.
Jenkins will now automatically pull the Jenkinsfile from your repo's root directory and run it whenever the job gets triggered. You've officially closed the Jenkins CI GitHub loop.
Advanced Integration Techniques You Should Know
Once you have a basic pipeline up and running, it's time to unlock the real power of integrating Jenkins with GitHub. These next-level techniques are what separate a simple build-and-test script from a fully automated CI environment that truly supports your team's workflow.
Let's dive into a few game-changers.
Say Goodbye to Manual Job Creation with Multibranch Pipelines
One of the most impactful features you can adopt is the Multibranch Pipeline. Think about it: instead of manually creating a new Jenkins job every time a developer pushes a new feature branch, a multibranch pipeline scans your entire GitHub repository. It automatically creates—and just as importantly, deletes—jobs for every branch that has a Jenkinsfile.
For any team that lives and breathes feature branches, this is huge. It ensures every single branch gets the same CI treatment without anyone having to lift a finger in Jenkins.
Automate Your Pull Request Validation
Another absolute must-have is pull request validation. This is where Jenkins automatically builds and tests any new pull request, then reports the status right back to GitHub. You've seen it before: the little green checkmark that appears next to a commit, giving reviewers instant confidence that the proposed changes actually work.
This immediate feedback loop is critical for keeping code quality high and speeding up reviews. It stops broken code in its tracks before it's ever even considered for a merge. Getting this running is straightforward—it's a native feature of the GitHub Integration plugin, so you just need to configure your Jenkins job to trigger on pull request events.
Key Takeaway: A well-configured Jenkins setup should act as a gatekeeper. By automatically testing every pull request, you ensure that only clean, tested code makes it into your main branch, dramatically reducing the risk of introducing bugs.
The CI/CD space is always evolving. Between 2019 and 2023, GitHub Actions saw massive growth, now used by 51% of teams. Meanwhile, Jenkins' share has settled right around 54%. This tells a story: while GitHub Actions is fantastic for its native integration, Jenkins remains a stronghold in complex environments where its deep customization and massive plugin ecosystem are simply indispensable. For more on this, check out the CI/CD tool evolution on Octopus.com.
Keep Your Pipelines Maintainable with Shared Libraries
As your projects grow, you'll inevitably find yourself copying and pasting pipeline code between different Jenkinsfile definitions. That's a maintenance nightmare waiting to happen. The solution? Jenkins Shared Libraries.
Shared Libraries let you define common pipeline steps and logic in a central, version-controlled repository. You can then import this library into any Jenkinsfile with a single line, keeping your pipelines clean and DRY (Don't Repeat Yourself). Honestly, it's a best practice for anyone trying to manage CI/CD at scale.
For organizations looking to take this even further, understanding the full CI/CD Jenkins workflow is incredibly valuable. Once you master these advanced methods—multibranch pipelines, PR validation, and shared libraries—you'll transform Jenkins from a simple build tool into the core engine of your entire development lifecycle.
Still Have Questions?
Getting Jenkins and GitHub to play nicely can sometimes bring up a few tricky questions. Let's walk through some of the most common ones I've run into over the years.
Does Jenkins Work with GitHub Enterprise?
Yes, it absolutely does. This is a common setup in larger organizations, and the GitHub Integration plugin is built to handle it.
The only real difference is during the initial configuration. Instead of pointing Jenkins to the public api.github.com URL, you’ll just plug in the API endpoint for your company's self-hosted GitHub Enterprise instance. Everything else—creating credentials, setting up webhooks, defining pipelines—follows the exact same process.
How Do I Handle Merge Conflicts in Pull Requests?
This is a classic "who's job is it anyway?" question. Jenkins itself doesn't resolve merge conflicts; that’s a task that firmly belongs to the developer. The real power of a solid Jenkins CI GitHub workflow is making those conflicts impossible to ignore.
When a pull request build fails because of a merge conflict, Jenkins will immediately send a failure status back to the pull request in GitHub. This is the crucial signal. It tells the developer, "Hey, your branch has fallen out of sync with where it's trying to go."
The best practice here is simple: the developer needs to pull the latest changes from the target branch, fix the conflicts on their local machine, and then push the updated branch. That push will automatically trigger a new build in Jenkins, and hopefully, this time it’s all clear.
Key Takeaway: Think of Jenkins as the automated lookout. Its job is to spot issues like merge conflicts the second they happen, not to untangle them. The goal is fast feedback, so developers can fix small problems before they balloon into massive headaches.
Is a Jenkinsfile Required for Every Job?
Technically, no. You can still set up "Freestyle" projects directly through the Jenkins UI. They're actually pretty handy for simple, one-off tasks or for teams just dipping their toes into CI for the first time.
But let's be honest, using a Jenkinsfile has become the modern standard for a ton of good reasons:
- It’s Version Controlled: Your pipeline is just code, living right there in Git alongside your application. No more guessing what a job does.
- You Have an Audit Trail: You can see exactly who changed the build process and when, just by looking at the commit history.
- It’s Reusable: Once you have a solid
Jenkinsfile, you can copy and adapt it for new projects in minutes.
So, while you can definitely start out with Freestyle jobs, making the move to "Pipeline as Code" with a Jenkinsfile is a game-changer for any team that's serious about building a scalable and maintainable CI/CD practice.
Are your CI costs spiraling out of control? Are developers stuck waiting in a slow, clunky merge process? Mergify offers an intelligent merge queue that slashes CI expenses and completely eliminates merge frustrations. See how our merge protections and CI insights can bring stability and speed back to your development workflow. Discover Mergify today.


